How Do I Place an Online Order?
Electronic Appointment Request is used by Referring Physicians to Order various studies. These studies can then be accessed by the Imaging facility to book appointments for the ordered studies.
When a study is ordered by the Referring Physician, the required fields are filled out and the Submit button is pressed. The ordered studies can be accessed by the scheduler through the Messaging ![]() icon on PowerReader. The unread messages and unprocessed referrals are stored in a folder called Referral Inbox. This Referral Inbox is available in Messaging screen. At this point, the scheduler can convert the Ordered Study into an Appointment.
icon on PowerReader. The unread messages and unprocessed referrals are stored in a folder called Referral Inbox. This Referral Inbox is available in Messaging screen. At this point, the scheduler can convert the Ordered Study into an Appointment.
- To place an online order, log in to the RapidResults and click Request an Appointment tab. Request an Appointment screen appears as shown below.
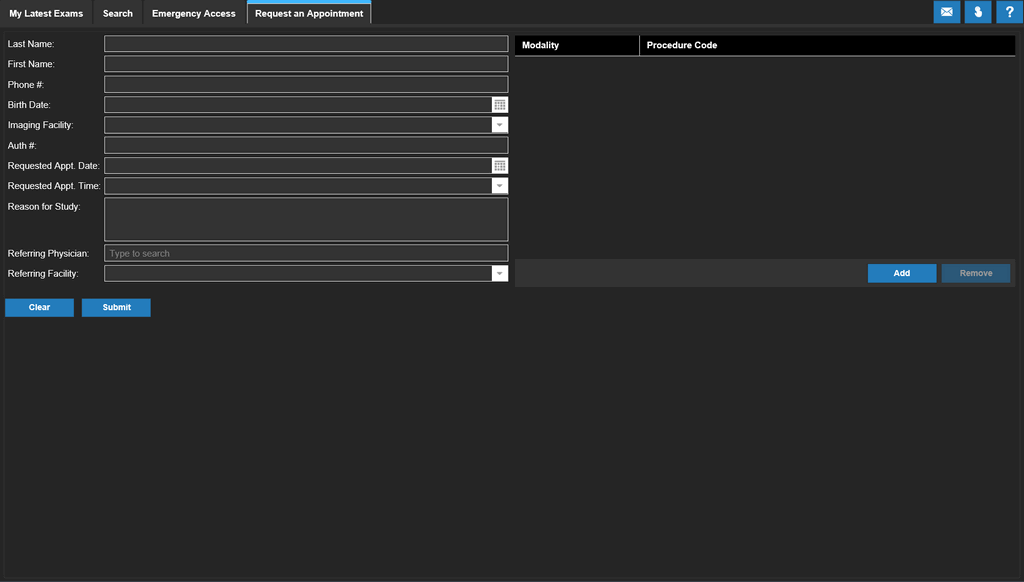
- Type in the patient's demographic information such as Last Name, First Name, and Phone #.
- Select the date of birth of the patient from the date picker
 available in Birth Date field.
 - Click the drop-down found in the Imaging Facility field. Upon click, the application will display a list of facilities that are associated. Select the name of the facility to which the patient need to be referred.
- Click the Add button to select a modality and a procedure code.
- Click the drop-down on the Modality field. Upon click, the application will display a list of exams available in that facility.
- Select the name of the exam that the referring physician has requested.
- Type in the unique identification code assigned for the exam in the field beside Procedure Code.
- Enter the authorization number in the Auth # text field. It is a unique authorization number generated by the insurance company authorizing the patient to undergo exam/procedure.
- Click date picker on the Requested Appt. Date field and select the date for appointment.
- Click the drop-down found in the Requested Appt. Time field and select the time that is convenient to the patient.
- Enter the reason for this study in the Reason for Study text field.
- Enter the name of the physician who refers the patient in the Referring Physician text field.
- Enter the name of the facility from where the patient was referred the Referring Facility text field.
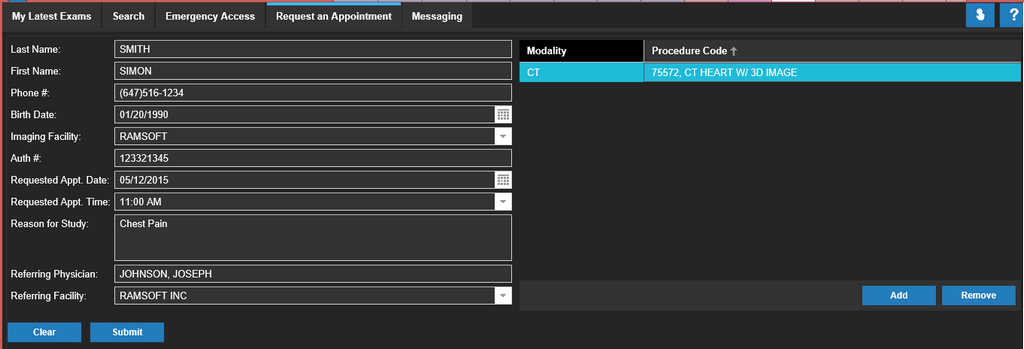
A sample of Request an Appointment tab with sample data filled in all fields is shown below for your reference.
- Click Submit. The application displays that the order has been completed as shown below.

For more information about RapidResults, refer to RapidResults User Manual
Scenario 1: Requested Date/Time and Facility/Resource Match
The requested Date/Time, Facility/resource matches and available as requested by referring physician. The appointment is booked and shows on the scheduler.
- Hover the mouse over Messaging
 icon. It displays the total count of unread messages and unprocessed referrals. Clicking this icon displays a messaging screen as shown below. The Referral Inbox displays a list of studies that have been ordered.
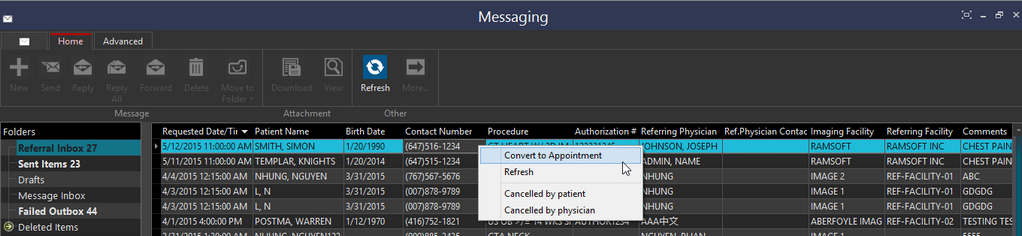
- Select the study that has been ordered, right-click on it and select Convert to Appointment. The Referral to Appointment screen appears. This screen displays the Patient Information and Appointment Information. This information is populated from the data which was filled out in the RapidResults while ordering this study.
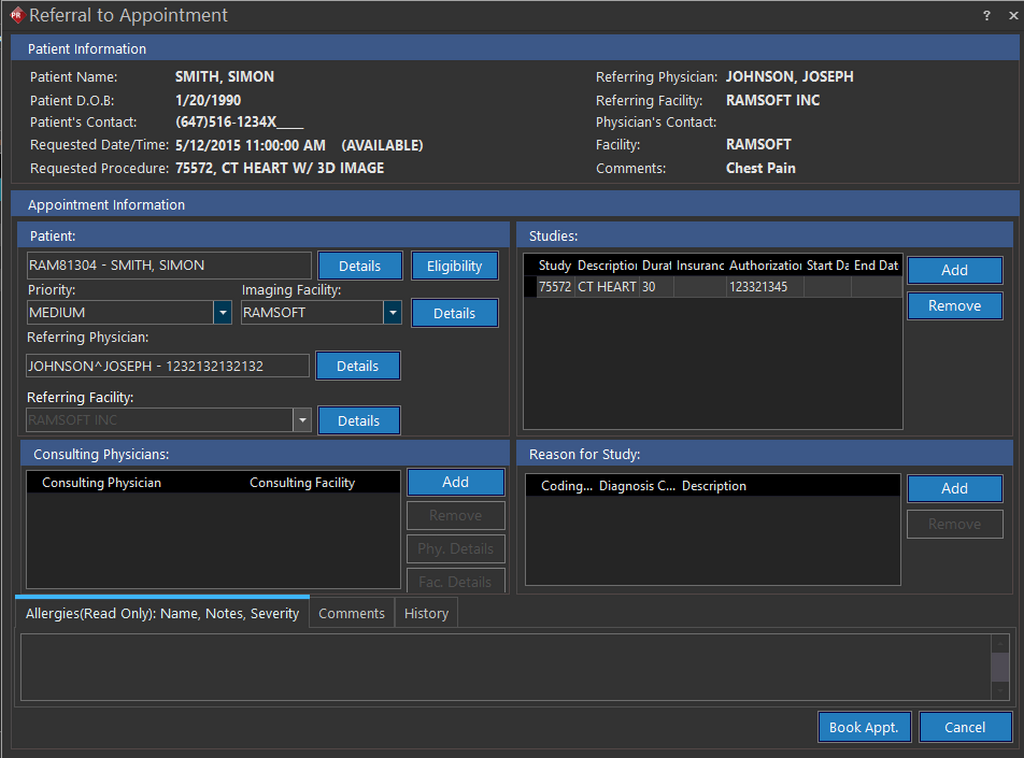
- In the Referral to Appointment form, any relevant information can be filled out. Fields such as Patient, Facility, Comments, and Study Type have already been populated. The other fields such as Consulting Physician and Symptoms can be added by the user.
- After all the necessary information has been filled out, click the Book Appt. button located on the bottom right of the screen.
A confirmation screen is displayed, inquiring if you want to proceed. The pop-up message will display the Date/Time for the appointment as shown below.

- Once the Appointment has been confirmed, the ordered study is booked into the Scheduler at the specified Date and Time.
- To view the appointment in the Scheduler, select the booked date from the calendar and locate the specific facility. If the facility is not visible, you can scroll horizontally or use the Show More Resources
 or Show Fewer Resources
  icons to locate the facility.
 - Locate the time slot for the appointment and you can see the scheduled appointment information.
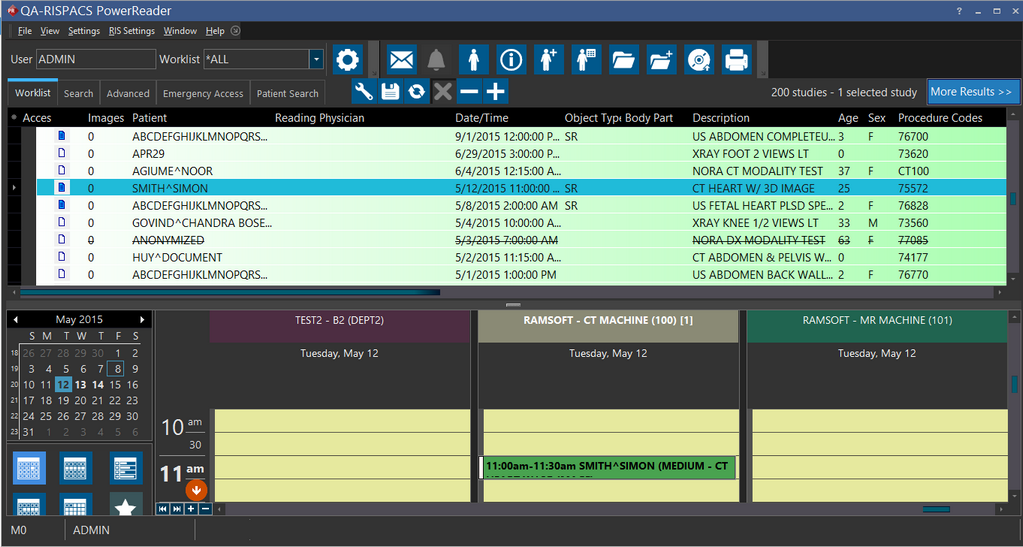
Note: If you do not see the Scheduler on the Worklist screen, select the Show Scheduler option at the bottom of the Worklist Editor.
Scenario 2: Date/Time or Facility/Resource Doesn't Match
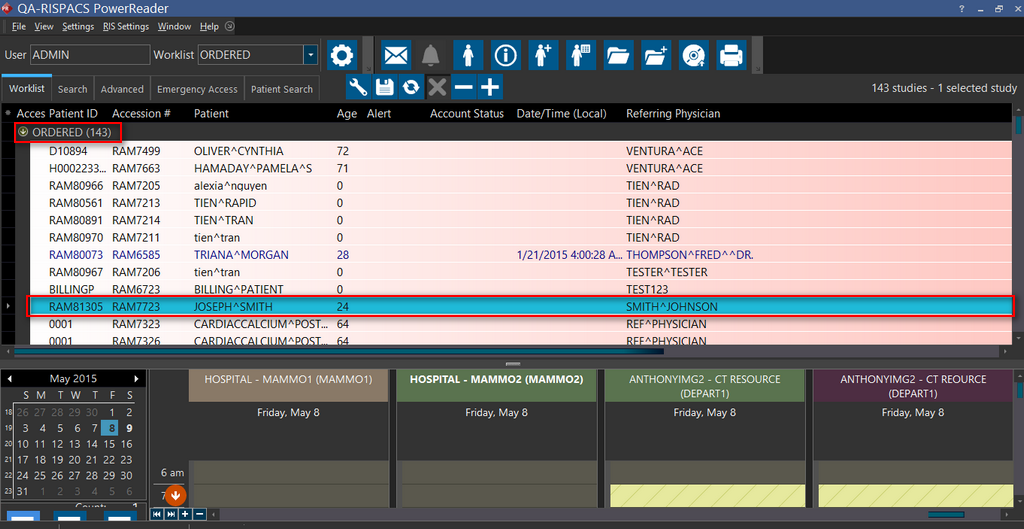
Either the requested Date/Time or Facility/Resource doesn't match or not available as requested by the referring physician. The study would only be shown in ORDERED status.
This scenario reveals either the requested date/time or facility/resource doesn't match or not available as requested by the referring physician. A sample screenshot is shown below. As per this scenario, the date is elapsed and the chosen procedure is not available in the selected facility and hence the application shows as many warning messages as it mismatches as requested by the referring physician.
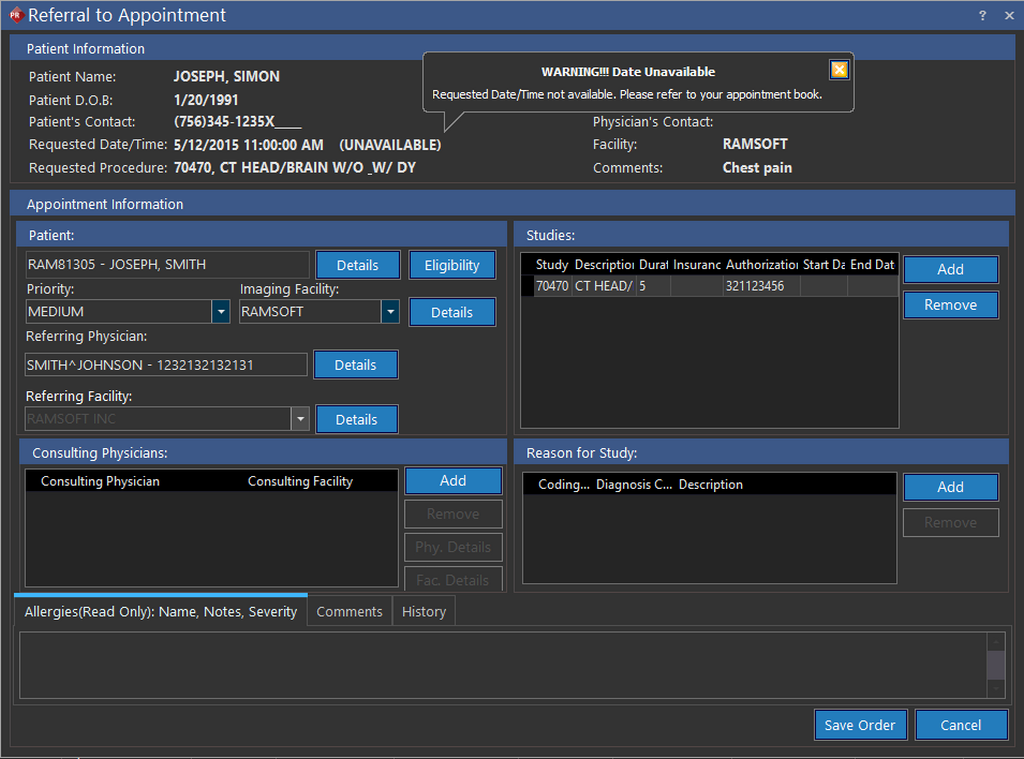
Close all the warning messages and click on Save Order button found on the bottom of the Referral to Appointment screen. The application displays the following screen notifying you that the study will be placed in ORDERED status.

Click OK. Navigate back to worklist screen so that you could see the study in ORDERED status.