Using Azure Blob for DICOM Storage
On PowerServer 6.0 PRU 9 or later, DICOM objects can be stored on Azure Blob storage, which allows easy, cost-efficient deployment on large sites as well as support for GRS (geo-redundant storage) and Azure AD recycle bin features.
When creating the storage account, it is recommended to select GRS (Geo-redundant storage) as the replication option. GRS is used to provide higher durability of data by replicating it to a secondary location. For more information on GRS, please see https://docs.microsoft.com/en-us/azure/storage/common/storage-redundancy-grs . In addition, ensure that Soft Delete is enabled and set to 7 days on the storage account.
Setup Steps
-
Under the File > Disk Management > Volume Setup > New > Create a new Volume dialog box, select "Azure Blob Storage" and specify the following:
- Volume ID: specify a custom Volume ID
- Container URI: input the Blob container URL
- Account Name: input the Storage Account Name
- Account Key: input either one of the two storage account name access keys
- Read Only: uncheck this (allow writing to this volume)
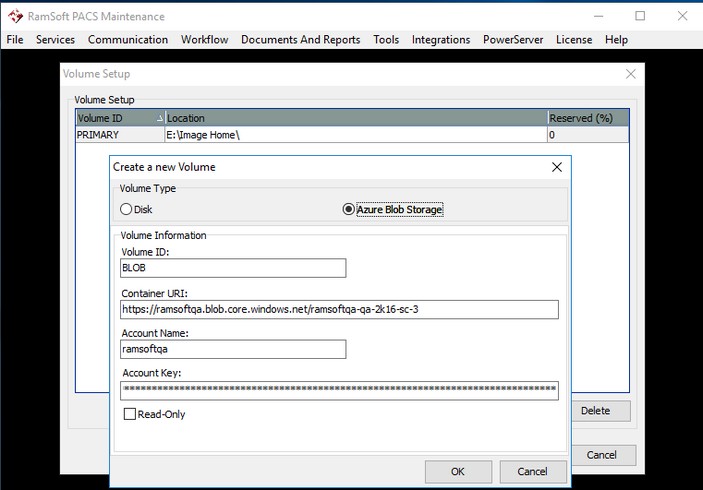
Ideally, only one blob storage volume will be set up; however, if multiple blob storage volumes are available, it will use the first non-read-only blob storage based on the Volume ID.
Test if object(s) are stored in the Blob storage volume
-
In PowerReader, create a new patient and study.
-
Open the study, import some DICOM objects and create a report for the study.
-
Using Azure Storage Explorer, check that the new objects are saved on the Blob container instead of the Image folder. It will store it under the 60dicomstore folder which is automatically created.
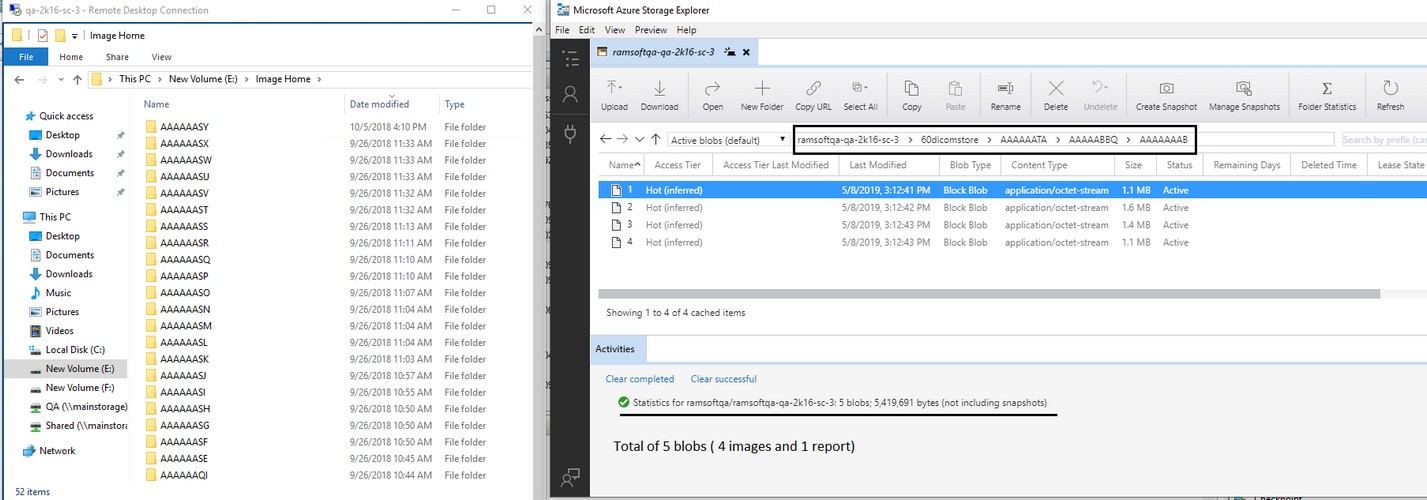
- Check the Disk (Image folder) Volume on the server. No new objects should be saved.
Editing an existing volume
To Edit an existing volume, perform the following steps:
-
Select the volume you would like to edit and click the Edit button.
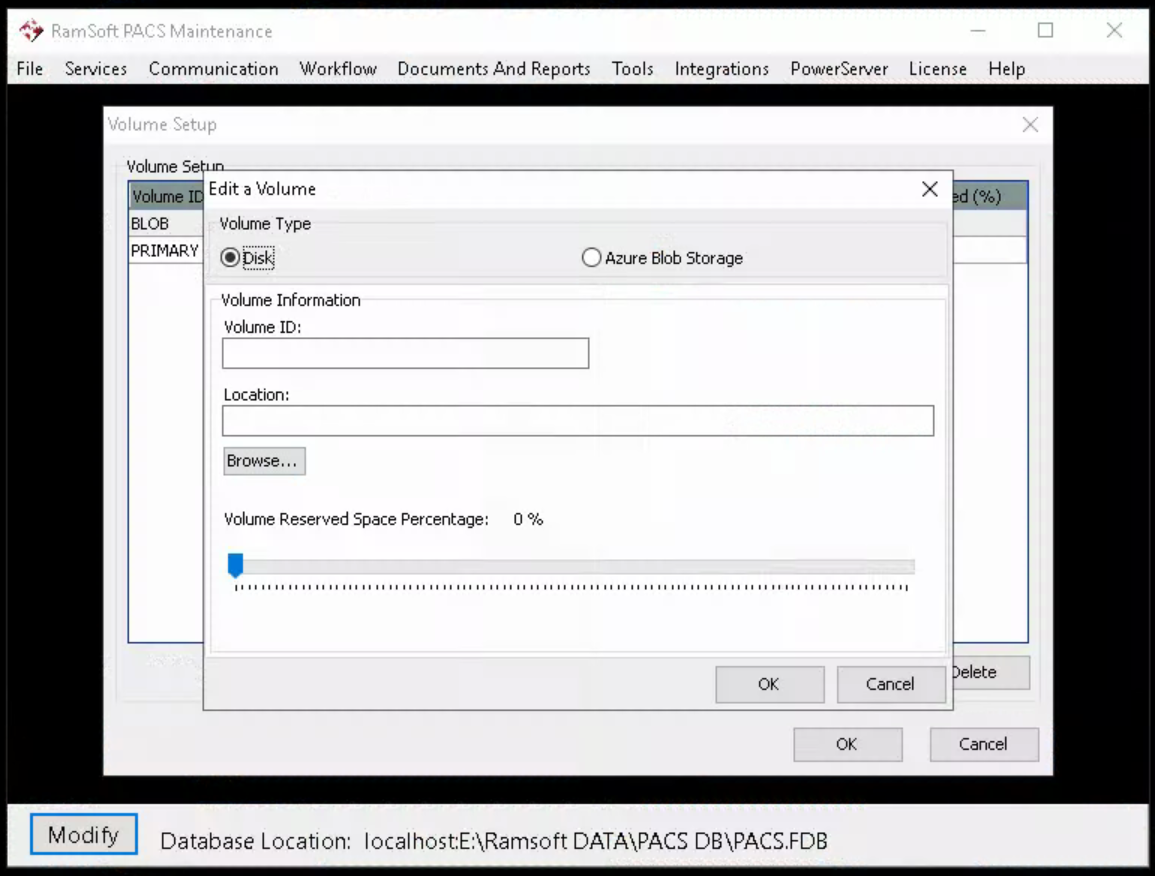
This will launch the Edit a Volume dialog.
-
Perform the changes and click OK to save the changes.
Deleting a volume
To Delete a particular volume, perform the following steps:
- Select the volume and then press the Delete button.
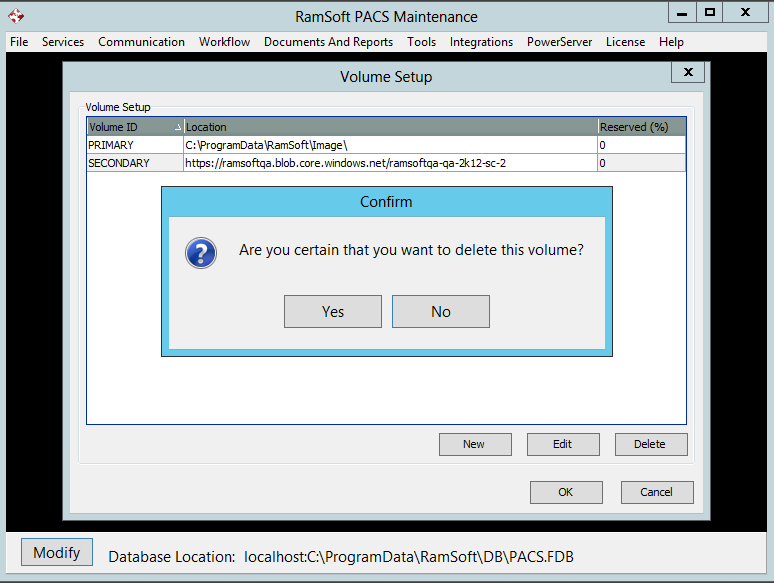
- A confirmation dialog will appear. Press Yes to confirm the deletion.