How Do I Configure Rule Based Purging?
Rule-based purging deletes stale study objects based on user-defined rules to reduce system storage. After establishing rules in the Maintenance module, the system will purge studies matching the criteria.
Rule-based purging tasks purge study objects based on the Institution Name, Modality, Body Part, Patient Age and Study age. Rules are applied in the order of their priority defined in the setup form. Be careful when creating purge rules; studies with no rules specifically defined will be purged if a general rule for all studies has a higher priority.
For example, if Mammo images should never be deleted, create a purge rule for BREAST in which no deletion option is checked. Next, define a rule which is more general: i.e. all studies older than ten years. Give the first rule higher priority in Purge Setup by placing it first. When the rules are executed, all studies older than ten years except for Mammo studies will be deleted.
Setting Up Purge Rules
Purge Setup is accessed through Services > Rule Based Services > Purge Setup.
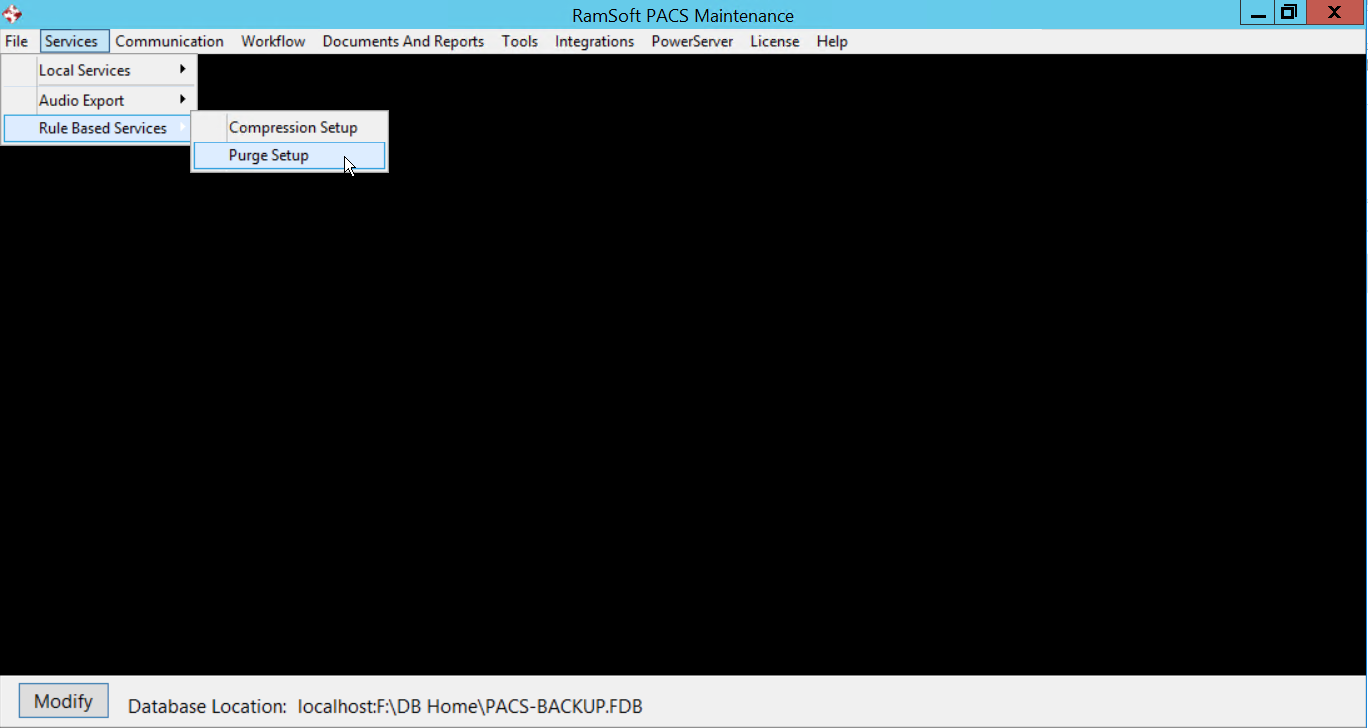
Clicking the Purge Setup button launches the Deletion Rule Setting form.
To create a rule, click the New button.

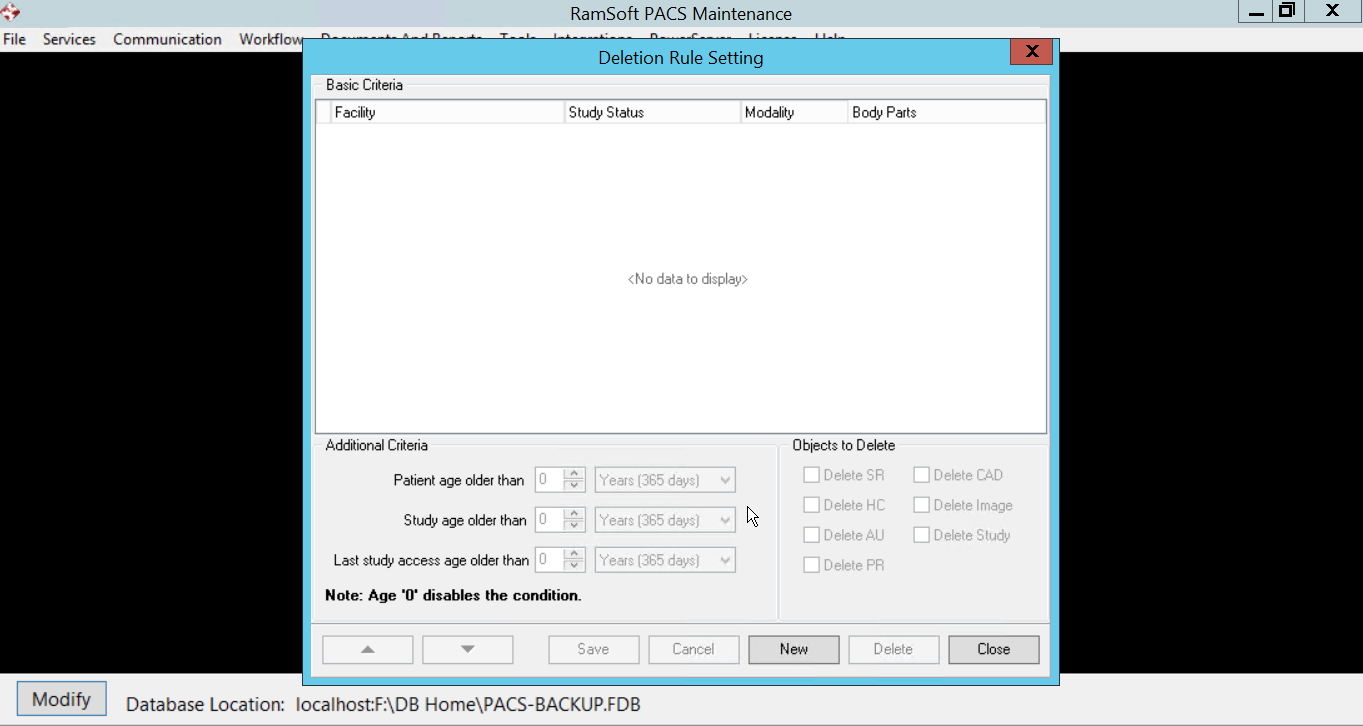
The Deletion Rule Setting form contains three sections. The Basic Criteria can be defined for purging specific studies. Define the facility where the files will be purged from (this is especially useful when the RamSoft software is installed in a multi-facility site). Describe the other criteria for the rule such as the Study Status, specific Modality and the specific Body Parts. If a particular field is not defined, the rule applies to all studies for that criteria.
Define the Additional Criteria such as Patient Age or the age of the study itself. Last study Access age older than criteria is used to select studies which have not been accessed or modified for a specified period of time. Each additional criteria makes the rule more specific.
Selecting a 0 age disables the criteria
In the Objects to Delete section, select the specific objects of the study to delete. Delete SR, Delete HC, Delete AU, Delete PR and Delete CAD options each deletes specific objects from the study. If the Delete Image option is selected, it will delete all objects except for SR, HC, AU, PR and CADSR objects. The Delete Study option deletes the entire study while all the other options only delete specific objects.
Click Save to save the rule; use the arrow buttons ![]() to set its priority. Rules on top will have a higher priority and will be implemented first.
to set its priority. Rules on top will have a higher priority and will be implemented first.
Auto-Delete Options (Available only on Gateway / Gateway Router)
For Gateway and Gateway Router, an additional field called Auto Delete can be used to flush old studies when disk space is about to be full. This is set as the Auto Delete Max % value. measured as a percentage of local disk space. The oldest accessed studies are deleted first, followed by studies with the oldest study dates. The Auto Delete Min % specifies the disk space to which the system will maintain studies.
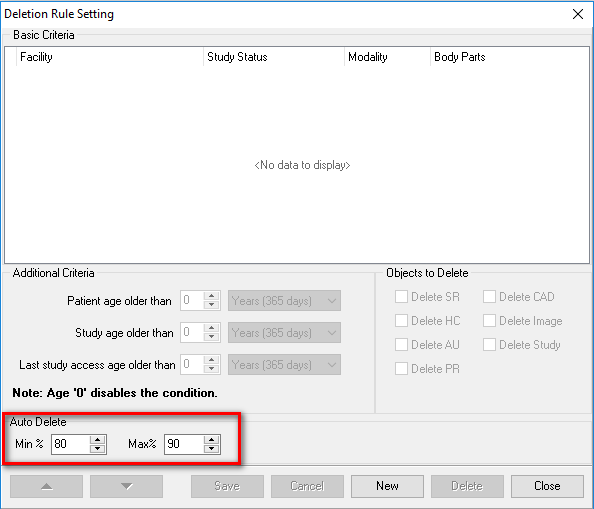
Auto-delete will start deleting studies when the Max% is reached, regardless of Rule-based criteria.