Creating Structured Report Templates in Word
Structured report templates can be created with Microsoft Word. The templates can contain graphics and logos as well as Bookmarks that are used to automatically port DICOM information and images into the reports.

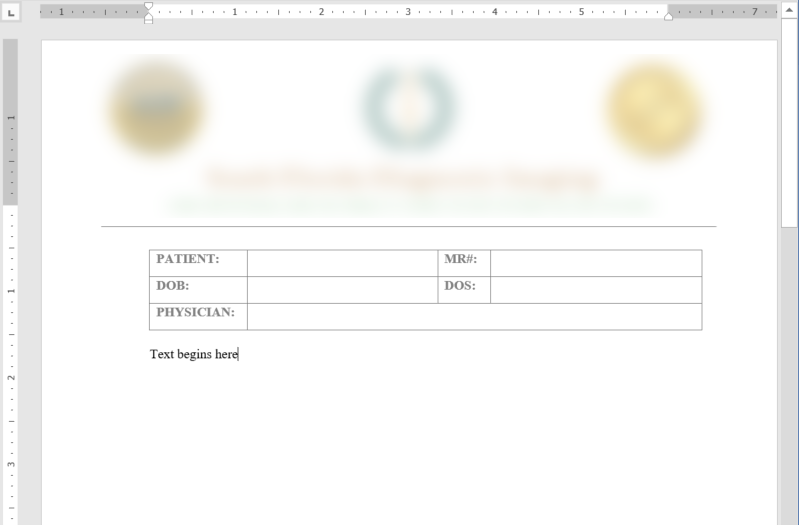
The image above demonstrates a sample template. The first portion of the report is composed of several DICOM fields such as patient demographic ( Patient Name, Age, Date of birth, etc.) The main body of the report contains the performed procedures, Reason for Study, Finding notes, etc. most of these fields are automatically filled with the information when a report is created with the help of Bookmarks. These are areas that the RamSoft software will automatically populate with the corresponding DICOM information. Once the templates are created, they are uploaded in the Template Manager to be accessible in the predefined templates section.
A structured report template can be created in MS Word by opening a blank Word Template file and adding content controls, including check boxes, text boxes, date pickers, and drop-down lists.
NOTE: You can print a form that was created with content controls; however, the boxes around the content controls will not be printed.
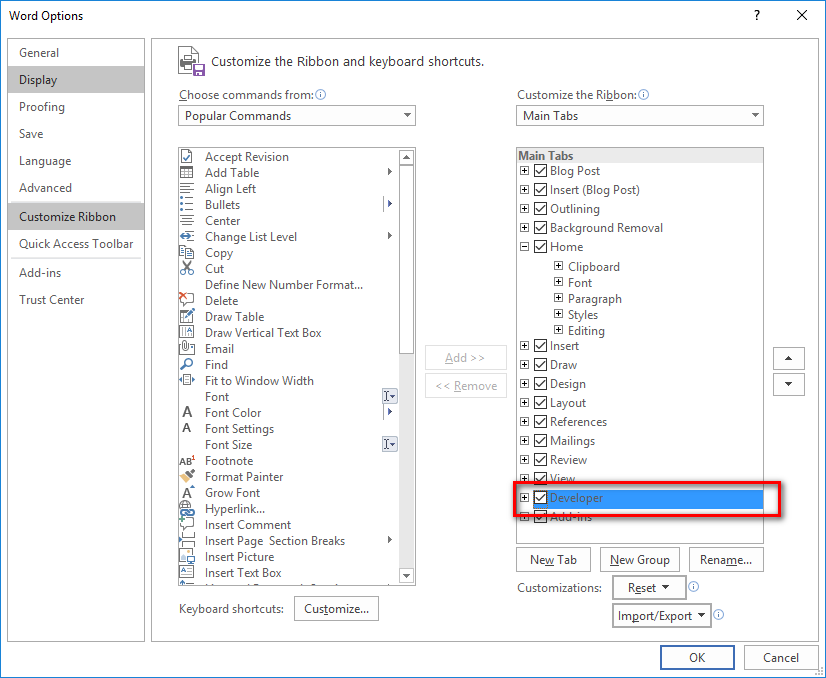
Step 1: Show the Developer tab if it is not yet enabled:
- Click the File tab
- Click Options
- Click the Customize Ribbon
- Under Customize the Ribbon, click Main Tabs
- In the list, select the Developer check box, and click OK
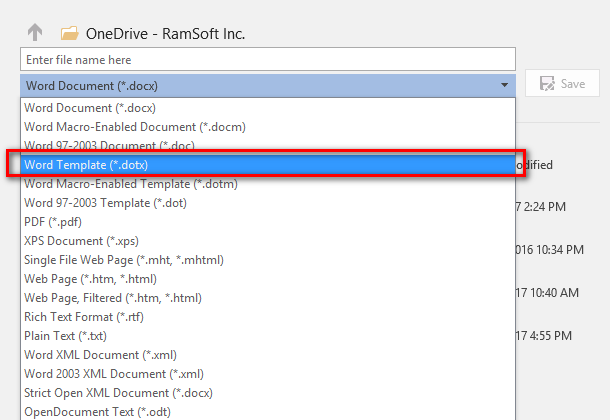
Step 2: Open a blank template file:
- Click the File tab
- Click Blank document
- Click the File tab again, and then click Save As
- In the Save As dialog box, type a file name for the new template. Select Word Template and then click Save
Step 3: Add content to the form:
On the Developer tab, in the Controls group, click Design Mode, and insert the controls needed.
Insert Rich and Plain Text Content Controls

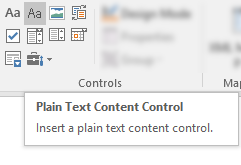
Insert text controls where users can enter text. In rich text content control, users can format text as bold or italic, and they can type multiple paragraphs. Insert plain text content control to limit user formatting.
- Click the area the control is to be added.
- On the Developer tab, in the Controls group, click Rich Text Content Control
 or Plain Text Content Control
  .
.

Example:
Patient Identification
Name: [< Adam, Smith >]
Identifier: [RAMSOFT]
Date of Birth: [18 –Jan-2000]
Insert a check box:
- Click where you want to insert the check box control.
- On the Developer tab, in the Controls group, click the Check Box Content Control.

Example:
![]()
Insert a combo box or a drop-down list:
In a combo box, users can select from a list of choices that you provide or they can type in their own information. In a drop-down list, users can only select from the list of choices.
- On the Developer tab, in the Controls group, click the Combo Box Content Control
 or Drop-Down List Content Control
  .
. - Select the content control, and then on the Developer tab, in the Controls group, click Properties.

- To create a list of choices, click Add under Drop-Down List Properties.
- Type a choice in the Display Name box, such as Yes, No, or Maybe.
Repeat this step until all of the choices are in the drop-down list.
Example:

TIP: The form can be tested prior to distribution by opening the form and filling it out as the user would.
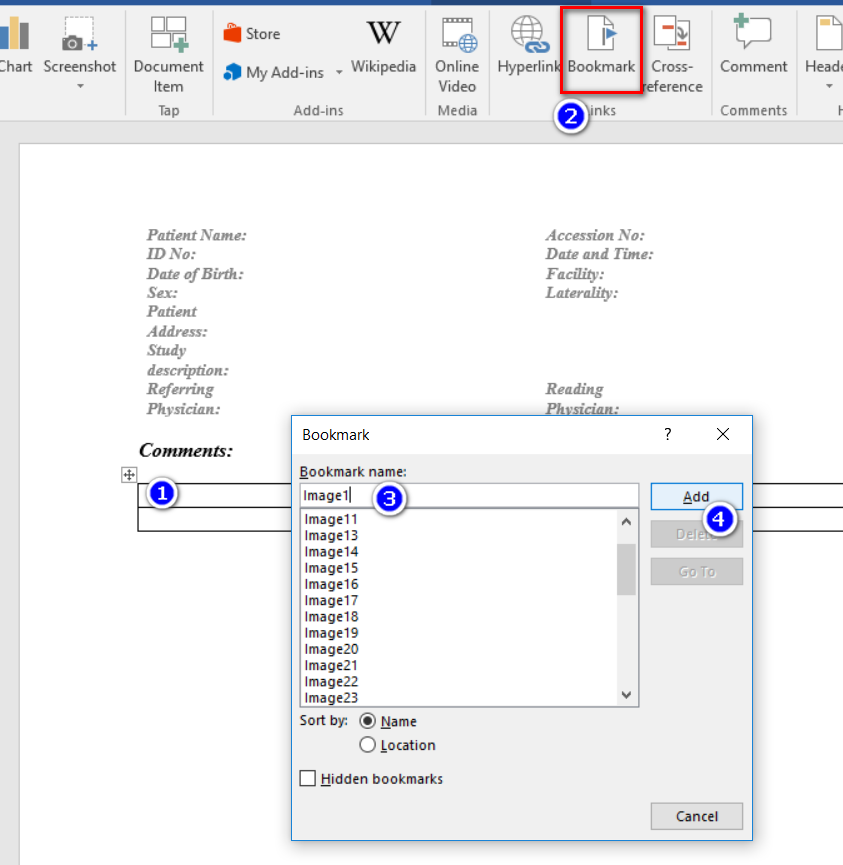
Insert a image bookmark:
Image bookmarks must be encapsulated in a table.
-
Create a table from the Insert table tool. Put the cursor in the cell in which you would like the first image bookmark to be inserted.
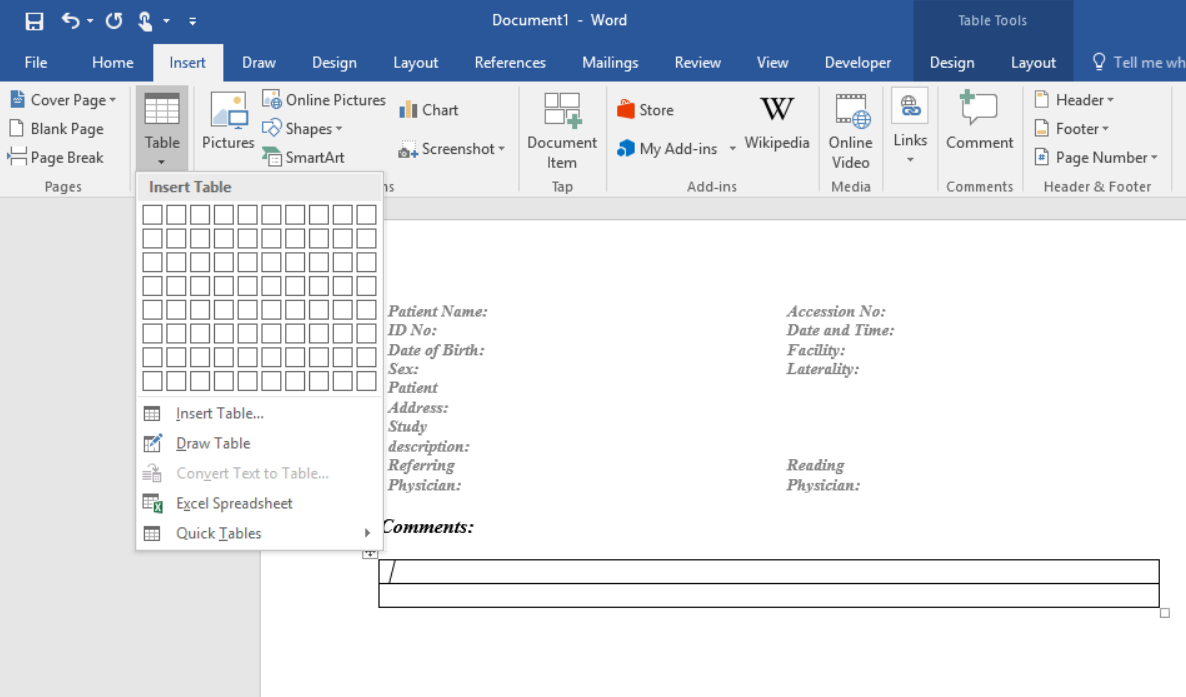
-
Via the "Insert" tab, insert the name of the first Image Bookmark as appropriate and click "Add".
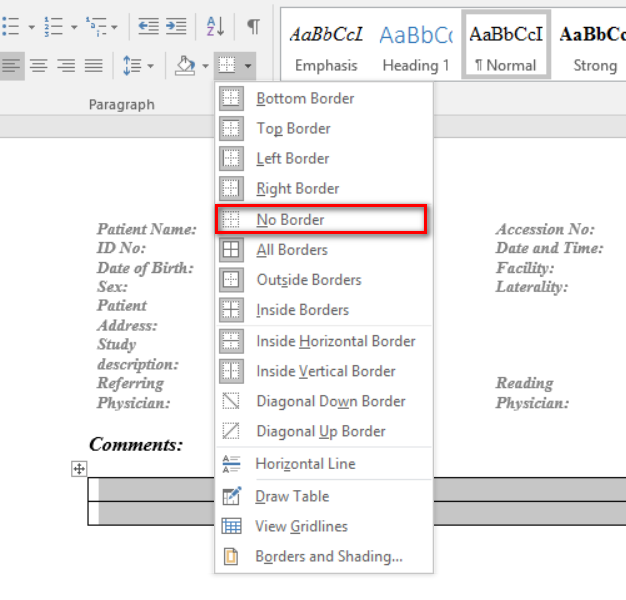
-
To hide the lines of the table after inserting the desired image bookmark(s), select the table and click "No Border".
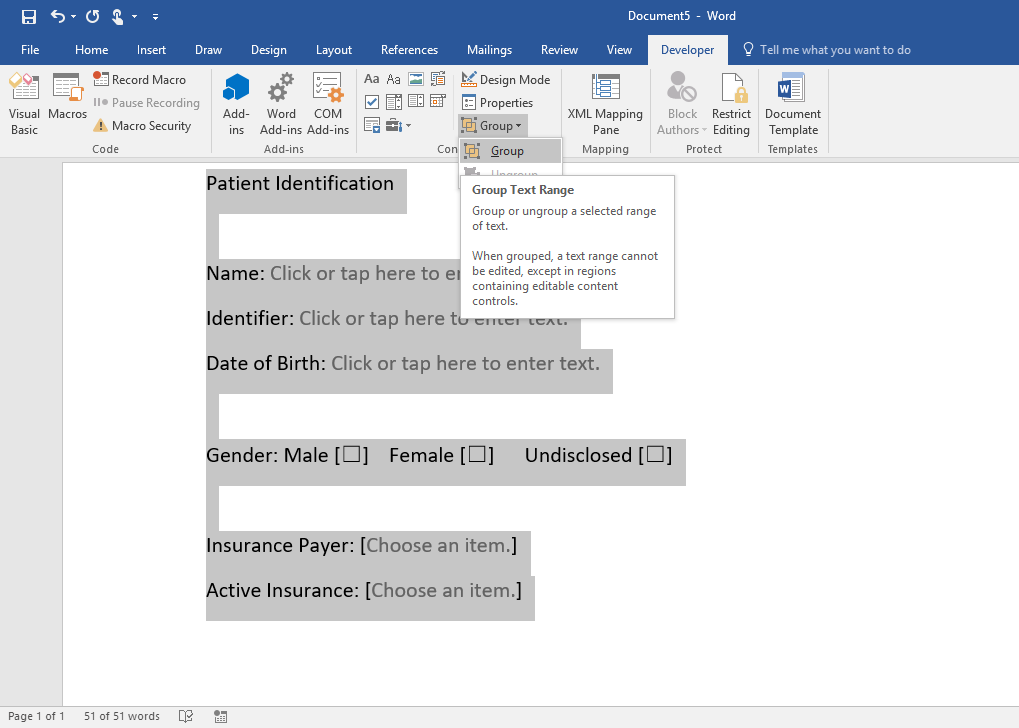
Step 4: Add protection to a form:
- Open the form. On the Home tab, in the Editing group, click Select, and then click Select All, or press CTRL+A.
- On the Developer tab, in the Controls group, click Group, and then click Group again. When grouped, the section cannot be edited, except in regions containing editable content controls.
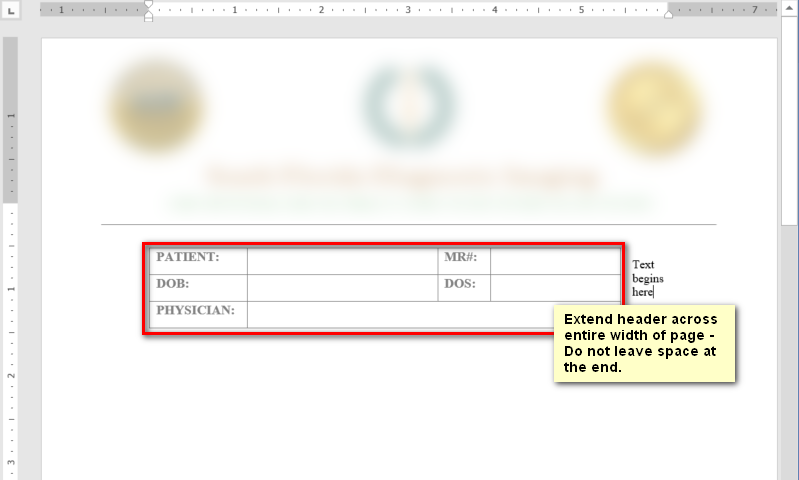
Note for Creating Headers:
When creating headers, extend the header across the entire width of the page. Do not leave spacing at the end of the page.
Invalid header design:
Valid header design: