Accessing Essence Reports
RamSoft Essence generates various types of report such as Analysis, Interactive, Dashboard, and Meaningful Use reports. These reports contain information in regards to how long studies were at each study status, how many studies were processed per facility or physician, how much time each Radiologist, Transcriptionist or Technologist spent on the study, the study count and the reports that can be scheduled to be generated automatically.
RamSoft Essence can be accessed by clicking the Essence icon  on the login page (only if the user has "Access Essence" privilege).
Upon gaining access to Essence, the user will be prompted with many reports to choose that are grouped into several categories such as Turn Around Time, Transition Date, Study Count, Studies Assigned to Radiologist or Technologist, Studies Statistic and Charges.
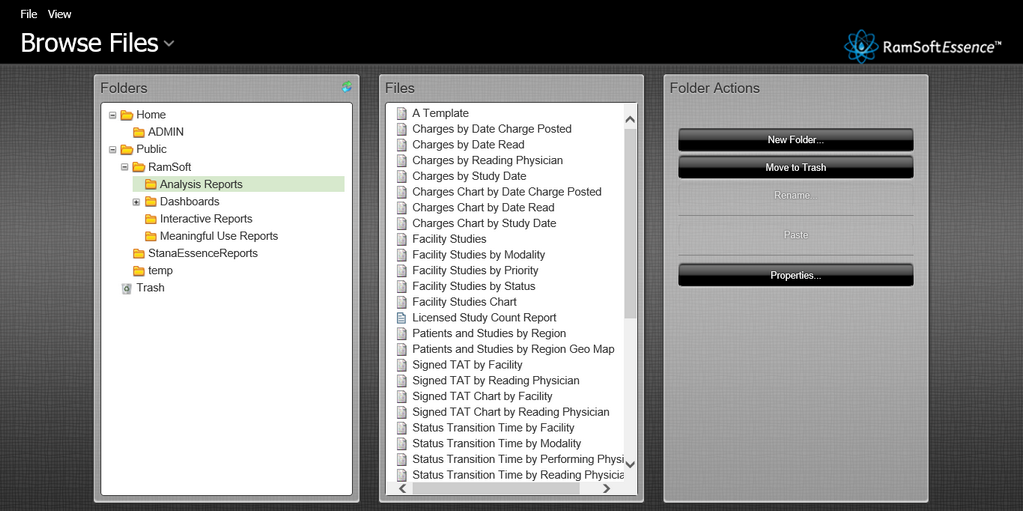
The filters can be customized in any reports, which can help the user to narrow down the results for the desired report. Any report can be generated by following three simple steps. They are as follows:
- Choose the type of report
- Setting filters (by drag and drop the filters to the report)
- Selecting an appropriate output to view/display
In the following scenario, the filters of the "Signed Turn Around Time by Facility" report are modified. Based on the filter set, the application will generate report. The user must choose the range of the date the report will fall into. The application searches for data between and inclusive of the dates specified in the range.

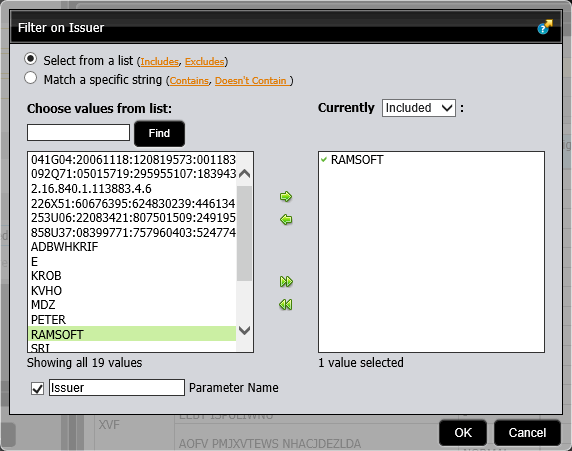
The user chooses the issuer of data as displayed below. The application searches for data provided by the issuer.
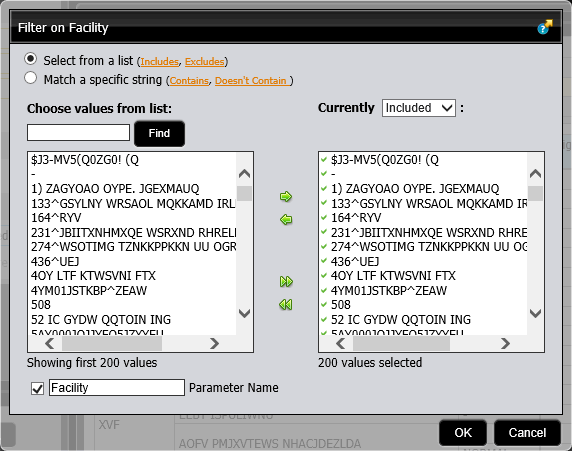
The user chooses the name of the facility from where the studies have been conducted. The application searches for studies conducted in the specified facility.
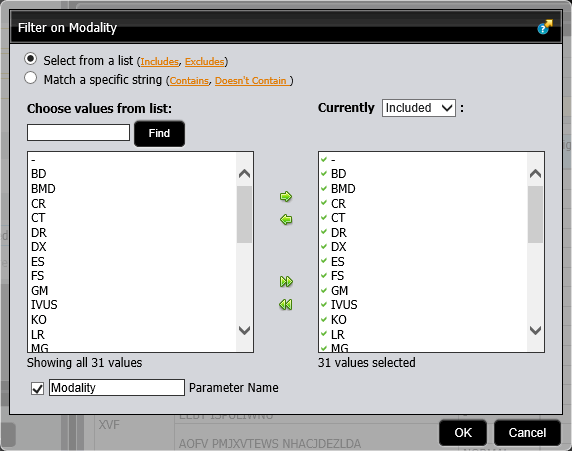
The user chooses the name of the modality. The application searches for studies as per the modalities.
For example, if the study status transition was from Read to Reported and then to Authorized, the accepted input combinations are Read to Reported, Reported to Authorized and Read to Authorized. Inputting Verified to Authorized as the study status transition will not return any results. The user can also choose the Study Status the report will fall into. The application automatically refreshes and displays the report as per the filter you set as shown below.

The reports that you generate could be viewed/displayed by selecting any one of the output format ![]() .
.
By default, the Auto Refresh ![]() icon is enabled. Upon setting a filter, the application will automatically generate the report. You may add as many filters as you need to customize the report.
icon is enabled. Upon setting a filter, the application will automatically generate the report. You may add as many filters as you need to customize the report.
Upon generation of a report, you will need to export it to any of the recommended format or print it. Click the More actions and options icon ![]() .
.
 | The report can be exported to a PDF, XLS, and CSV by selecting the desired format in the menu. |
The report can be printed only from any of the export format mentioned above.
You can save reports to a folder that is available with your username under the HOME tab.
Note that if the user has a name that either has a "\" or "/", then the naming convention of the folders where in the user can save the reports will be changed. For example, if a username is "TEST\TEST1", then the folder under HOME would be named as "TEST__TEST1" (the "\" is replaced by a double-underscore). Similarly, if a username is "TEST/TEST1", then the folder under HOME would be named as "TEST--TEST1" (the "/" is replaced by a double-dash).