Comparing Studies
You can now compare current study with priors or compare multiple series of different studies. Patient Explorer lets you compare two studies by a single click of the Compare with Original Study button.
The Compare option settings are controlled by your Viewing Protocol set up. You can compare up to four studies per monitor if you set up your Viewing Protocol for 4 monitors.
Auto Compare Studies
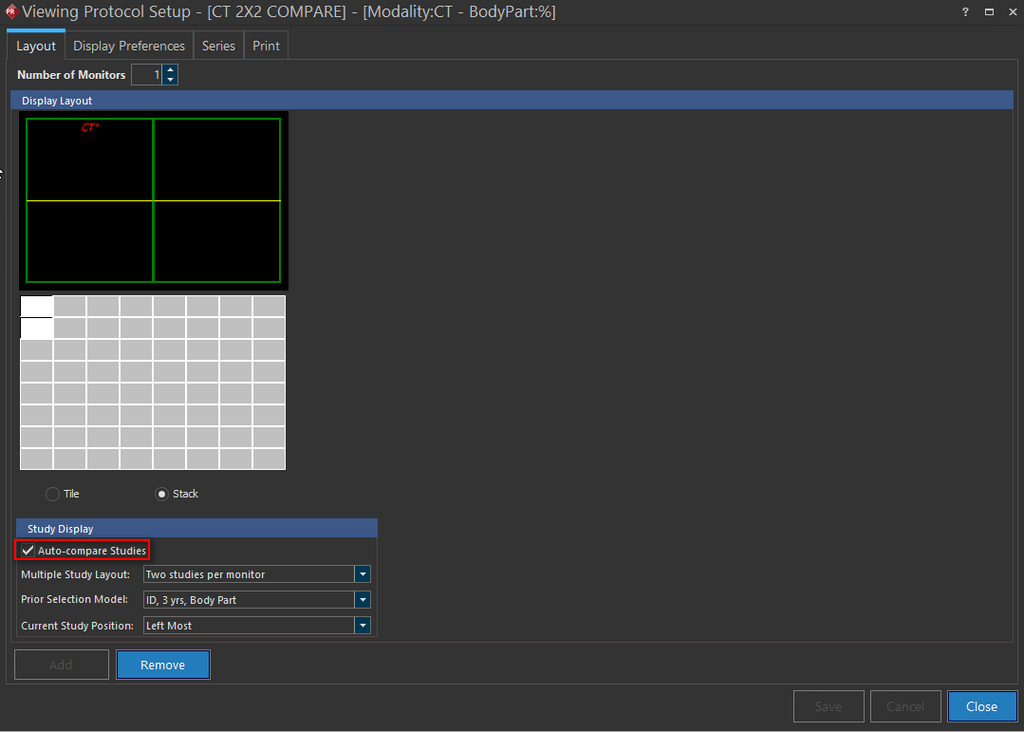
You can by default open studies for comparison when you open the Study Desktop. Based on the Study Layout and Prior Selection Model, you can see the studies in comparison mode. In this example, you can see that a 2x2 layout was selected with the Auto Compare Studies option selected.
You can compare studies by the click of a button. To compare studies, perform the following steps:
- Select the original study and load the study in the image viewer in a layout of your choice. You can see that the selected study is highlighted in bold on the Patient Explorer StudyGrid.
- Now select the study you would want to compare the original study with.
Note that the study you selected for comparison would be highlighted in blue to distinguish it from the other studies in the Worklist.
- Click the Compare with Original Study button
 . Clicking the button will enable the Compare mode.
You will see that both the studies appear side by side in the image viewer for comparison.
Note that you will see a monitor button displayed indicating the number of monitors set up in the Viewing Protocol settings. Clicking on a specific monitor button, will display the compared study on the corresponding monitor.
. Clicking the button will enable the Compare mode.
You will see that both the studies appear side by side in the image viewer for comparison.
Note that you will see a monitor button displayed indicating the number of monitors set up in the Viewing Protocol settings. Clicking on a specific monitor button, will display the compared study on the corresponding monitor.

The original study is identified by the ![]() button.
button.
Note: If you open studies that are already in Compare mode, you would not see the Compare button. Only the monitor buttons would be displayed.
For more information on comparing Studies, please refer to the topic above.
Viewing a prior case is quite often a very useful tool in monitoring changes that have occurred in a patient since the previous study was performed. The RamSoft software provides a Compare mode which allows simultaneous viewing of multiple studies that belong to the same patient. There are two options for comparing the two studies. The Compare mode can be activated by right clicking any node in the Patient Explorer and choosing either the Compare Left/Right option or the Compare Top/Down option.
The options will only be visible if the patient has more than one study stored in the system. When the Compare option is chosen , it opens the following sub-menu.
If Left Most: Originally Opened Study option is chosen, the image display area will be split into two. The left side of the screen will display the current study and the right side will display the most recent prior study. Choosing the Right Most: Originally Opened Study option will display the current study in the right side of the screen and the most recent prior study will be displayed on the left side. Choosing the Single Study option will turn off the compare mode.
If Top: Originally Opened Study option is chosen, the image display area will be split into two. The top portion of the screen will display the current study and the bottom part will display the most recent prior study.
Choosing the Bottom: Originally Opened Study option will display the current study in the bottom half of the screen and the most recent prior study will be displayed in the top half. Choosing the Single Study option will turn off the compare mode.
If more than one prior study is present for the current case, a different study might be desired on the screen. There are two ways to display such a study. The first option is to right click it in the Patient Explorer and choose the Open Study On option
If the Compare Left/ Right option has been chosen by the user, this will open the following sub menu.
Choosing Monitor 1 will load the study onto the left half of the screen. Choosing Monitor 2 will display it on the right side.
In a fused monitors layout setup, note that the Compare mode will always separate fused monitor displays.
If the Compare Top/ Down menu has been chosen by user, choosing the Open Study On option will open the following sub menu.
Choosing Top will load the study onto the top half of the screen. Choosing Bottom will display it on the bottom part of the screen.
The second option for displaying a new study on the screen is to click on an image belonging to the study that should be replaced. This will open the Image Right Click Menu.
Choosing the Study option will open a list of all the studies associated with the patient. Choosing one of the studies will load it into the currently selected viewport.
While in compare mode, the two studies can be linked together. This is done by using the Study Linking feature. The feature is enabled/disabled through the Image Right Click Menu.
Choosing the Linking option will open the following sub menu.
Clicking Study Linking will enable the feature. Clicking it again will disable it. When Study Linking is enabled, a tick mark will appear next to it in the list. Study linking can be used in conjunction with the other linking types resulting in a wide range of linking options. More information on the other linking types can be found in the links at the bottom of this page.
The compare mode described in this section allows the user to compare only two studies at a time. The Viewing Protocols offer a much more powerful compare option which allows the simultaneous comparison of up to four studies per monitor. More information on Viewing Protocols can be found in the links at the bottom of this page.