Using the Search List
The Search is used to find a specific patient or a study.
A study could be searchable only if the study date is included in the Study Info form.
The Search tab could be accessed from the PowerWorklist. Search tab appears as shown below.

Use this screen to search a specific study. Type in the data (search criteria) to search and hit Enter or click ![]() . All the matching results will be displayed.
. All the matching results will be displayed.
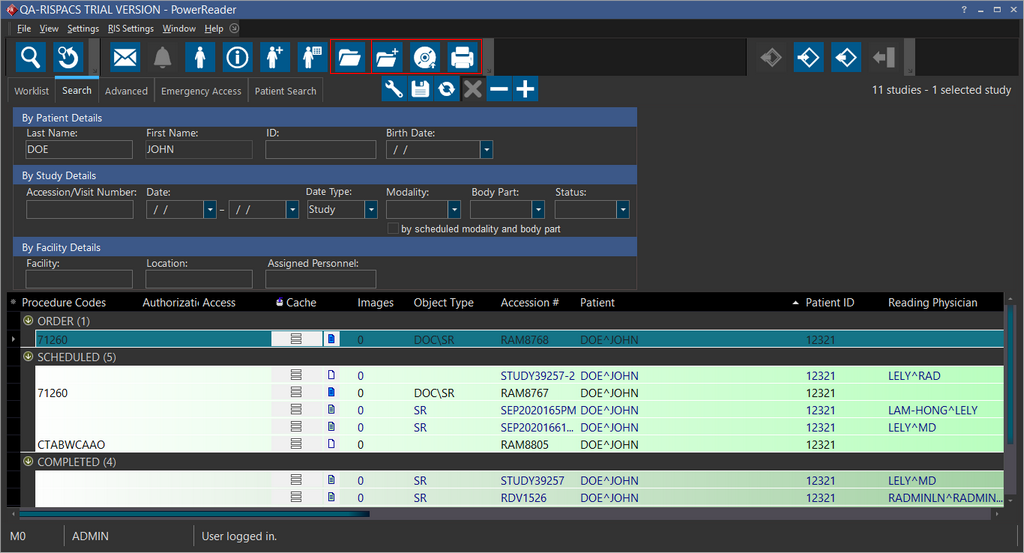
Note that the Open the selected study, Write the study to a disc, Print the study list and Create a new study for this patient icons are enabled only when a study is selected in the Search or Worklist grid.
To conduct a new search, click the New Search icon ![]() . This will empty all the search fields. If a study contains more than eight different modalities or more than eight different body parts, the study can be searched through the first eight modalities or the first eight body parts. The study will be ignored if it is searched by the remaining modalities or body parts.
. This will empty all the search fields. If a study contains more than eight different modalities or more than eight different body parts, the study can be searched through the first eight modalities or the first eight body parts. The study will be ignored if it is searched by the remaining modalities or body parts.
Search fields are classified into three types based on criteria. This classification has made the search ease.
- By Patient Details
- By Study Details
- By Facility Details - To search studies based on information related to their facility.
All search text fields are case sensitive. If you wish to enforce upper case, you can enable the System Configuration entry Allow Case Sensitive Person Name.
By Patient Details
| FIELD | DESCRIPTION |
|---|---|
| Last Name | Last name of the patient |
| First Name | First name of the patient |
| ID | To search studies based on patient's account number, patient ID or Social Security Number (SSN). |
| Birth Date | Date of birth of the patient |
By Study Details
| FIELD | DESCRIPTION |
|---|---|
| Accession/Visit Number | To search a study based on Accession number/Study ID or the order number during the visit |
| Date | By providing a date range |
| Date Type | By providing any of the following criteria such as Study, Read, Receive, Ordered, Verified, Transcribed, Signed, Addendum, and Last Updated |
| Modality | The Object type/physical instrument used to examine the patient |
| Body Part | The body part to be examined |
| Status | The status of the examination |
| By scheduled modality and body part | To search a study based on the modality and body part. |
By Facility Details
| FIELD | DESCRIPTION |
|---|---|
| Facility | To search based on name of the premises where the examination was conducted |
| Location | To search based on department, room number or patient's location where the examination was conducted |
| Assigned Personnel | Field which searches all study players and replaces the Referring Physician and Reading Physician fields used previously |
You cannot search by a Consulting Facility name.
Search Utilities
| ICON | DESCRIPTION |
|---|---|
| The Grouping tool allows you to group the search results based on the chosen grouping hierarchy | |
| The Save Current Settings tool lets you save the current settings applied on the Search tab | |
| The Refresh Data tool updates the status of a studies listed in the Search tab if there is any change in the status of a study being searched | |
| The Cancel Refresh tool cancels a refresh action if there is a lag in refreshing the data | |
| The Contract Groups tool allows you to collapse the search result groups either by Patient, Study or Facility. | |
| The Expand Groups tool expand the search result groups displaying individual search results |
Advanced
The Advanced tab can be accessed from the PowerWorklist. Click > Advanced tab. The Advanced tab appears as shown below.
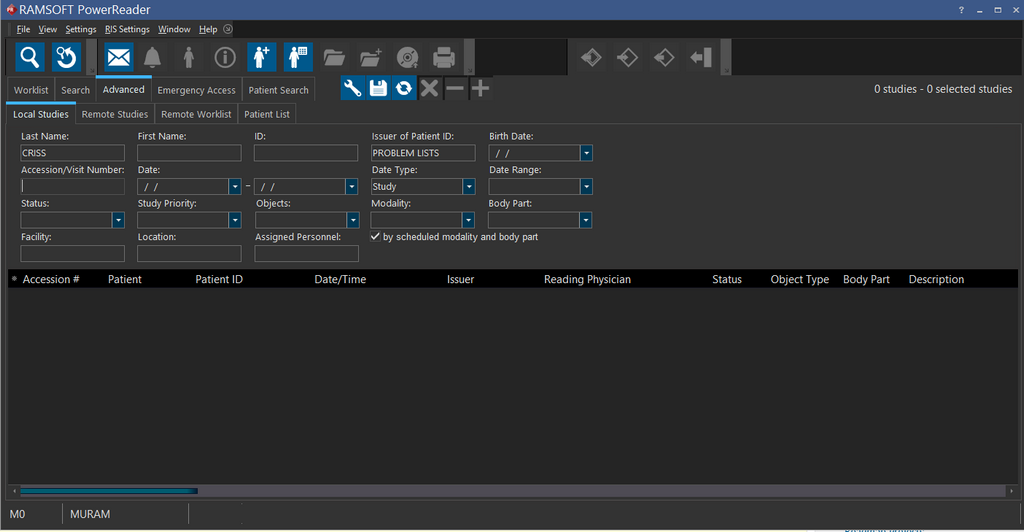
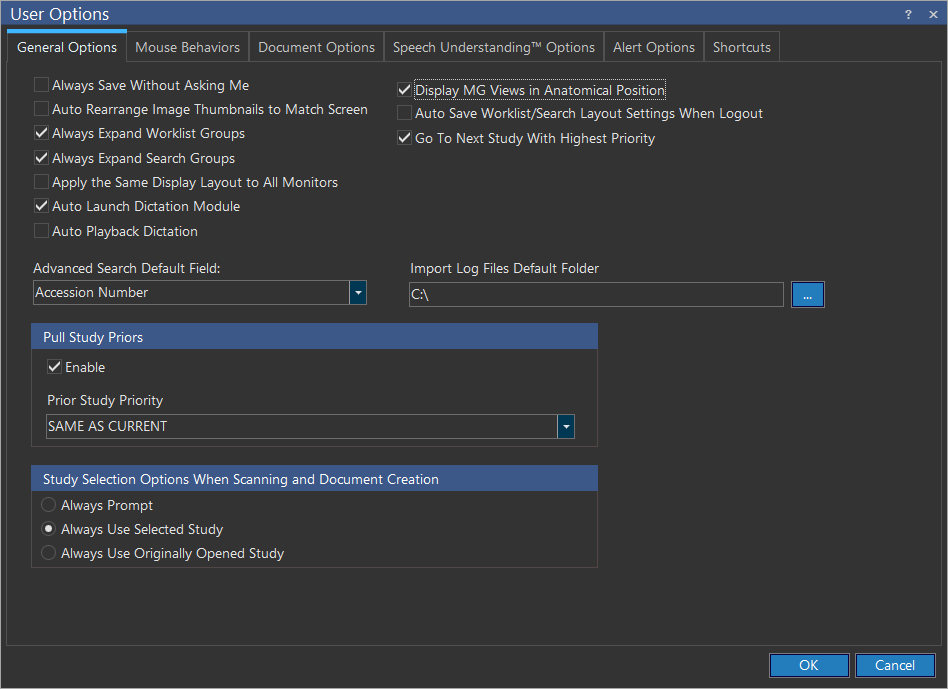
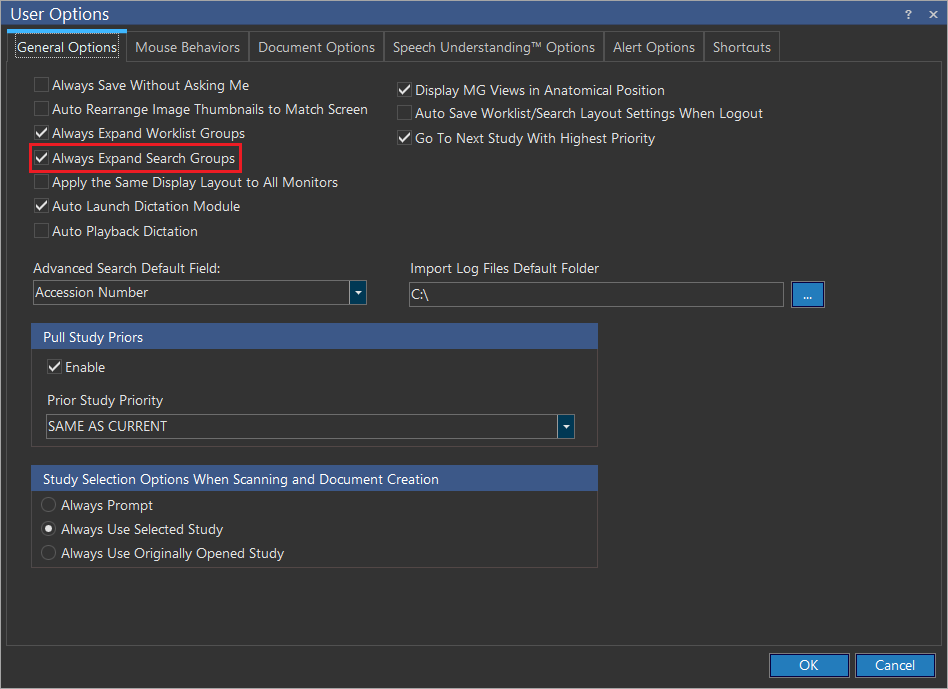
The advanced search feature has 19 search fields which includes 15 fields already available in the Search tab. In addition to this, four search criteria has been addressed. By default, the cursor is on Accession number field. To change the default field setup of the cursor, click Settings > User Options > General Options tab and then choose the desired option in the Advanced Search Default Field drop-down menu. Click OK.
Patient Search
This feature has a patient search mechanism. The patient search screen can be accessed from the PowerWorklist.
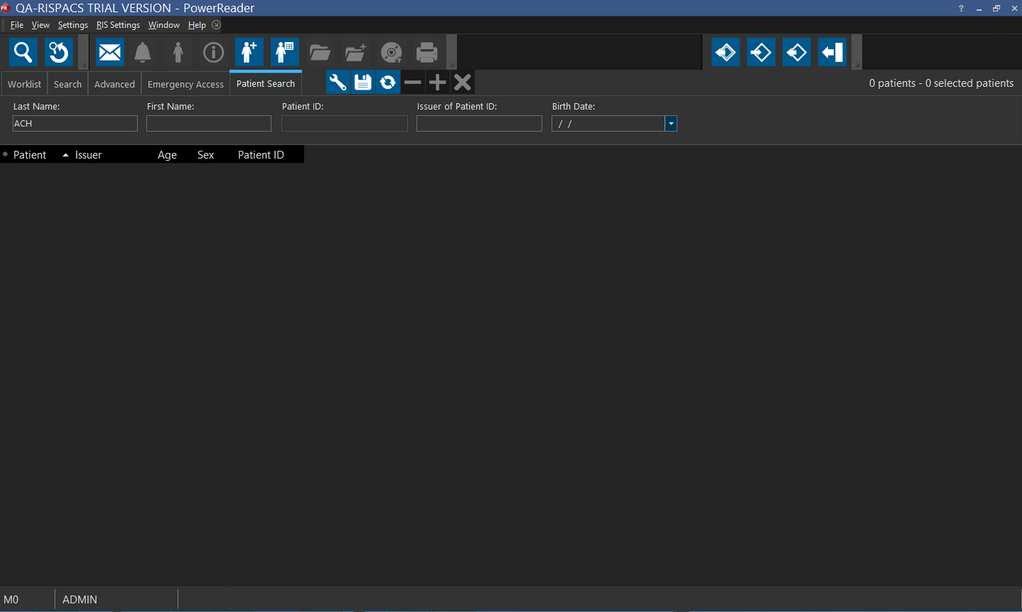
A search can be performed for any patient in the system. If a patient has their studies deleted, it is displayed in this listing. Double clicking any of the patients opens up that patients' most recent study. A new study can also be created for a patient by clicking the New Study button.
Note that the Age field in the Patient Search screen displays the age of the patient at the time of the study, not their current age.
To keep the Search Groups always expanded, click Settings > User Options. Check Always Expand Search groups checkbox. This will prevent groupings in Search windows to collapse after a new search or when you switch between different search windows.
The option Auto Save Worklist/Search Layout Settings When Logout saves any changes in the display settings of the Worklist or Search screen when logging out of the PowerReader. This checkbox is unchecked by default.