How Do I Configure the Replication Services Settings?
To configure the Replication Service, follow these steps:
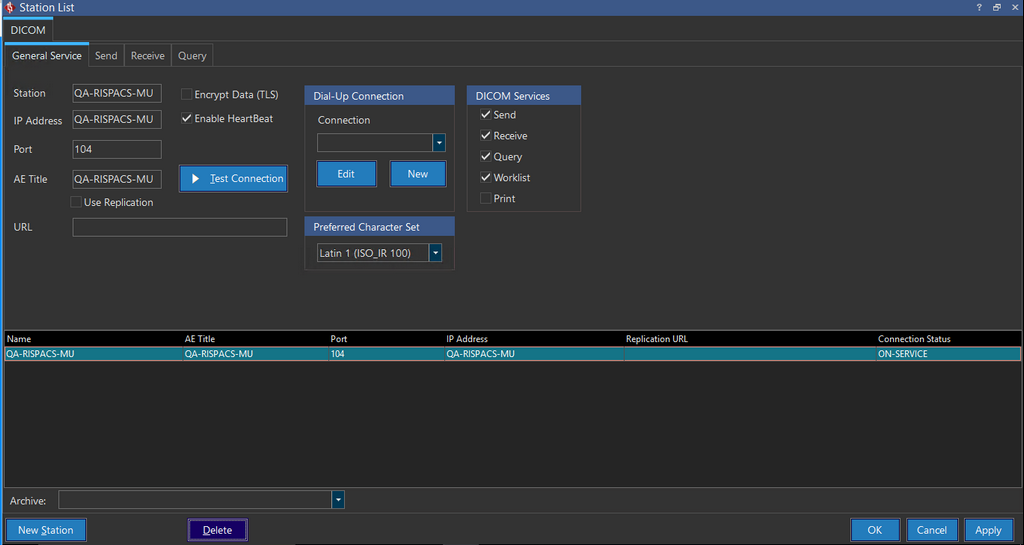
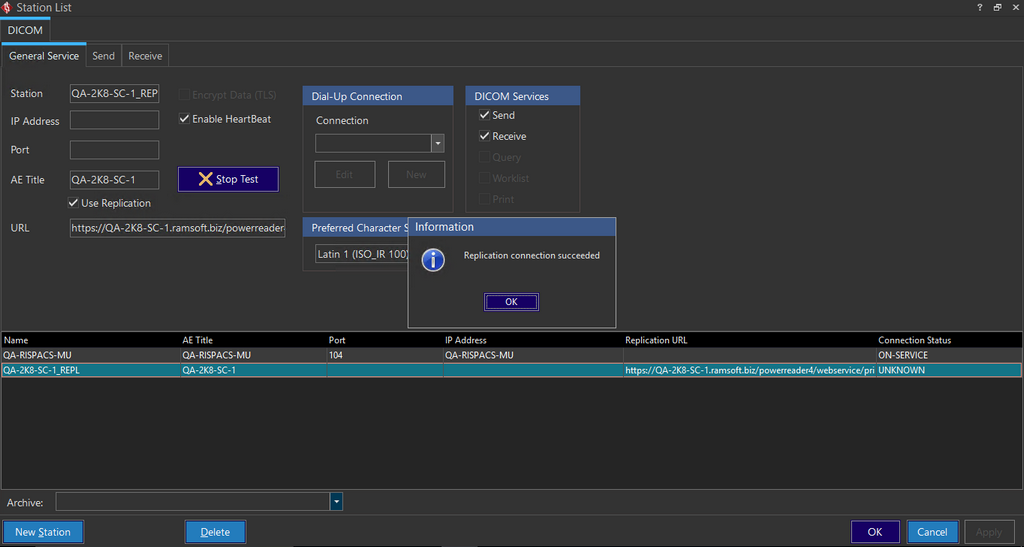
- Go to Settings > Server Settings > Station List. Station List screen appears as shown below.
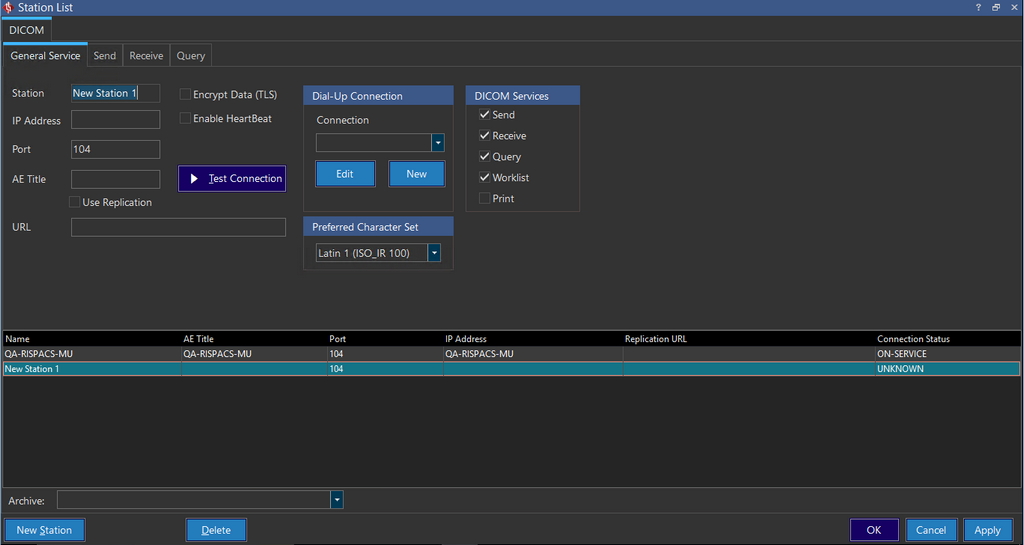
- Click New Station. The Station List screen now displays a new station in the station list grid. You can change the Station Name accordingly.
- Check the Use Replication checkbox. Upon selection, the following options will be available.
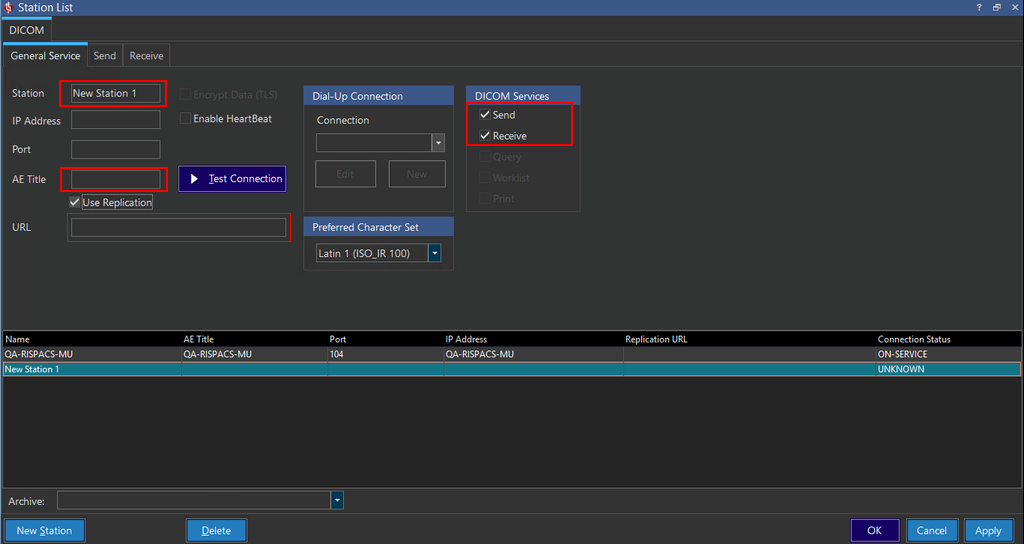
When the Use Replication option is chosen, only the Send and Receive options are available. The system will be able to send and receive images through replication only when the URL has been defined in the table. For further information, please refer to the Adding New DICOM Station section.
- To activate DICOM Heartbeat for this station, check the Enable Heartbeat option.
- Select a station and enter the AE Title of the station. Failure to input a correct AE title or leaving the field blank will result in the sending client not being able to communicate with the receiving client. To send images from Gateway via replication, add the "AE Title of the PowerServer" in the Station List form of Gateway. The receiving client also must include the sending client in its station list. For security reasons, the RamSoft software communicates via DICOM with only those devices that have been identified as safe communication entities. Any device that the RamSoft software will be communicating with, must be entered into the list of safe stations and thus be identified to the software.
Note: During a new installation, if the software has been installed by default in promiscuous mode by enabling the configuration entry Allow Promiscuous Receiving in Maintenance, the RamSoft software will communicate with all devices.
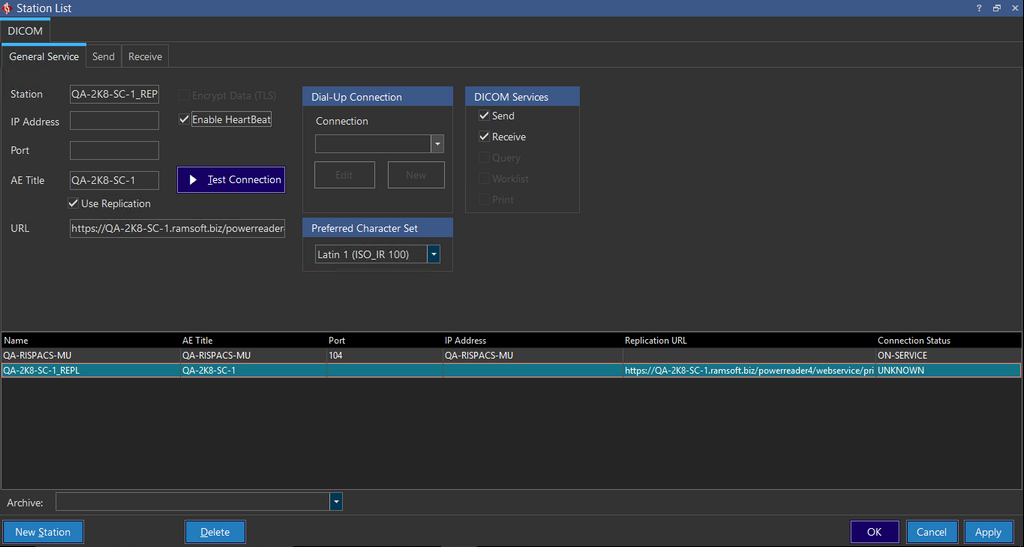
- Provide the URL of the station the images will be sent to. The URL field has a different format depending on whether the station is PowerCache or PowerServer. A PowerServer requires a link to its prisapi.dll while a PowerCache station requires a TCP/IP address with a port number (default is 12800). For instructions regarding replication to a PowerCache, please see the section Replication to a PowerCache below. The following table provides examples of the required format:
| Station Type | Example Format |
|---|---|
| PowerServer (HTTPS Connection) | https://<serverURL>/powerreader/webservice/prisapi.dll/bin |
| PowerServer (HTTP Connection) | http://<serverURL>/powerreader/webservice/prisapi.dll/bin |
| PowerCache | <PowerCache Machine URL>:12800 |
Note: Gateway does not have a server URL, therefore images cannot be sent to Gateway via replication. However, it is possible to send images via replication from a Gateway to a station with a URL (e.g. PowerServer).
- Click Test Connection to ensure that the replication connection is successful.
Send and Receive Tabs
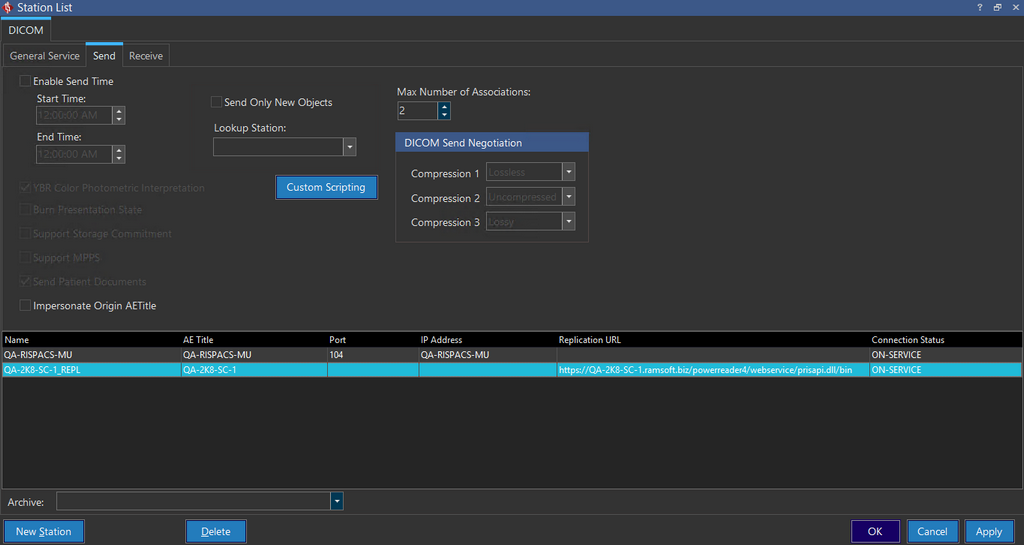
Send Tab
-
The Send tab contains many options for replication. The Enable Send Time option restricts the time period during which studies can be sent to the specified station. If a study being replicated does not fall within time frame of the send time, it will stay in the queue with a SCHEDULED status until the start time is reached. The Start Time and End Time options allow the user to create a time frame during which studies will be replicated.
-
The Max Number of Associations option is used to make use of the number of associations which is a configurable value. The option allows higher efficiency and faster transfers of files. Through the use of multi-threading, it allows the user to send studies through a number of threads, instead of only one thread. This increases the throughput of the system, ultimately decreasing the amount of time if takes for studies to be received by remote stations.
-
The Send Only New Objects option ensures that the study only sends new objects. Replication service first checks for the existence of the study. If the study is found, Replication Service then checks each object for its existence at the destination by first checking the database entry and then the actual physical file location. Any objects that do not exist will be replicated to the receiver.
-
Custom Scripting in replication works identical to the custom scripting option in DICOM sending. The script will be executed on each object before it is sent to the destination. For further reference, please refer to Custom Scripting section of the manual.
-
The "Set Burn In Presentation" state is disabled if "Use Replication" is checked.
Receive Tab
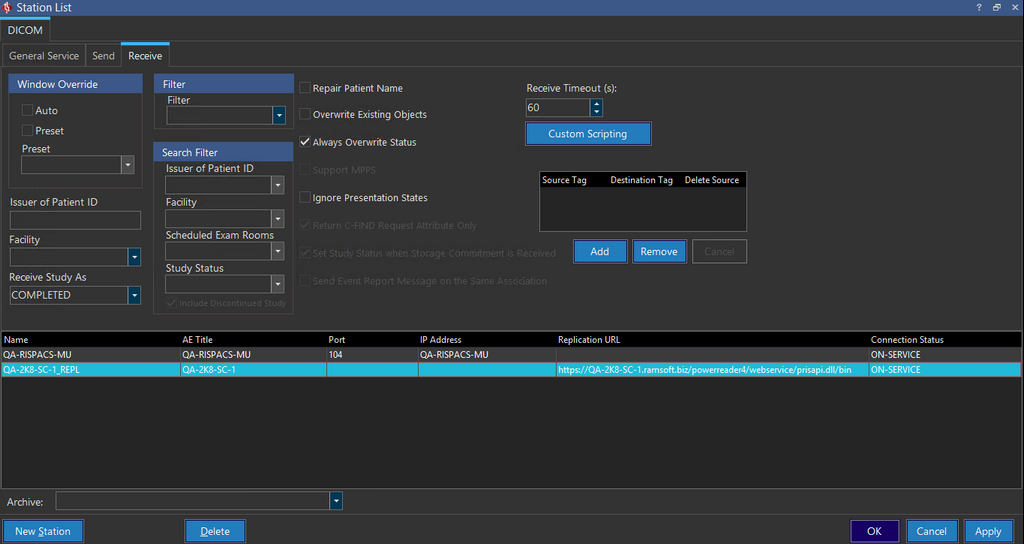
The Receive tab contains many options for configuring replication receiving. Similar to the Send option, these options are a subset of the options available for DICOM receiving.
-
If images received from a specific station do not appear very clear and the window/level values have to be adjusted by the user to view them, the Window Override section can be used to automate this process. The Auto window/level, or a Preset can be automatically applied to all images that come in from the station. The Auto option will automatically determine an appropriate window center and window width based on the image histogram for all images received from the selected station. The Preset option will automatically apply the selected window/level preset to all images.
-
Similarly, if the window/level values cannot be used to clean up certain images, Filters can be auto applied. For example, a smoothing filter may be applied to remove grid lines from a CR device, while a minimum filter may be applied to remove noise from an RF device. This is done by selecting a filter from the Filter Image pull down menu.
-
The Repair Patient Name option will check all incoming patient names to see if they contain carets (^). If they are missing, they will automatically be placed into the name. This helps in reducing conflicts and matching up priors with existing patients.
-
The Overwrite Existing Objects option overrides any existing objects if they already exist.
-
When receiving DICOM data from facilities using different RIS/HIS numbering systems, it is important to segregate Patient IDs from the two facilities. In this situation, it is likely that the same Patient ID is used to represent different patients in the two facilities. Entering a value for the Issuer of PatientID field, will result in DICOM objects that have the Issuer of PatientID field blank or null to be populated with this value. The default value for the Issuer of PatientID (if not set specifically for this station) can be specified in Maintenance. Since this is part of the primary key field in the patient table, this patient will not be merged with a patient with the same Patient ID received from a different facility.
-
The Facility drop-down menu will change the incoming study's facility to the selected one. If "default" is used instead of a specific facility, the default facility will be used.
Note: The default facility is defined in the system configuration entry Institution Name.
-
The Always Overwrite Status and Receive Study As options are used in conjunction with each other. If the Always Overwrite Status option is checked, the incoming study's status will always be set to the value defined in Receive Study As field, after the study has been transmitted. If the Always Overwrite Status option is not checked, the Receive Study As option will still be used if its status is higher than the status of the incoming study. If the status of the incoming study is lower than the status defined in the Receive Study As option, the status of the incoming study will remain as is.
-
The Receive Timeout option represents the length of time (in seconds) after which the system will consider the transfer of study as complete. After the specified amount of time has passed in which no new objects are received, the study will be considered as having finished transmission and will be marked as Completed.
Note: Setting a timeout value which is too low can potentially result in many "Completed" entries in the receive log since it will take a long time for new objects to come in.
-
The Ignore Presentation States option discards any incoming DICOM objects which are presentation states.
-
Field mapping allows individual DICOM tags to be copied, moved or deleted when DICOM objects are received from a specific station. Typically, this feature is used to correct images from modalities that are missing or incorrectly populating crucial DICOM tags. For further information regarding this field, please refer to the section Advanced Receive Settings in the user manual.
Replication to a PowerCache
When replicating to a PowerCache, the following steps should be followed:
- Click Settings > Server Settings > Station List > DICOM tab.
- Check the Use Replication checkbox.
- It is recommended that the DICOM Heartbeat be enabled by toggling on the Enable Heartbeat option.
- Select a Name which is easily recognizable.
- In the AE Title field, enter the AE Title of the 'PowerServer' which the PowerCache will be sending studies to.
- In the URL field, enter the URL (TCP/IP Address) for the machine on which the PowerCache is installed followed by the port number (default is 12800).
Note: In the AE title field, the AE title of the PowerServer (to which the studies will be sent by the PowerCache) should be entered. In the URL field, the URL of the machine where the PowerCache is installed (followed by the port number) should be entered.
| Station Type | Example Format |
|---|---|
| PowerCache | <PowerCache Machine URL>:12800 |