How to Import DICOM Files?
It is often desirable to import DICOM files (images) individually or in the form of a folder/CD. DICOM information is extracted from the imported files. However, it is possible that a technician may be restricted from viewing the imported DICOM files as the images are from an issuer or facility which the technician is not a part of. To overcome this barrier, the system allows overwriting the DICOM tags for 'Study Status', 'Issuer of Patient ID' and 'Facility' of the images during import.
- Click File > Import > Import DICOM File. The Import DICOM screen is displayed.
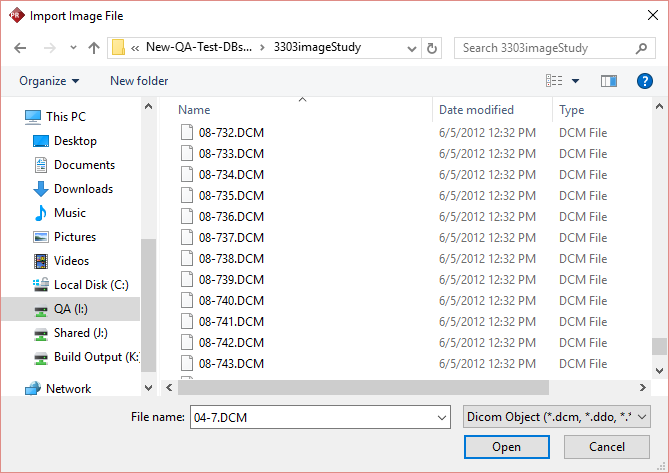
- Select the desired DICOM file(s) from the list and click Open. Upon click, the selected file will be displayed in DICOM Import screen of the application.
| FIELD | DESCRIPTION |
|---|---|
| Add Files | Add Files allows you to reopen the directory from where the original files were imported. |
| Clear Selection | Clear Selection will remove the selected file from the list. |
| Select All | Select All allows you to select all files available in the list. |
| Unselect All | Unselect All allows you to unselect the selected files. |
| Invert Selection | Invert Selection allows you to to invert your choices, i.e. Select the unselected files and unselect the selected files. |
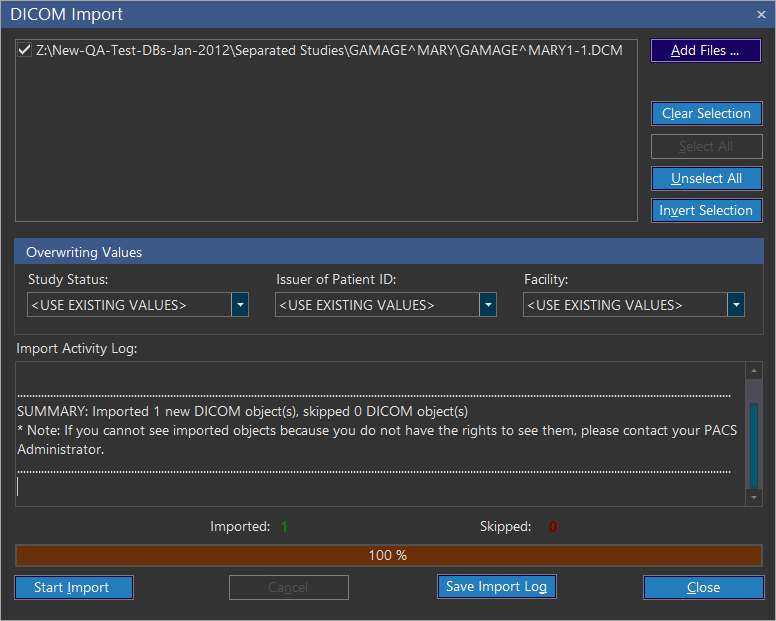
Overwriting DICOM tags
It is possible to overwrite the values in an imported DICOM file. Overwriting the values could be done only in Study Status, Issuer of Patient ID, and in Facility fields. Overwriting the values is crucial for member of a group who does not have privileges to see the DICOM files.
| FIELD | DESCRIPTION |
|---|---|
| Study Status | Study Status overwrites the existing study status of the DICOM image. You can select a different value if you are being prevented from viewing studies of a certain status. |
| Issuer of Patient ID | Issuer of Patient ID overwrites the existing Issuer of Patient ID of the DICOM image. You can select a different value if you are being prevented from viewing studies from a certain issuer. |
| Facility | Facility overwrites the existing facility of the DICOM image. You can select a different imaging facility if you are being prevented from viewing studies of a specific imaging facility. |
Overwrite the values in Study Status, Issuer of Patient ID, and Facility fields if required.
Click Start Import. The application starts importing the selected DICOM files and on completion it displays summary and status in the bottom of the screen.
a. The summary is classified based on the completion as "Imported" & "Skipped".
- Imported: Displays the total count of files been successfully imported.
- Skipped: Denotes that if any of the DICOM files were been already imported in the database or not a valid DICOM file.
b. The status is represented in percentage.
You can save the import activity to create a log by pressing the Save Import Log. Once the DICOM file has been imported, the patient and study information are automatically added to the database and can be accessed from the Search screen or the Worklist.