Groups Overview
Setting up roles is important in order to determine what user is able to do within the system. However, that is unrelated to which studies the user should have access to. That is where the concept of groups comes in. By separating groups from roles you have the capability to give groups consisting of the same type of users access to different studies. A member of a group is automatically associated with studies assigned to that group.
You can also give a group access to studies that belong to certain issuers of Patient IDs. Hence, the members of a group will be able to view studies belonging to a specific issuer of Patient ID. For example, a few transcriptionists can be members of one group. If the study has been assigned to the group, every transcriptionists in the group will be able to access the study. If the issuer of Patient ID has been specified for this group, the transcriptionists who has that specific issuer of Patient ID will be able to access those studies.
How to create a New Group
- Click Settings > Users and Facilities.
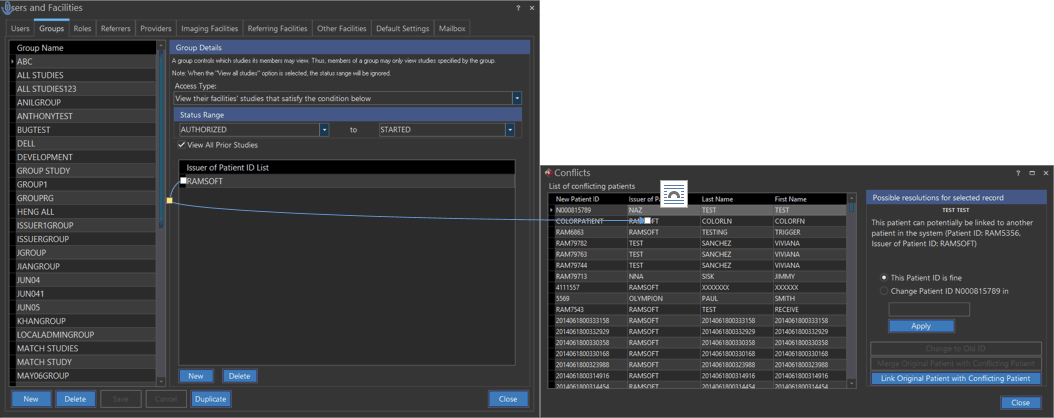
- Click Groups tab. Groups tab of Users and Facilities screen appears as shown below.

- Click New. Upon click, the application will add a new row at the bottom of the existing group list.
- Type in a new group name.
Once a Group Name has been typed in, Access Type, Status Range and the Issuer of Patient ID need to be specified. This is done by clicking on the Access Type menu and choosing the appropriate criteria.
| ACCESS TYPE | DESCRIPTION |
|---|---|
| View their own studies that satisfy the conditions below | Refers to the user being able to only see studies they are associated with. This access is further limited by the criteria defined in the Status Range section found below. |
| View their group's studies that satisfy the conditions below | This is similar to the first entry, except each user is able to see not only studies that they are associated with, but also all the studies that the other members of their group are associated with. |
| View their facilities' studies that satisfy the condition below | Each member of the group will only be able to view studies of a specific facility which they are a member of. |
| View studies that satisfy conditions below | Provides the user access to all studies within the system as long as they fall within the selected Status Range and have the same Issuer of Patient ID and contains at least one facility (Imaging, Referring, Reading, or Performing) the user would access. |
| View all studies | Allows the users of that group to access all studies regardless of the status or the issuer of the study. |
The Status Range section defines the statuses that the user is able to see. In the example above, the READING group of PERFORMING MD, allows its members to access their own studies that they have been associated with and are between the status ranges ORDERED and READ.
The View All Prior Studies checkbox being selected will allow the members of the group to view prior studies in addition to the current studies.
The Issuer of Patient ID list limits users in that group to view studies whose Patient IDs have been issued by a specific issuer. A group member who has an issuer in this list will be able to access studies which have been issued by that specific Issuer of Patient ID. If the list is empty, the user in the group can access studies from any issuer. This is important as the Merge Patients button on the Link Patient dialog will be visible if currently logged in users can access both Issuers of Patient IDs and also have the Merge Patients privilege. Hence, the user must have both Issuers of Patient ID in the groups form or must have this list blank.
Note that the access restrictions for Groups do not apply for Roles, and vice versa. A user with a Systemwide Admin role would be able to access studies of all Facilities, as the Facility access criteria is a Role access criteria. However, if the Group type restricts the user to only studies within a Status Range, the Systemwide Admin would still be bound by such Status Range restrictions.
Note: You can enter a new Issuer of Patient ID manually. When you type the name of a new issuer, it will only be available for this particular group. This issuer will not be available anywhere else in PowerServer. Similarly, if new Issuer of Patient IDs added manually under Imaging, Referring and Other facilities are only available under those Imaging, Referring and Other facilities respectively and not anywhere else in PowerServer.
Duplicating an existing Group
If your business demands to create a new group which is almost similar to an existing group, you can make use of this duplicate feature.
How to Duplicate
- Select the name of the group which is most similar in functionality from the list available on the left in Groups tab of Users and facilities screen.
- Click Duplicate. Upon click, the application will create a copy of the chosen group.
- Type in the new name of the group.
- Click Save.
Associating Issuer of Patient ID with a Group
- Select the group to which you wish to associate an issuer of patient ID.
- Define Access Type, Status Range.
- Click New found below the Issuer of Patient ID List box. Upon click, the application displays a new row in Issuer of Patient ID List box
- Type in name of the Issuer of Patient ID. While you start typing, the application immediately starts searching in the database. The text which matches is automatically popped up.
- Select the name of the issuer of patient ID from the pop-up list.
- Click Save.
Group behavior under specific Issuer of Patient IDs
If a specific Issuer of Patient ID has been added to a group, it is possible to restrict the access of a user according to that issuer. In the Access Type drop-down menu, the option View their facilities' studies that satisfy the condition below is available.
If this option has been selected and a list of Issuers of Patient IDs have been added, then a member of one particular facility under that issuer will be limited to his own studies and the studies of that the facility he is a member of.
For example, if Issuer of Patient ID Issuer XYZ has four facilities associated with it (e.g. Facility A, B, C, and D), then a group member, say user Tom, who is a member of Facility A will be able to view his own studies and those from Facility A. He will not be able to see studies from facilities B, C, and D as he is not a member of those facilities.
If a group member does not belong to any facility, he will be able to see his own studies and those of all the four facilities A, B, C, and D.
For example, if Issuer of Patient ID Issuer XYZ has four facilities associated with it (e.g. Facility A, B, C, and D), then a group member, say user Joe, who is NOT a member of any Facility, will be able to view his own studies and those from Facility A, B, C, and D.
Viewing the Conflicts Table
Users can see the disputes in the conflicts table according to the groups they are members of.
System-wide Administrators can see all the conflict studies in the system. If the Issuer of Patient ID of a conflict study has been defined in the "Issuer of Patient ID List" of a Group, then members of that group will be able to see that conflict study. If the conflict study belongs to an imaging facility which the logged in user is a member of, the user will be able to see the conflict. If the user is not a member of that imaging facility, he will not be able to see the conflict study.
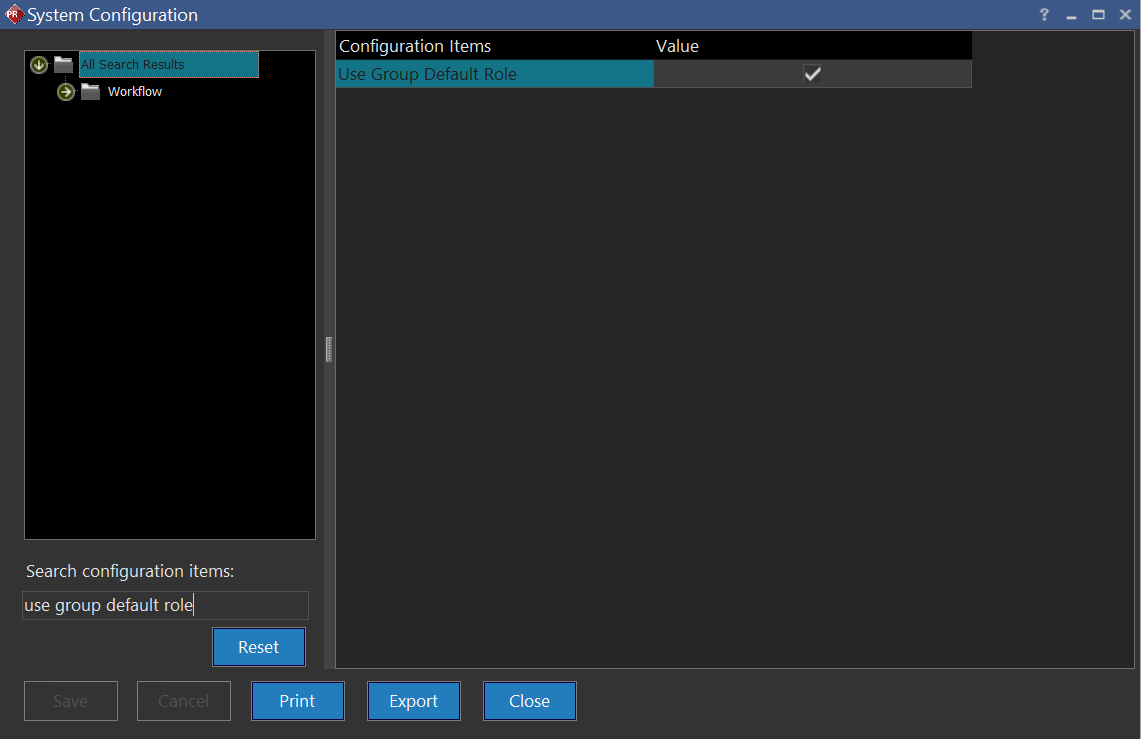
Setting Default Roles
A Group's Default Role is the role users of the Group are assigned to if they are not set up with their own custom Role. To set up Default Roles, the "Use Group Default Role" configuration in System Configuration must be enabled. Check the configuration if it has not been checked, and restart PowerReader for the new setting to take effect.
Assign a Default Role for the desired Group in the Default Role column.
