Using the Document Viewer
Document Viewer
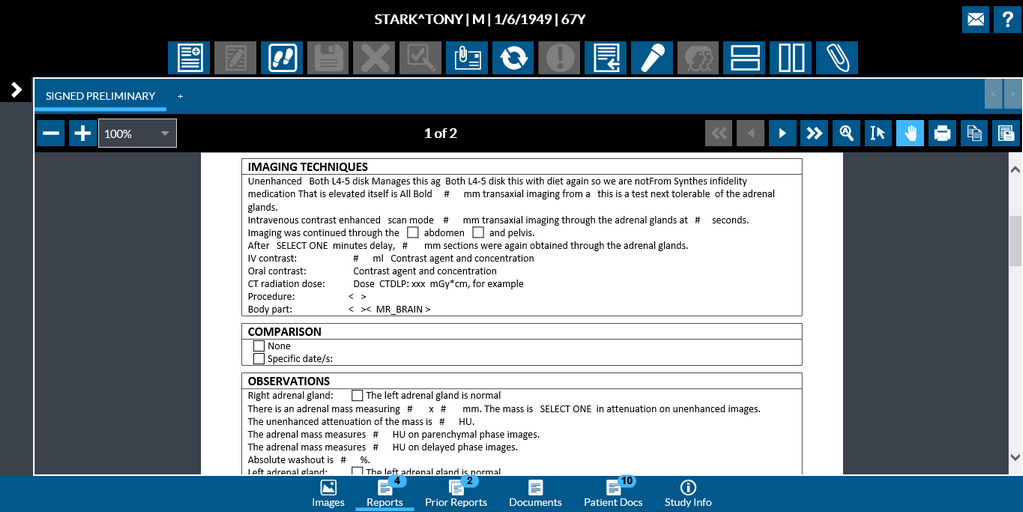
You can see this screen when you click either on the Reports/Prior Reports/Documents/Patient Docs options on the Study toolbar.
There are three sections in the Document Viewer: The Documents List panel, the Documents Editor/Viewer and the Reporting toolbar.

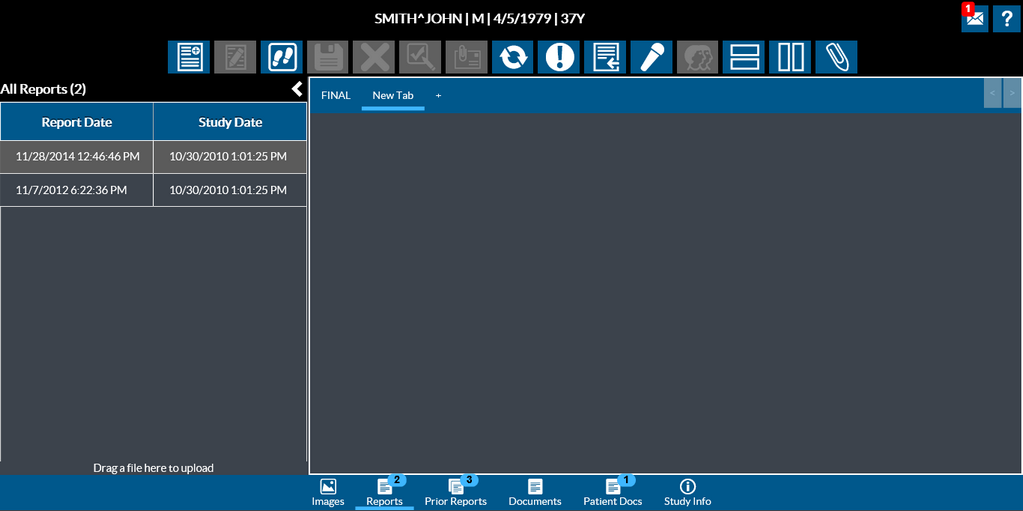
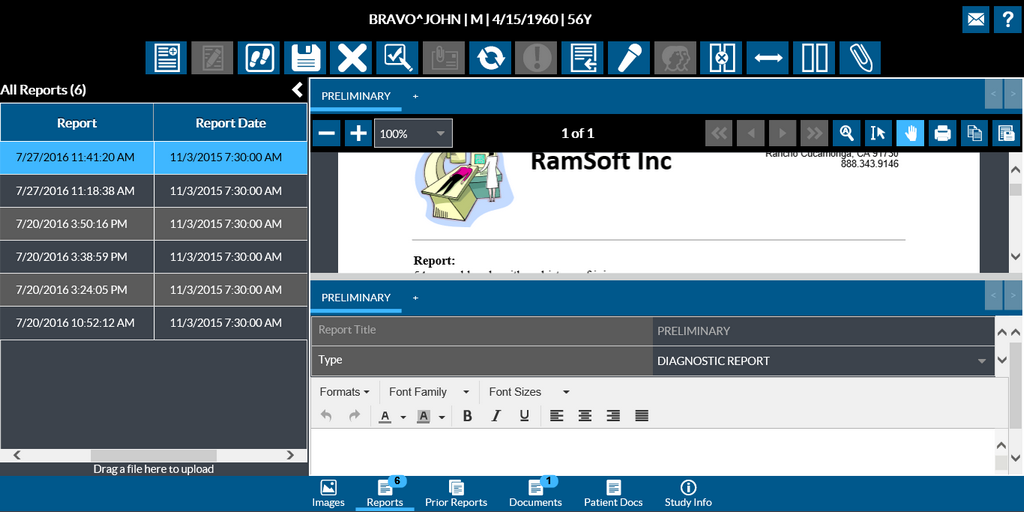
The Document List panel on the left, lists all the reports or documents along with the report creation date and time. You can drag any files here to upload or attach them to a study.
Collapse/Expand the Document List Pane
You can collapse or expand the Document List pane easily. To expand or collapse the Document List pane, click the ![]() button. When you collapse this pane, you can see the report viewer in full screen mode displaying the current selected document/report.
button. When you collapse this pane, you can see the report viewer in full screen mode displaying the current selected document/report.
Dragging and dropping reports in Document Viewer
The following file types are supported by drag-and-drop:
- .txt
- .doc
- .docx
- .docm
- .dot
- .dotx
- .dotm
- .rtf
- .html
- .jpg
- .tif
- .tiff
- .bmp
- .png
- .gif
Report Viewer
The report viewer in RapidResults is intuitive and renders reports/documents in PDF.
The report viewer has the Title bar displaying the current selected report. You can add additional tabs to open multiple reports without having to close the existing tab. Clicking the ![]() button adds a new tab. You can drag and drop the report that you want to view here.
button adds a new tab. You can drag and drop the report that you want to view here.
Changing the Document Viewer Layout
Various option can be used to change the layout of the document viewer.
Selecting the Horizontal Split tool ![]() will display the report and document viewers in horizontal positions.
will display the report and document viewers in horizontal positions.
You can revert to the vertical position by selecting the Vertical Split ![]() tool.
tool.
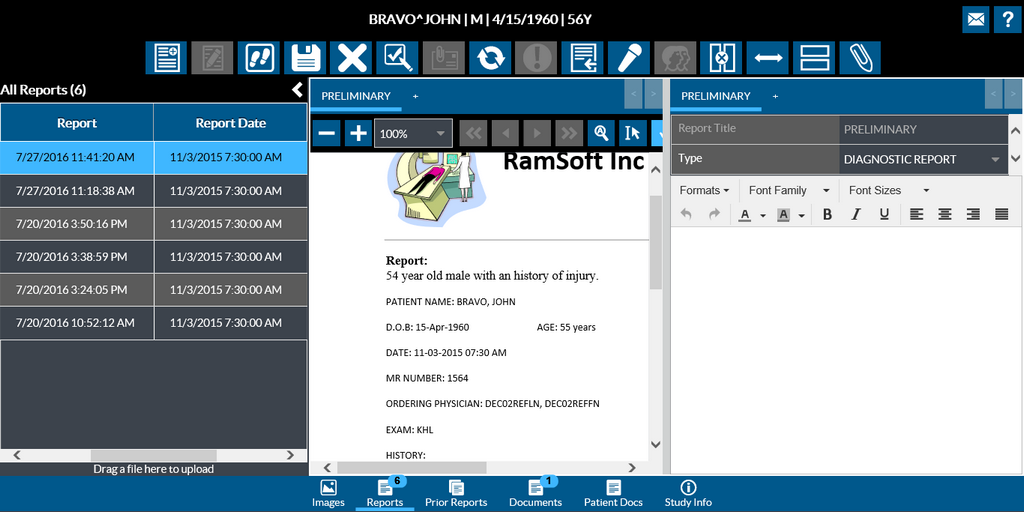
You can also swap the editor positions by clicking the Flip Editor Position ![]() tool.
tool.
You can exit the split mode by clicking the Do not split Document Viewer ![]() tool.
tool.
Report Viewer Toolbar
The report viewer toolbar is visible when you have a report/document open.
| Icon | Tool | Description |
|---|---|---|
| Zoom Out | Decreases the current Zoom level | |
| Zoom In | Increases the current Zoom level | |
| Select Zoom | Has pre-defined page scaling options. By default a report or a document is displayed in the Fit Page mode. Fit Page resize large pages to fit the Report Viewer window. Fit Width fits the report or a document into the report viewer window. | |
| First Page | Displays the beginning page of the document | |
| Previous Page | Displays the previous page | |
| Next Page | Displays the next page | |
| Last Page | Displays the last page of the document | |
| Search Text | Allows you to search for text in the current PDF. Highlights each occurrence of the text being searched. | |
| Select Text | Select the text you want to highlight | |
| PAN Tool | By default, the PAN tool is selected when you open a PDF document. This is used to move the document up, down to the left, and to the right. When the PAN tool is active, the PAN cursor is displayed. Note that horizontal pan only works if the entire document width is not visible and vertical pan works if entire height of the document is not visible. | |
| You can print a report or a document by clicking on the Print tool. When you click on Print, you will get the Print dialog box | ||
| Copy text to EHR | Allows you to copy the body text from diagnostic reports and paste it on to the Electronic Health Record (EHR). | |
| Download PDF Document | You can save a PDF report or document to your local machine by clicking on this tool |
Stylus/Touch screen Users
PAN Tool ![]() - By default, the PAN tool is selected when you open a PDF document. This is used to move the document up, down to the left, and to the right. Note that horizontal pan only works if the entire document width is not visible and vertical pan works if entire height of the document is not visible.
- By default, the PAN tool is selected when you open a PDF document. This is used to move the document up, down to the left, and to the right. Note that horizontal pan only works if the entire document width is not visible and vertical pan works if entire height of the document is not visible.
Place your finger over the document and move in any one of the direction.

Zoom In
Touch the Zoom tool and pinch to zoom in (slide your fingers apart till you have a clear vision of the document).

Zoom Out
Touch the Zoom tool and pinch to zoom out the document (touch the screen with two fingers and drag your fingers together).

Document Viewer Toolbar
| Icon | Description |
|---|---|
| New Document - opens a new document/report. | |
| Amendment History - shows a chronological list of all the amendment requests made along with the details of the users who requested an amendment. This is enabled only for amended reports (current and prior). | |
| Sign Report - Users with the appropriate privilege can sign the diagnostic and diagnostic preliminary reports. This is only available for unsigned reports (not prior reports) and is accessible only for users who can sign reports. A report needs to be selected for it be signed. | |
| Send To - Lets you send reports by Fax to New Receipt, Imaging Facility, Referring Physician and All Recipient. You can email reports to New Recipient. You can redistribute reports to Imaging Facility, Referring Physician, All Recipient and via HL7. | |
| Refresh - Updates the latest data for all reports | |
| Critical Finding - You can flag a report with Critical Finding only when you have the privilege to create or amend diagnostic reports, and if user is Reading Physician and study priority is less than the Critical finding priority or study status is less than Prevent Modification status. This is available only for Reports, as it only applies to the originally opened study. | |
| Attach Document - Lets you attach reports to a study. This is enabled if a user has the privilege to attach reports. | |
| Update Selected Document - Lets you update the report title or Document Type for the selected document. This is disabled if the study status is greater than or equal to Prevent Modification status. | |
| Peer Review - Lets you perform a peer review of a report. | |
| Vertical Split - Splits the Report Viewer and Document viewer vertically | |
| Horizontal Split - Splits the Report Viewer and Document viewer horizontally | |
| Do not split document viewer - Brings back the Report viewer in its original layout | |
| Flip Editor Position - Swaps the positions of the Report Viewer and Document viewer | |
| Scan - Lets you import and scan documents | |
| Dictation - Opens the Dictation module for voice recording | |
| Save the Report - Saves the changes made to a report | |
| Cancel Changes Made - Lets you cancel any changes you have made to the report |
Note that when a study has its status greater than or equal to the "Prevent Modification" status setup in workflow settings, you cannot create/update/attach/import any reports/documents or dictate to any reports or documents. These options are available to you only when you open a study whose status is lower than the "Prevent Modification" status.