How Do I Create and View Reports?
Open the Document Viewer either by clicking on the View/Create Documents icon ![]() after opening the study or by clicking on the Document icon in the Worklist or the Documents button in Study Info.
after opening the study or by clicking on the Document icon in the Worklist or the Documents button in Study Info.

Non-diagnostic reports will be visible with a dark blue icon while diagnostic reports will be represented by a light green icon. A white icon represents the absence of any diagnostic reports.
Launching Document Viewer can also be controlled by Auto launch options set up in User Options > Document Options. For more information, please refer to the topic on User Options.
Note: You can also access Document options by clicking the Configure Document Options ![]() icon on the toolbar.
icon on the toolbar.
Creating a New Report
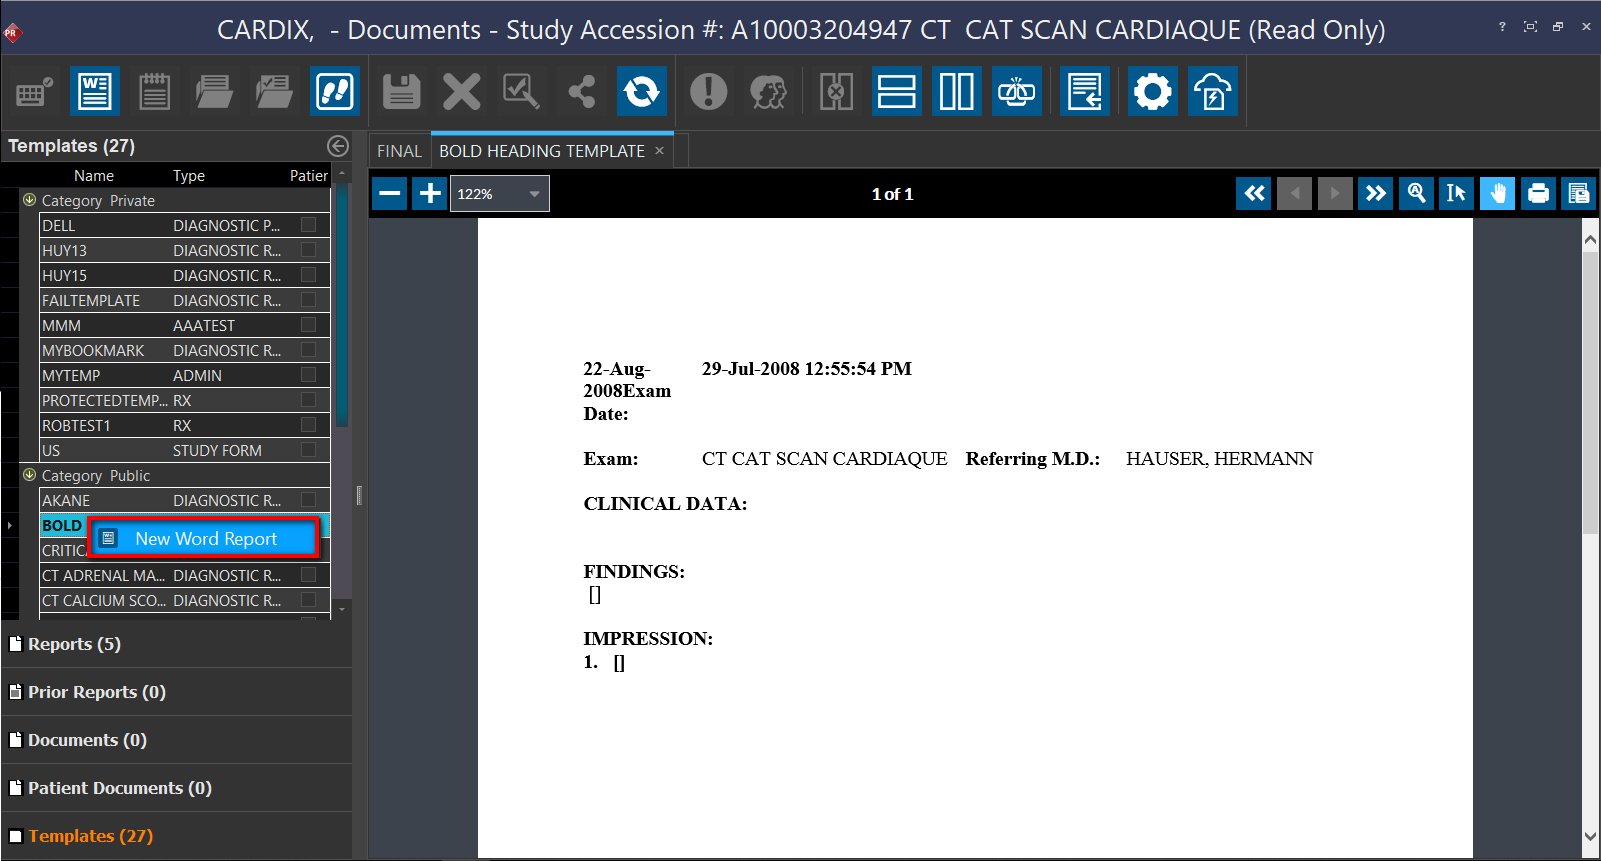
On the Document Viewer, you can create a new report by either clicking the Create new word report from template icon ![]() or by right-clicking on the desired template and selecting the New Word Report option.
or by right-clicking on the desired template and selecting the New Word Report option.
Note: Patient Documents is only available in PowerServer RISPACS.
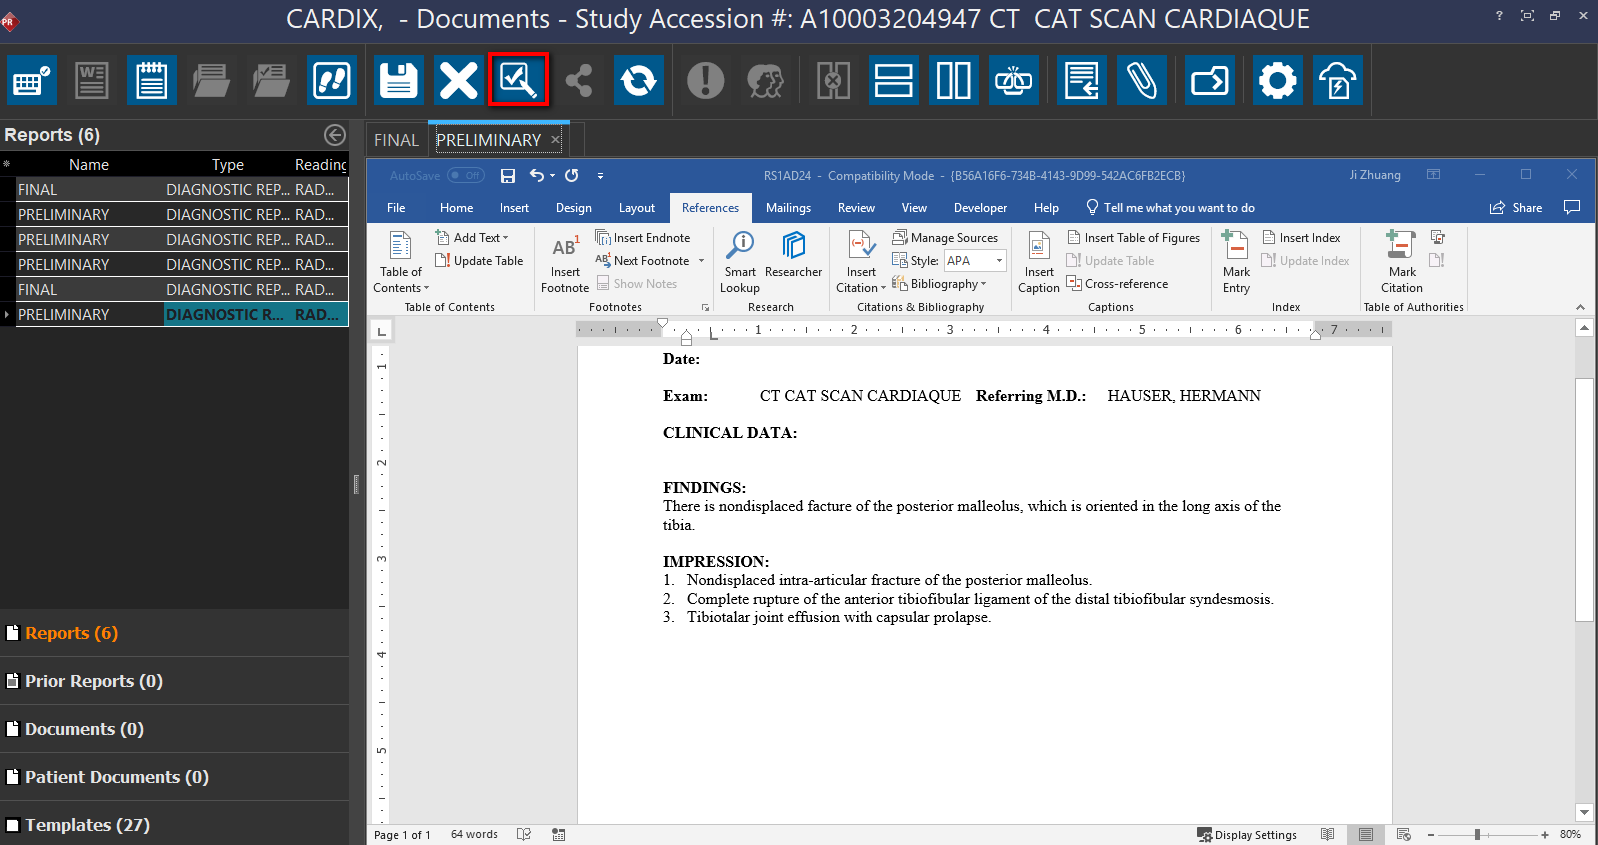
On the new report, dictate/type the report content. Once the content is complete, the user can save the report. After it is saved, the report can be updated by clicking the Update Report ![]() icon on the toolbar. The final step after saving a report is signing the report. You can sign a report by clicking the Sign Report
icon on the toolbar. The final step after saving a report is signing the report. You can sign a report by clicking the Sign Report ![]() icon. Once the report is signed, the report will be displayed in PDF format.
icon. Once the report is signed, the report will be displayed in PDF format.
Whenever a user creates more than one diagnostic report, the system alerts the user with the confirmation message "Are you sure you wish to create an additional diagnostic report?". Selecting Yes would open a new report based on the template.
Viewing existing reports
The report viewer displays the existing documents associated with the study. The documents are rendered in PDF format. You can also search within a PDF document by using the Search feature available when you right-click on a document. If there are Preliminary and signed Final Diagnostic reports, the signed Final Diagnostic report is displayed first.
When you click Search, a Search button with text field is displayed. You can type in the text that you want to search for in the document and click the Search button. The matching text is highlighted in yellow on the PDF document.
The report viewer also displays prior reports. The documents displayed in the report viewer are are not editable.
When the user opens a study and the template is selected, the report viewer displays the most recent relevant prior report. If no relevant prior exists, the report viewer will be blank.
Keep in mind that the way documents are displayed in the document viewer is customizable and various options can be used to determine that. You can view multiple documents and reports in the report viewer. Each document or report can be opened in a new tab.
To open a report or a document in a new tab, click the New tab button on the Tabs bar. You can close individual tabs by clicking the Close button on the tab you'd like to close.
The Document Viewer
There are three sections in the Document Viewer: the Documents Navigator (with the Documents/Templates) tab, the Report viewer and the Document Editor.
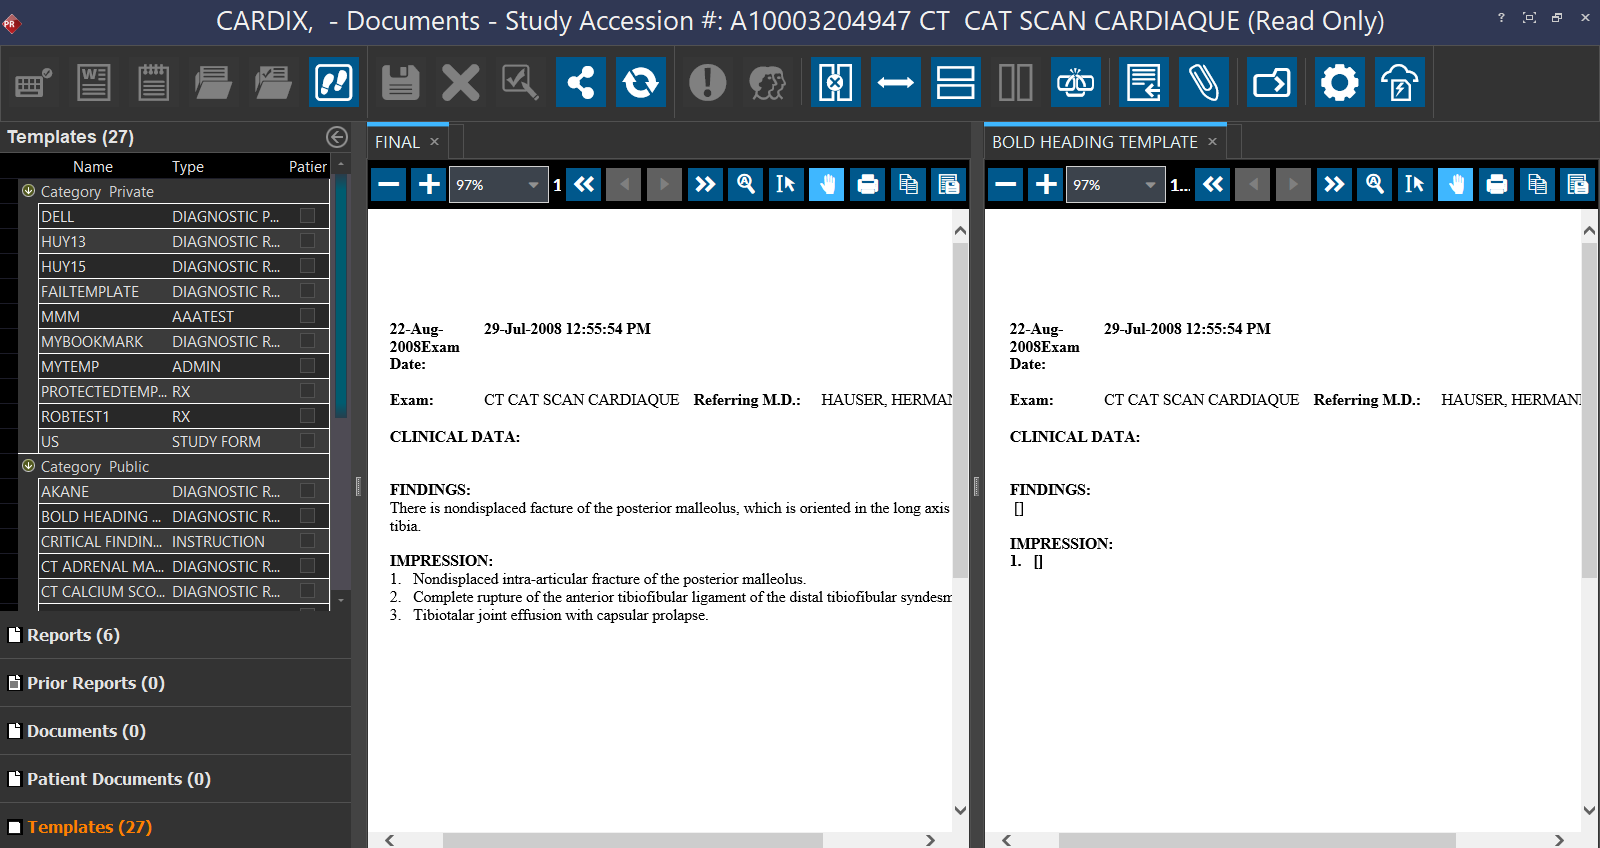
The Document Editor and Document Viewer are separated by a divider.
Tip: Clicking the ![]() icon opens the Document Editor.
icon opens the Document Editor.
In the image above, clicking on the divider displays the existing document in the Document Viewer in the center and the document editor is displayed on the right.
The settings can been configured to auto-select a template when the document viewer is opened. In that case, a template will be available immediately when the document viewer is opened and the user can start dictating/ typing. If the users need to select a template, they will have to click on the Templates tab in the document viewer and double-click on a template to select it. Only templates of type *.DOT, *.DOTM, and *.DOTX are supported by the document viewer.
Enabling the  linking option will keep the currently displayed prior report when switching between prior study images. This means that when the Document Viewer is open, clicking on a prior study's images will automatically open the prior study's reports. Click the linking icon to enable or disable this behavior.
Launching RapidResults from Document Viewer
There can be instances when users might want to view documents and reports from other studies in the patient's history. The Launch RapidResults tool ![]() in the Document Viewer toolbar lets you launch RapidResults on the fly.
in the Document Viewer toolbar lets you launch RapidResults on the fly.
When you click this tool, the RapidResults screen is launched in a new browser window displaying the Documents screen of the originally opened study in PowerReader.
Report Viewer Toolbar
The report viewer toolbar is visible when you have a report/document open.
| ICON | DESCRIPTION |
|---|---|
| Zoom Out - Decreases the current Zoom level | |
| Zoom In - Increases the current Zoom level | |
| Select Zoom - Has pre-defined page scaling options. By default a report or a document is displayed in the Fit Page mode. Fit Page resize large pages to fit the Report Viewer window. Fit Width fits the report or a document into the report viewer window. | |
| First Page - Displays the beginning page of the document | |
| Previous Page - Displays the previous page | |
| Next Page - Displays the next page | |
| Last Page - Displays the last page of the document | |
| Search Text - Allows you to search for text in the current PDF. Highlights each occurrence of the text being searched. | |
| Select Text - Select the text you want to highlight | |
| PAN Tool - By default, the PAN tool is selected when you open a PDF document. This is used to move the document up, down to the left, and to the right. When the PAN tool is active, the PAN cursor is displayed. Note that horizontal pan only works if the entire document width is not visible and vertical pan works if entire height of the document is not visible. | |
| Print - You can print a report or a document by clicking on the Print tool. When you click on Print, you will get the Print dialog box. | |
| Copy Text to EHR - Copies body text of report to clipboard. | |
| Download PDF Document - You can save a PDF report or document to your local machine by clicking on this tool |
The Document Navigator
There are two tabs in the document navigator. The Documents tab displays all the documents stored under the selected study. These existing documents are displayed in PDF format inside the Report Viewer on the right. The Templates tab allows the user to select the templates to use. The templates are uploaded from the Template Manager.
In the Document navigator, the Documents tab can be divided as follows:
| FIELD | DESCRIPTION |
|---|---|
| Reports | The diagnostic reports from the selected study. These can include Diagnostic reports as well Diagnostic Preliminary Reports |
| Prior Reports | The priors reports of the study as well as the prior reports of any prior studies. The prefetching of these priors is configured in the setup Workflow |
| Documents | It displays the reports on report viewer. The reports displayed here can be edited. |
| Patient Documents | The patient level documents store specific information about the patient such as Patient Referral Info, Insurance Card, Patient Forms or Lab Reports |
| Templates | It displays a list of all templates available on the Document Navigator and its content is displayed on the document editor where you can edit the report. |

In the Templates tab, the user can select an appropriate template. These templates are in the form of a list and the user can create a document from the list by double-clicking on the desired template.
After a template is selected, a report composed of the desired template will open in the Document Editor. This will allow the user to enter data into the template and save the template to Study Documents.
The bookmarks in the template will auto populate if the required information has been filled out in Patient or Study Info.
These templates visible in the Templates tab are chosen by the template manager. It is possible to auto-launch a particular, frequently used template in the document editor.
Show/Hide/Move Columns in Navigator
You can show, hide or move columns in the Document Navigator.
You can do this for viewing any document related information by clicking on the Click here to show/hide/move columns button ![]() .
.
The following columns are available in Document Navigator for you to select based on the report/document you want to view:
- Name
- Report Date/Time
- Type
- Reading Physician
- Study Date/Time
- Modality
- Body Part
- Study Date/Time
- Imaging Facility
- Laterality
- Performing Physician
- Reading Physician
- Referring Physician
- Document Date/Time
The screenshot below shows the columns for Reports section.

The screenshot below shows the columns for Prior Reports section.

Collapse/Expand Navigation Pane
You can collapse or expand the Navigation pane easily.
To expand or collapse the navigation pane, click the button ![]() . When you collapse the Navigator pane, you can see the report viewer in full screen mode displaying the current selected document/report.
. When you collapse the Navigator pane, you can see the report viewer in full screen mode displaying the current selected document/report.
The system has been designed to remember the splitter position and it remember's the last position before the document viewer is closed. Once you open the same study's document viewer again, you can see that the navigation pane is in the same position as it was left previously.
Configuring Document Options
You can now configure Document Options from the Document Viewer without having to navigate to User Options on the Settings menu. You can configure your preferences with regard to documents by clicking the Configure Document Options button ![]() on the tool bar menu. You can see that the User Options window appears with the Document Options tab information.
on the tool bar menu. You can see that the User Options window appears with the Document Options tab information.
Clicking the Go to Next Study ![]() button or using the shortcut key (Shift +F5 (default)) in document viewer auto saves the changes and advances to the next study in the Worklist.
button or using the shortcut key (Shift +F5 (default)) in document viewer auto saves the changes and advances to the next study in the Worklist.
For more information on configuring document options, please refer to the topic User Options.
Advancing to the next Study
Clicking the Go to Next Study ![]() button or using the shortcut key (Shift +F5 (default)) in document viewer auto saves the changes and advances to the next study in the Worklist.
button or using the shortcut key (Shift +F5 (default)) in document viewer auto saves the changes and advances to the next study in the Worklist.
Clicking the Finish Reviewing Study ![]() button closes the study and advances its status. If there are any pending reports to be signed, the system will display the Sign Report Confirmation message "There are multiple reports to be signed. You have the options to either sign the current report or sign all the un-signed reports or to cancel this process. Clicking the Current button lets you sign only the current report. Clicking the All button lets you sign all the un-signed reports.
button closes the study and advances its status. If there are any pending reports to be signed, the system will display the Sign Report Confirmation message "There are multiple reports to be signed. You have the options to either sign the current report or sign all the un-signed reports or to cancel this process. Clicking the Current button lets you sign only the current report. Clicking the All button lets you sign all the un-signed reports.
When you close the study in this manner, you will be returned to the Worklist.
Refreshing the Document Viewer
You can manually refresh the Document Viewer screen by clicking the Refresh button ![]() on the menu toolbar. This lets you check the updated status of any document without waiting for the system to automatically update it after a certain refresh time interval.
on the menu toolbar. This lets you check the updated status of any document without waiting for the system to automatically update it after a certain refresh time interval.
Changing the document viewer layout
Various options can be used to change the layout of the document viewer.
Selecting Horizontal Split ![]() will display the Report Viewer and Document Viewer in horizontal positions.
will display the Report Viewer and Document Viewer in horizontal positions.
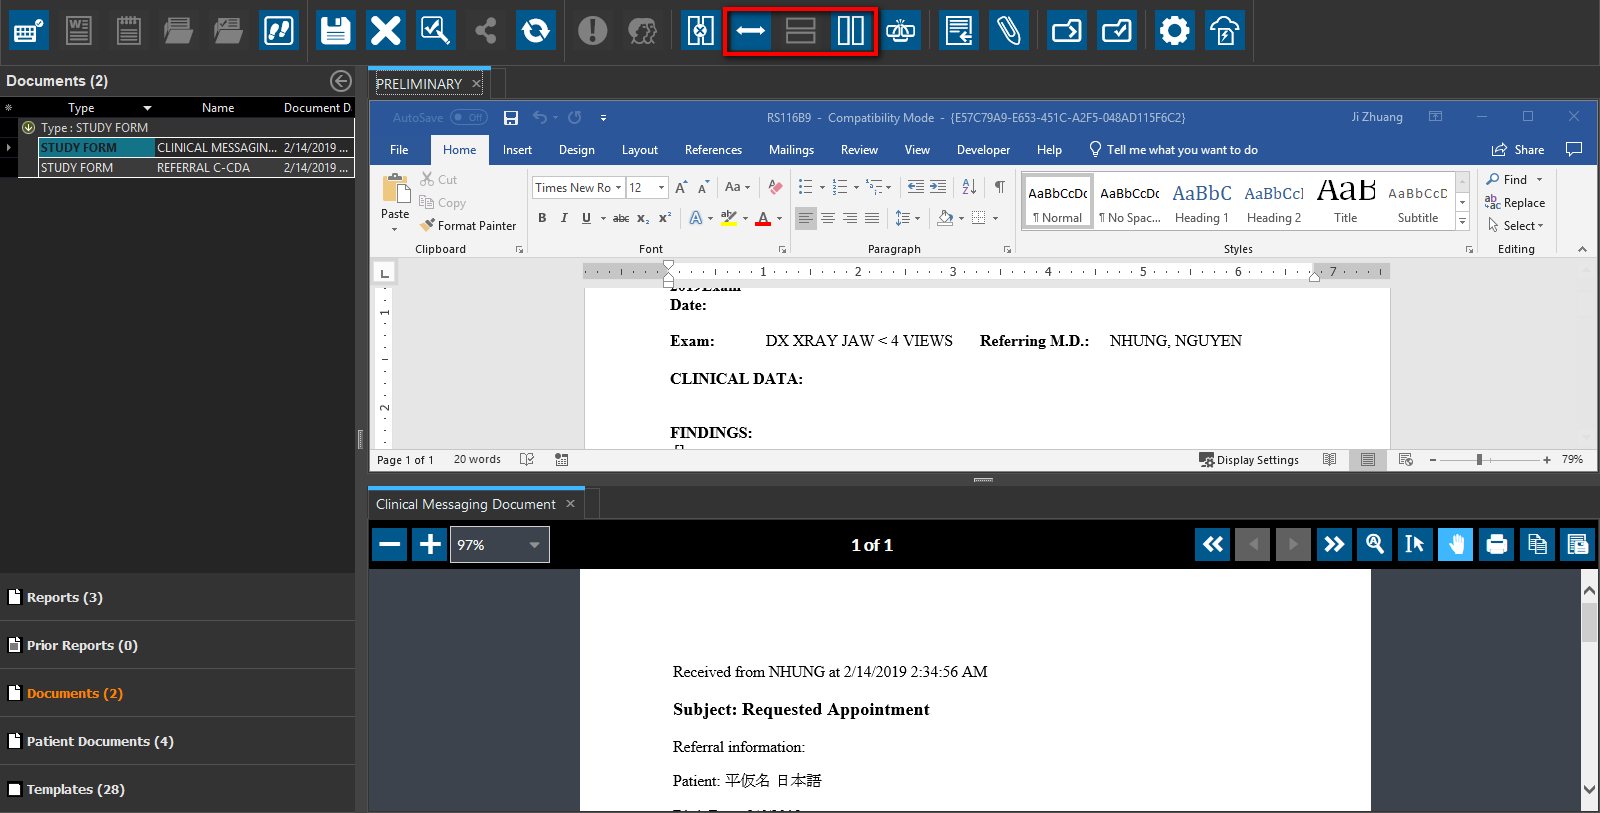
The user can revert to the vertical position by selecting Vertical Split ![]() icon.
icon.
The user can also swap the positions of Report Viewer and Document Viewer. This is done by selecting the Flip Editor Position ![]() icon.
icon.
Dragging and dropping reports in the document viewer
An existing report can be imported into the Document Viewer by dragging and dropping the report into it.
The following file types are supported by Document Viewer:
- JPG
- PNG
- GIF
- TIF
- TXT
- DOC
- BMP
- HTM
- RTF
Begin by opening the Document Viewer. The system has been designed to remember the type of report chosen by the viewer, so it will open the same type of report the next time the user decides to create a diagnostic report.
The desired report can be dragged from its folder and dropped on the document navigator. This can also be done in Microsoft Outlook.