Configure Mammography Viewing Protocols
You can customize viewing protocols for mammography studies and specify the layout in which the Mammography images are shown, as well as the presentation states to be applied on the images.
Mostly during diagnostic mammography, many doctors find that comparing between mammography views requires random reordering of the views on the screen. Hence these doctors prefer to simply click and drag views in a viewport as required and thus create a view on the fly. To allow this reordering of views, the Display Layout is available for Mammo studies. The Mammo views can only be selected in Stack mode.
To create a mammography viewing protocol, follow these steps:
-
Go to View > Viewing Protocols > Wizard. Select a name for the viewing protocol and then select MG as the Modality and Breast as Body Part for the protocol. Click Next.
-
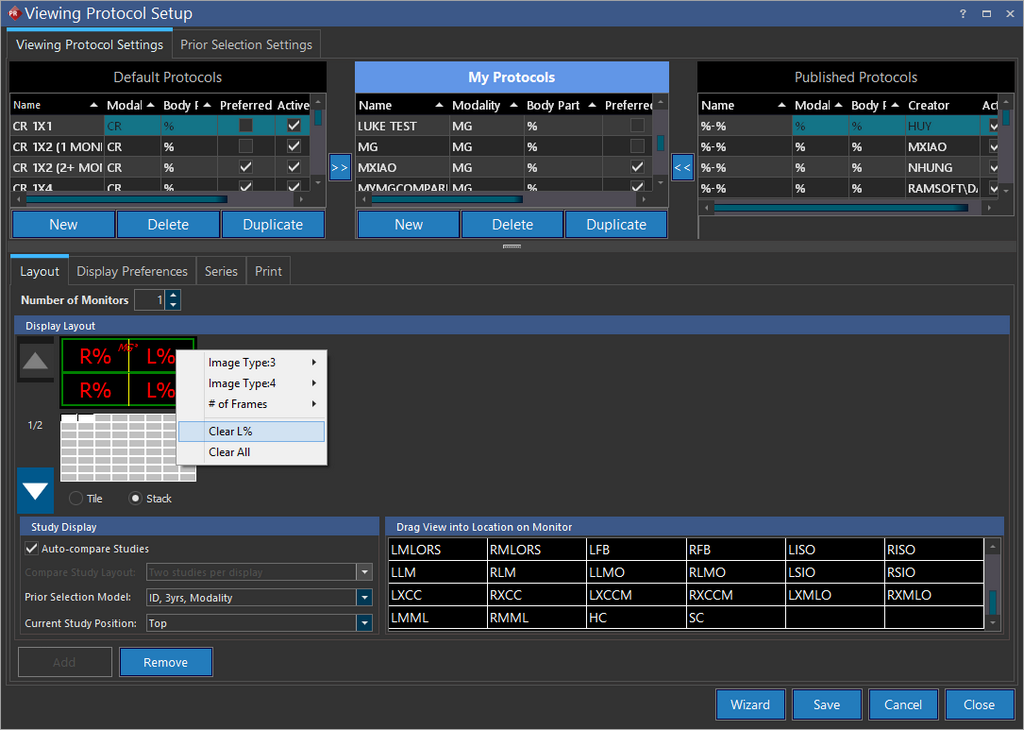
In the Monitor layout screen, choose the number of monitors. Next select the number of view boxes on the monitor. By default the Mammo views are displayed in the Stack mode.
Note: If you want to compare the current study with prior studies, choose the Compare with prior studies option. After selecting the appropriate number of studies per monitor choose a Prior Selection Model if desired (If left unspecified, a model defined in the Prior Selection Settings tab will be chosen). Choose a position for the current study (the default position is left most).
-
In the Drag Image type into Location On Monitor you will notice various Mammo views. There are two generic views of R% (Right) and L% (Left) which are used to match unknown views based on whether they are the left or the right breast. There are 58 types of view (image types) for mammogram images and they are all labeled accordingly. Drag and drop the desired Image types from the bottom right to the display layout.
Note: If you wish to clear a particular image type from the graphic, right click on the viewport graphic and choose Clear.
-
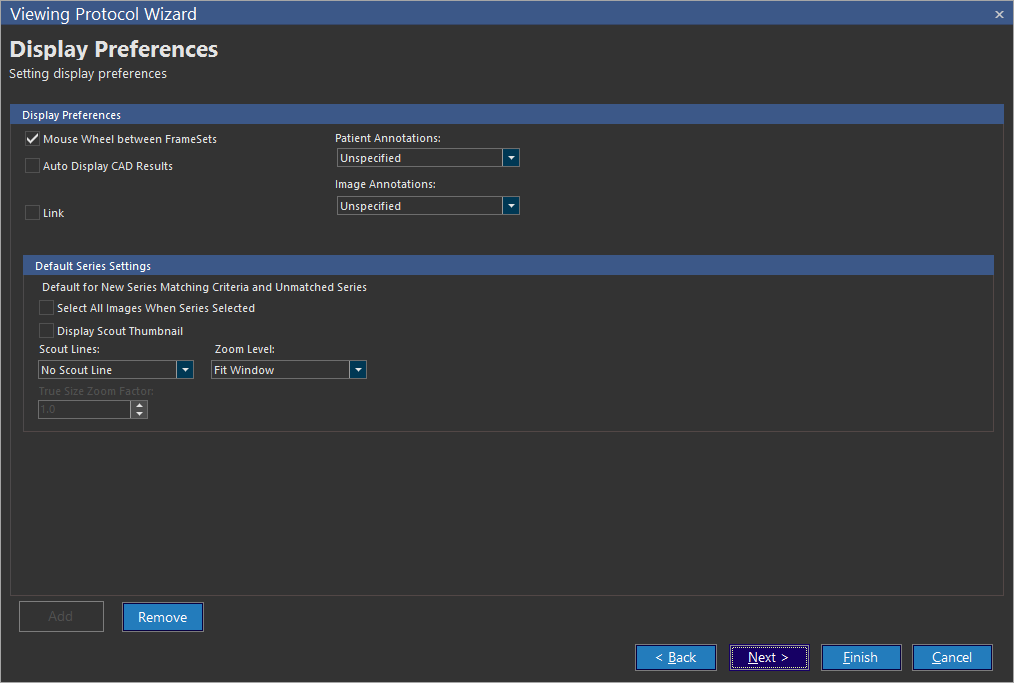
Click Next to open Display Preferences screen.
-
Select the desired Display preferences and settings.
 note
noteThe Auto Display CAD Results option will display any available CADSR tags when the Mammography is opened (if this option is disabled, you can view the CADSR tags by selecting the CADSR button from the study toolbar).
-
Save the Display Preferences. If you wish to make any further changes to the viewing protocol, click Next and complete the protocol according the instructions provided in the section How Do I Create a Viewing Protocol.
-
It is important to create/update protocols using images that contain a value for the DICOM tag ViewPosition (0018,5101). Without a value, PowerReader will display x-rays in the order they were scanned in.
Important: Note that the ImageType3, ImageType4 and # OF Frames settings do not apply to HC or SC images as these are only applicable for MG views.
Assigning Viewports for Different Image Types
Viewing Protocols can be set up for different image types. 3D Tomosysnthesis images can be identified as Multi frame images and 2D synthesized images are identified as Single Frame images by default. You can assign the number of frames for any of this image types by selecting the # of Frames option from the right-click menu on the Display Layout section.

Comparing individual images between current and prior studies
Available in PowerReader is the ability to transfer individual images in comparison mode from a current study to a prior studies or vice versa. To transfer an images from one series to another, select the drag tool and then click and drag the said image to the desired position.
It should be noted that both the series should be mammography series only (This feature is available for MG, CR, DX, RF, RG and OT modalities only). The transferred images will be visible in their new position even when the study is closed and reopened. To keep the position of the swapped images when it is reopened, the Auto-Book Mark option must be chosen and the study should not be in a Prevent Modification status. However, the original images will be reloaded when the current viewing protocol is refreshed or any other viewing protocol is applied.
For all other modalities, when the user attempts to swap images from one current series to another prior series (or vise versa), the whole viewport with all the images is transferred to the other series.
Displaying Mammogram Image Views from Left to Right
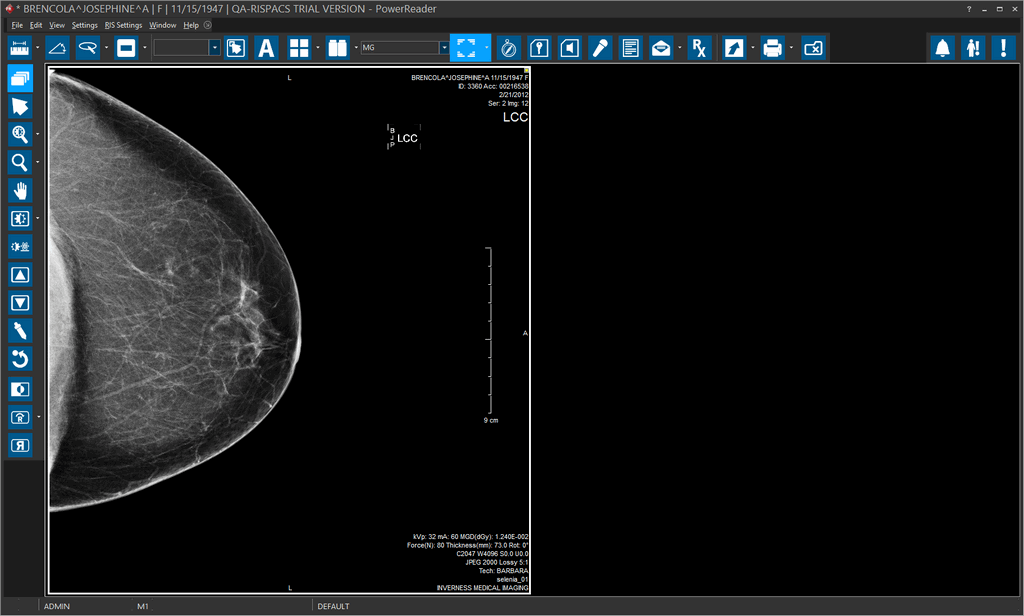
The preferred Industry standard Display Layout view for MG images is from R to L. Occasionally, users might want to view MG images in anatomical positions, i.e from L to R. When you are viewing MG images, at any point of time, you can change the MG image view by clicking the Horizontal Mirror tool ![]() icon on the Study desktop. Depending on the existing view layout, PowerReader will re-arrange the layout of the viewing protocol.
icon on the Study desktop. Depending on the existing view layout, PowerReader will re-arrange the layout of the viewing protocol.
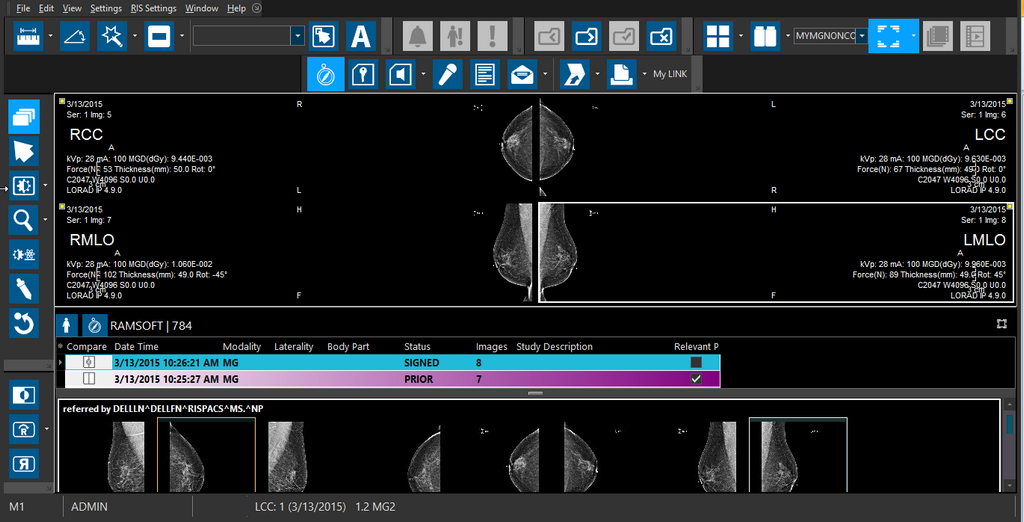
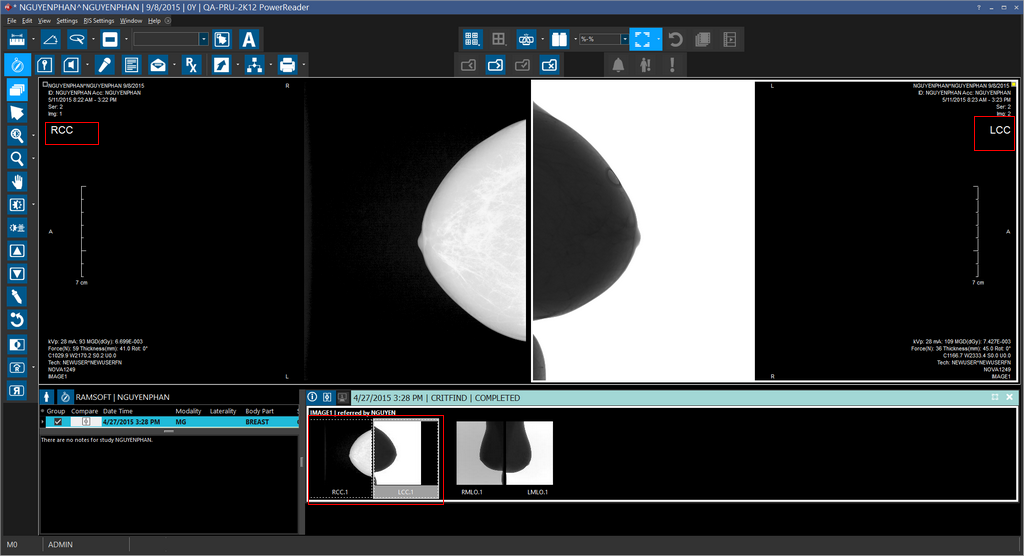
By default, when you open a MG image, you can notice that the R (Right View) images are right justified to be displayed chest wall to chest wall with the L (Left View) images.
If you wish to view the images in their anatomical positions, that is with the Left View image being displayed on the left side and vice versa, you can click on the ![]() tool icon.
tool icon.