Using the Power Worklist
The PowerWorklist is the list of studies that are currently in the facility's database. It eliminates the user's need to search for studies to work with as they are automatically available upon login.
Any study currently highlighted on the Worklist can be opened by using the Open button, or by double clicking it. This will launch the Study Desktop where the study images can be viewed.
Sorting studies in the Worklist
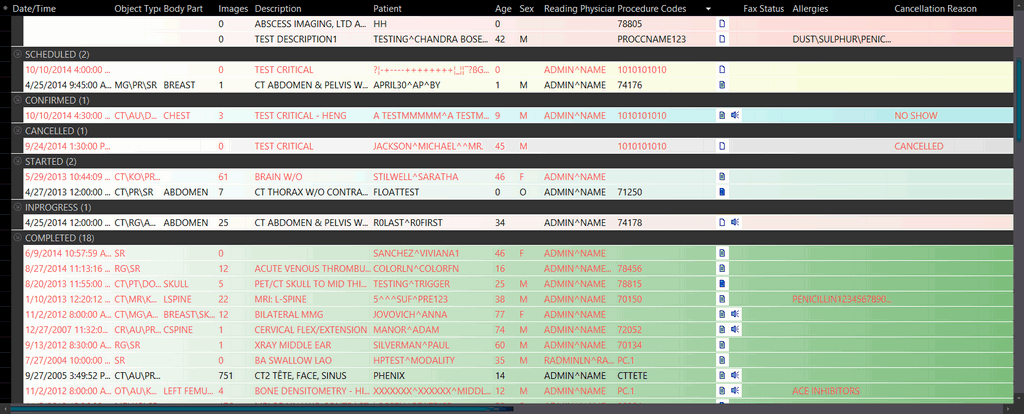
The studies displayed in the Worklist are portrayed with different colors. Each color emphasis a specific status. In addition to that, studies can also have a priority associated with them. A priority also affects the appearance of the study in the Worklist. You can choose the color and value for a priority under Settings > Server Settings > Priority. Priority Settings screen appears as shown below.

The default priorities are:
- CRITFIND
- CRITTEST
- STAT
- HIGH
- MEDIUM
- ROUTINE
The CRITFIND and CRITTEST priorities can be deleted, or their priority values can be changed as long as no studies are associated with them. The other priorities (STAT, HIGH, MEDIUM, and ROUTINE) and cannot be changed or deleted. The font color for a priority can be changed according to user preferences.
Creating a New Priority
- Click New. A new row is added at the bottom.
- Name the priority in the Priority Name text field.
- Type a value in the Priority Value text field.
- Choose a suitable color from the Font Color drop-down menu.
- Click Save.
The option Go to Next Study with Highest Priority when unchecked, allows users to go to the next study in the Worklist regardless of priority. The option is available in Settings > User Options > General Options.
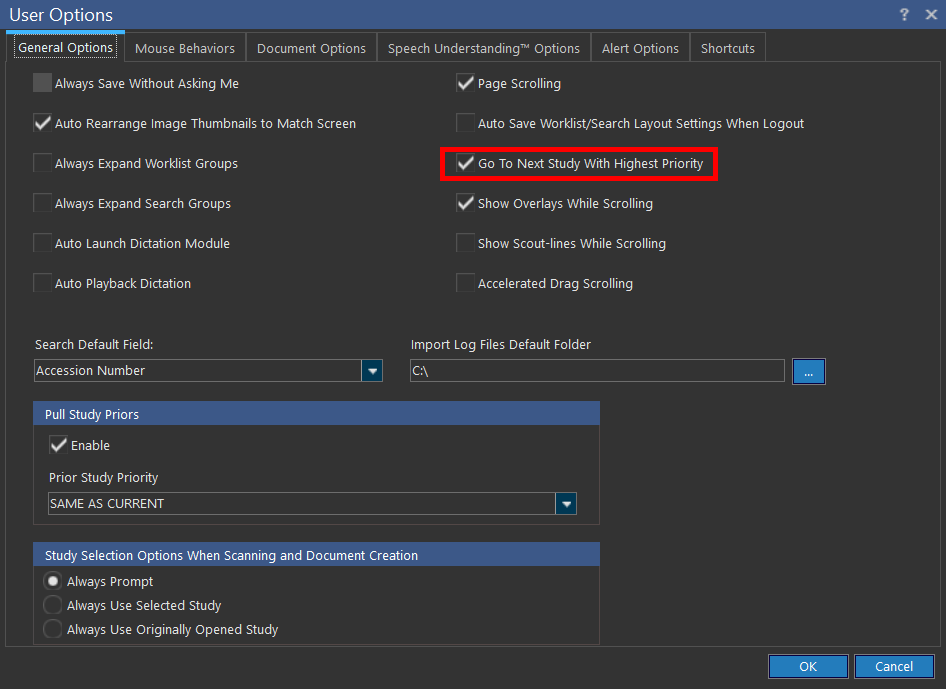
This option is enabled by default and allows the user to go to the next study in the Worklist with highest priority.
Worklist right-click menu
If the user selects a study and uses the right-click button, a menu appears, allowing the user to perform the following operations:
- Open the study
- Get study information
- Change the study status
- Assign a Performing Physician, Performing Technologist, Reading Physician, Referring Physician and Transcriptionist
- Change the priority of the study
- Open the Audit Log
- Unlink the Patient
- Export the Worklist
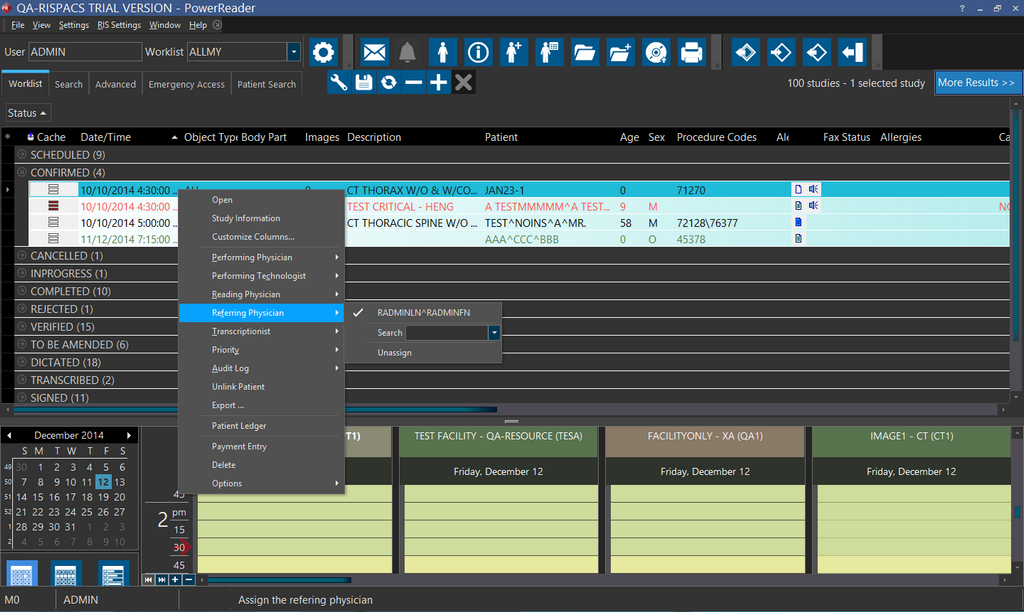
If the referring facility is already set, the list of Performing Physicians, Reading Physicians, Referring Physicians and Transcriptionist will be short listed to only that facility. If only one referring facility is associated with a particular referring physician and that physician is chosen through the right-click menu, the referring facility's name will be automatically filled out in the study info. The same rule applies for reading and other facilities.
You can assign a new physician or un-assign an existing physician. You can assign a physician by right-clicking on a study and selecting the Reading Physician or Referring Physician option and search for the desired physician using the meta search option. When you start typing in the letters of the First Name or Last Name of the desired physician, the available values matching the values entered so far are displayed along with the NPI number, address, city and state details of the matching physicians.
Note that only the first 16 characters of Address, first 16 characters of City and first 16 characters of State are displayed in the search results.

If two or more studies are selected in the Worklist, the user can perform the following actions:
- Merge Patients
- Merge Studies
- Link Patient
- Unlink Patient

Sorting the worklist columns
The location of the columns can be rearranged. To move a column, simply grab its heading and drag it to a new location. The columns around it will automatically shift over.
The width of the columns can also be altered. To do so move the mouse to the edge of the column heading you will like to modify, click and hold the left mouse button. The column divider line will appear. Drag this line to the left or right until the desired width is achieved. If a study contains more than eight different modalities or more than eight different body parts, the Worklist will display the first eight modalities or the first eight body parts.
At any point, the list can be sorted by any of the columns. To sort by a specific column, simply click on that column heading. An arrow head will appear in the column indicating that this is the column that the list is currently sorted by. The direction of the arrow indicates whether the sort is ascending or descending. Clicking the column heading a second time will reverse the order of the sort.
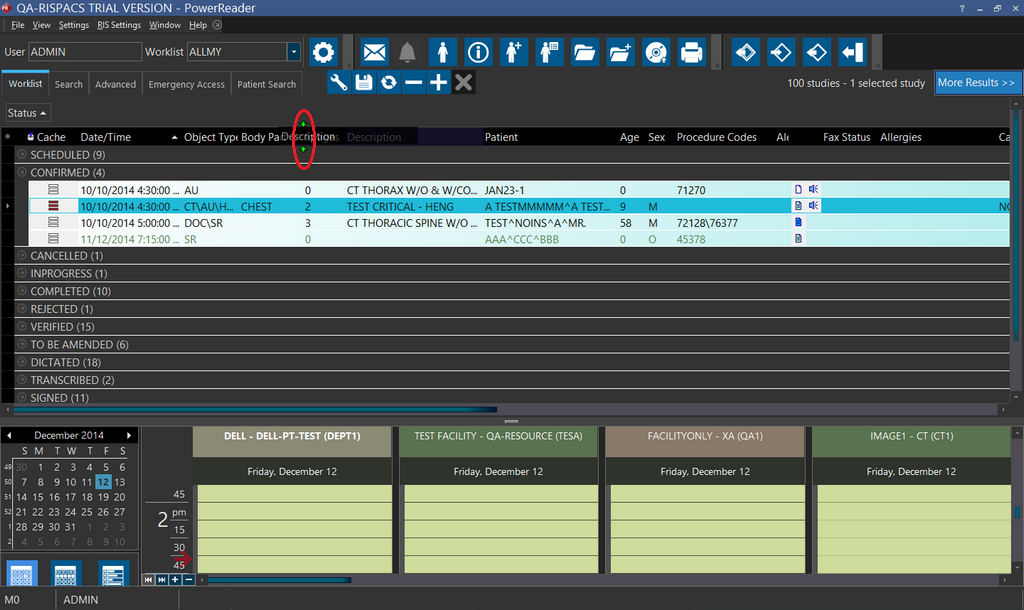
The columns being displayed can also be modified. Columns currently displayed that you do not want to use can be removed, while new columns can be added. To modify the list of columns, click the ![]() button located to the left of the column headings. This will open up the following list.
button located to the left of the column headings. This will open up the following list.
 | Placing a tick next to any of the headings, will place that column in the list. Emptying the box beside any heading, will remove that column from the list. |
The Age column will display the age of the patient at the time of the examination.
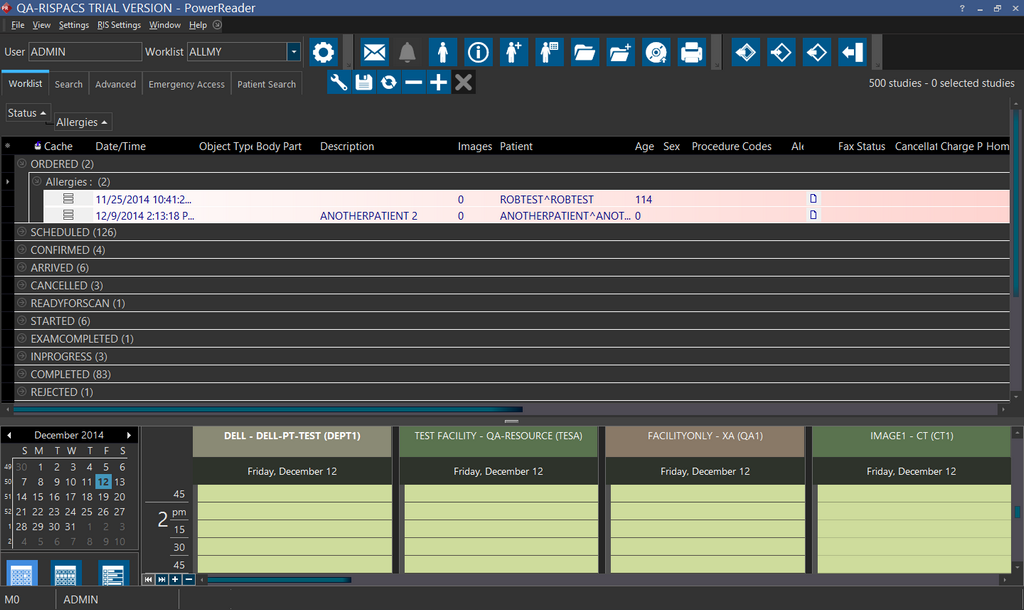
By default, the studies in the Worklist are grouped by date. Typically these are Today, Yesterday, Mon-Tue, Last Week, Last Month and Older. These groups are separated with a divider. The divider contains the name of the grouping as well as a -/+ symbol. This can be used to collapse a full group so it does not occupy space on the screen. In the very first screen shot in this section the Older grouping has been collapsed. The studies within that group are not visible on the screen, until the + sign is pressed to reopen the grouping.
All the groups may be expanded and collapsed using the ![]()
![]() Expand and Collapse Groups buttons. The criteria used for grouping studies can be modified. To do so, click the Grouping
Expand and Collapse Groups buttons. The criteria used for grouping studies can be modified. To do so, click the Grouping ![]() button. This will open the Group editing area above the study list.
button. This will open the Group editing area above the study list.
By default, the only item visible in the editor will be the Status column.
The grouping is ordered by date.
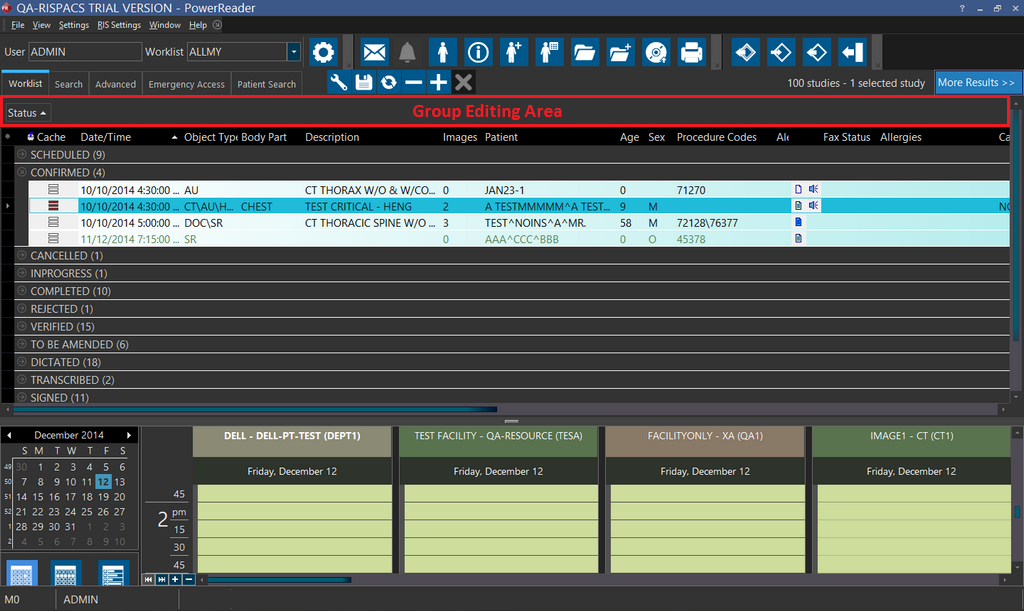
To remove the grouping, simply grab the column heading and drag it out of the Group Editing Area. To add a new grouping criterion, grab the heading of the desired column and drag it into the Group Editing Area. Dragging multiple column headings into the editor will create nested groupings. For example, in the screenshot below, the studies have been grouped by Status at the highest level, then within each status group the studies are grouped by priority.
Any grouping order can be reversed by clicking on the column heading inside the editor. Once you are satisfied with the new groupings, click the Grouping button to close the editor.
Saving the worklist settings
Once you have completed the customization of the Worklist, the modifications should be saved. That way, every time you log into the system, your Worklist will appear in this manner. To save the modifications made to the Worklist click the Save Current Settings ![]() button. The following menu will open up:
button. The following menu will open up:

The Default layout for all new Worklists is an option that allows a user to save the current layout to all the new Worklists henceforth. The *All users option allows a user to save the the Worklist for all the other users who have the same role as the current user. For example, if a transcriptionist changes and saves the layout, it will be saved for all other transcriptionists who will view this Worklist. The Myself only option will save the changes for this particular user only.
If you have shuffled the appearance of the Worklist around and now want to get back to your default settings, you should right click on the Worklist and scroll down to Options and click on Reload/Restore Worklist Columns. The application will restore the Worklist as per the default settings.
Even though studies appear on the Worklist when they are ready to be viewed by the current user, the Worklist may take up to a couple of minutes to update. If you are expecting a study to come at any time and want to view it right away, the Refresh button ![]() can be used to reload the Worklist.
can be used to reload the Worklist.
If you will like to retrieve the next set of records which are currently not visible, you can press the Retrieve next set of records ![]() button. This will retrieve the next set of records.
button. This will retrieve the next set of records.
If you will like to change the overall size of the Worklist, it can be resized by grabbing and dragging its edges. Once the Worklist window is the desired size and in the desired location, this information can be saved as the default. This is performed by clicking Window > Save Main Window Position.
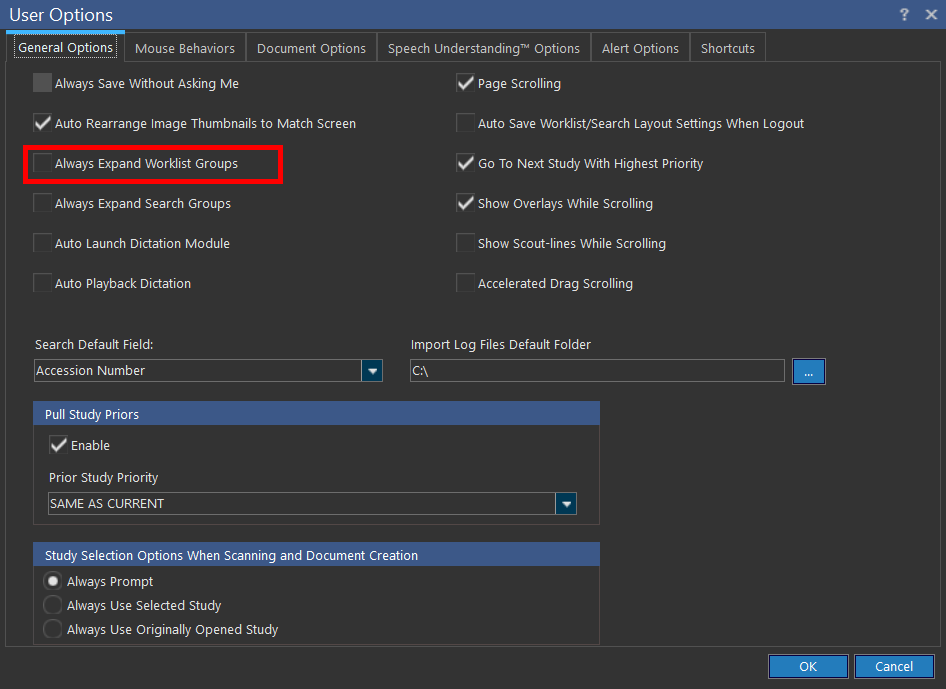
To prevent the nodes from collapsing in the Worklist, go to Settings > User Options and check Always Expand Worklist Groups option.
If the option is unchecked, whichever state the groups are in (expanded or collapsed) will be saved by PowerServer. The next time the user logs in into PowerServer, the groups will be displayed in the same manner as before (collapsed or expanded).
The option Auto Save Worklist/Search Layout Settings When Logout saves any changes in the display settings of the Worklist or Search screen when the user logs out of the PowerReader. This option is unchecked by default.