Printing Letters
You can print letters for communication and follow-ups with Patients and Doctors using Stana Web.
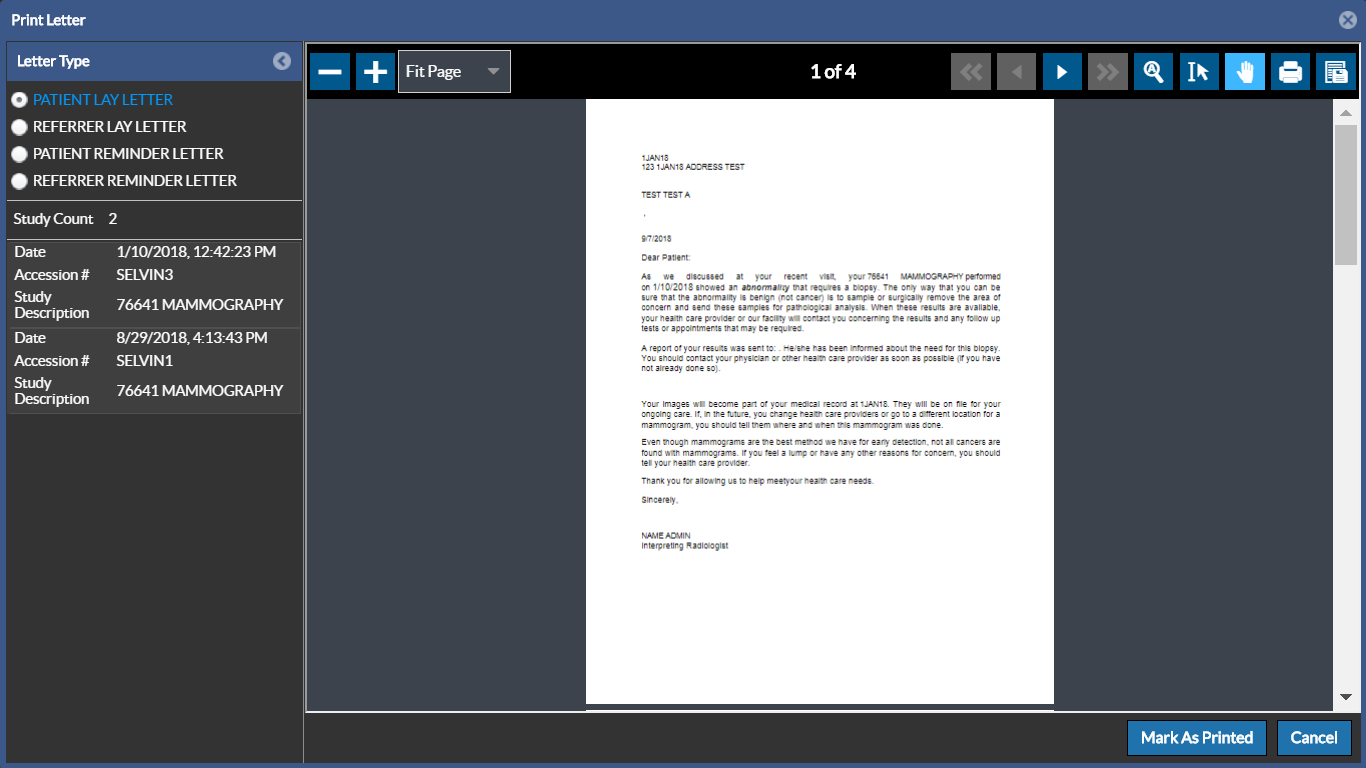
There are four letter types available for printing:
- Patient Letter
- Referring Doctor Letter
- Patient Reminder Letter
- Referring Doctor Reminder Letter
Based on the examination outcome and the status of the study, you will be able to print out a pre-drafted letter to communicate to a patient or a doctor informing them of the findings of a Study or reminding them of a pending followup exam.
Selecting a Letter Type and Printing a Letter
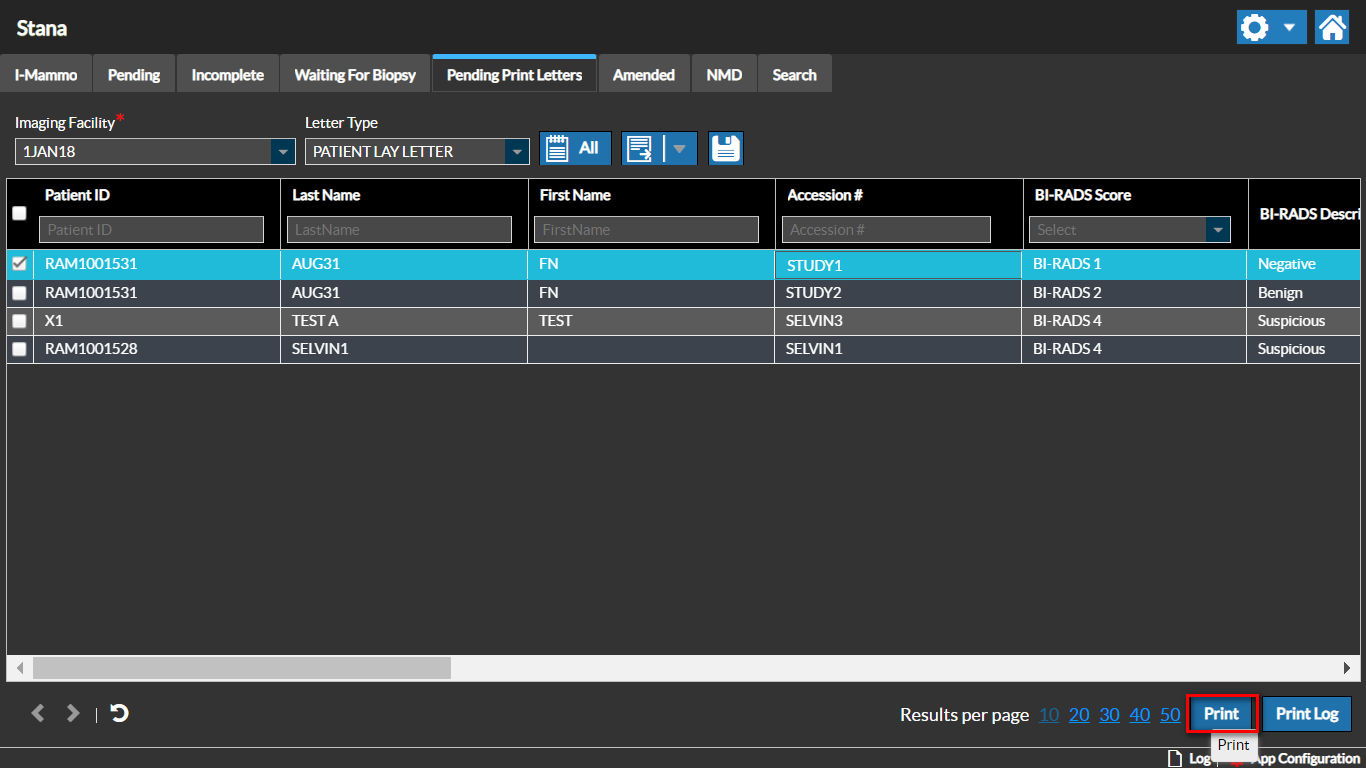
You can print letters either from the Pending Followups or Pending Print Letters screen depending on the Worklist you are currently using.
To print a letter, perform the following steps:
- Select a Study and click the Print button. Note that the Print and Print Log buttons are only visible when you select a study. For more information on Print Log, refer to the topic Tracking Pending Print Letters.
The Study Reports / Letters screen displays the letter in Report Content viewer for the selected Letter Type. Different Letter Types from the list of Letter Types available can be selected for printing.
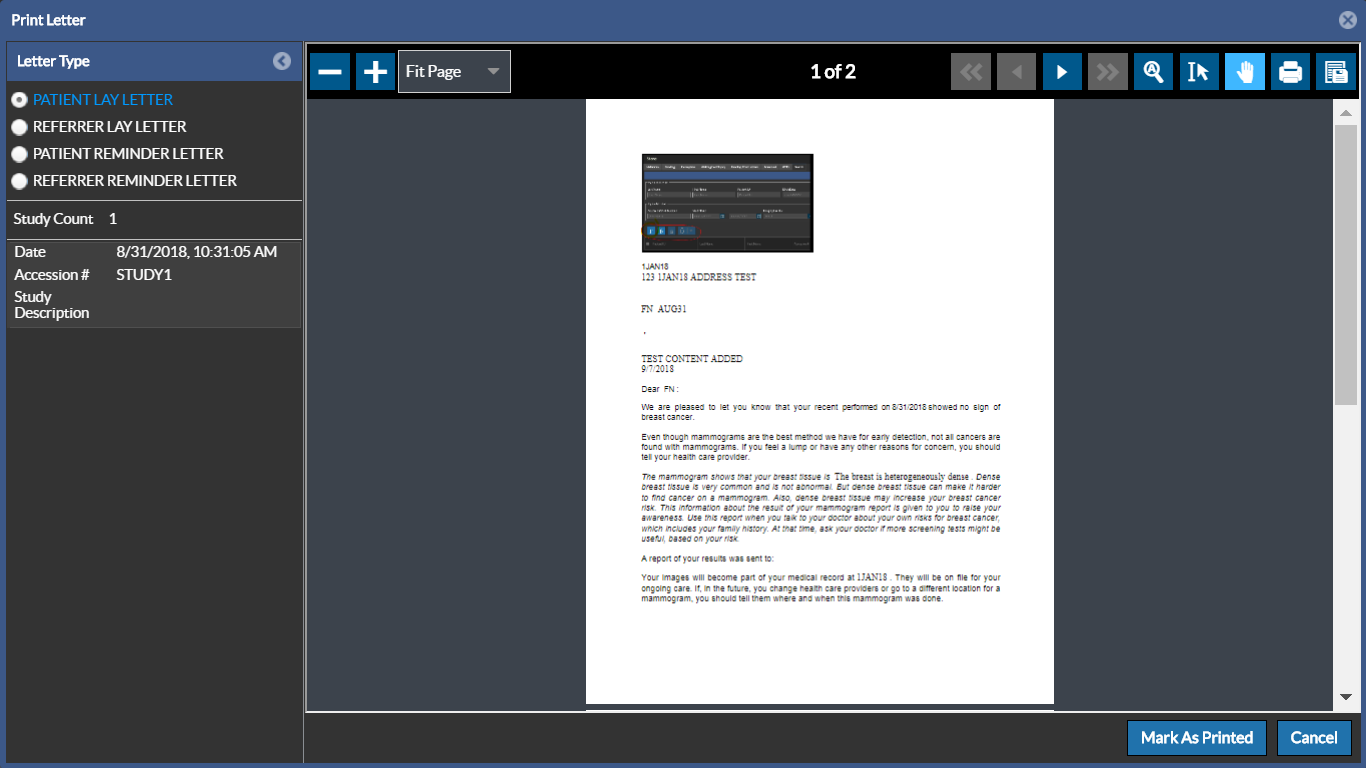
The Report Content window typically is a PDF viewer. On the left hand side of the window, the pages of the letter are displayed as thumbnails. You can click directly on a thumbnail image to view the content of that specific page.
The following tools are available on the Report Content Toolbar:
| Fields | Description |
|---|---|
| Find in Document : Find information in the document. Enter your search term to find an instance of the term you are searching for. Select Highlight all to find each instance of the search term. Match Case highlights the content in the letter if the case matches with that of the search text. | |
| Previous Page: Navigates to the previous page | |
| Next Page: Navigates to the next page | |
| The current page being focused | |
| Zoom Out: decreases the magnification one level down | |
| Zoom In: Increases the magnification one level up | |
 | Zoom : You can use the Zoom menu to set the Zoom level to a pre defined zoom setting. By default the letter opens in"Fit Page" zoom level so that the document is shown one page at a time. The "Fit Width" option re-sizes the document to fit the width of the Report Content viewer.You can use the Automatic Zoom which sets the Zoom level based on the size of the document. You can also set the zoom level to a zoom level % as per your convenience in order to make the page easier to read. |
| Print: Initiates the printing process | |
| Download PDF document: Saves the letter( in PDF format) into your local drive |
Tools: The following tools are available to manipulate the document:
| Fields | Description |
|---|---|
| Go to First Page : Selecting this option when you are on any page, shows the first page of the document | |
| Go to Last Page : Selecting this option when you are on any page shows the last page of the document | |
| Select Text: Lets you select any text by highlighting the desired text | |
| Pan: Progressively displays adjacent areas of the document. By default, the Pan tool is enabled. |
-
Select the relevant Letter Type. You can see that the Report Content window displays the letter in a PDF format.
These letters are pre-defined and are drafted based on the templates defined for your facility and the Category of the outcome reported.
a. Patient Letter: informs the patient on the findings of the recent exam and requests the patient to contact the Imaging facility if additional studies need to be performed.
b. Referring Lay Letter: letter that is sent to the Referring Doctors to inform them on the findings and recommendations for the selected Study.
c. Patient Reminder Letter: can be used to send a reminder to the patient based on the follow-up interval suggested for the Study.
d. Referring Reminder Letter: can be used to inform the Referring Doctor about a follow up exam for the patient they referred.
-
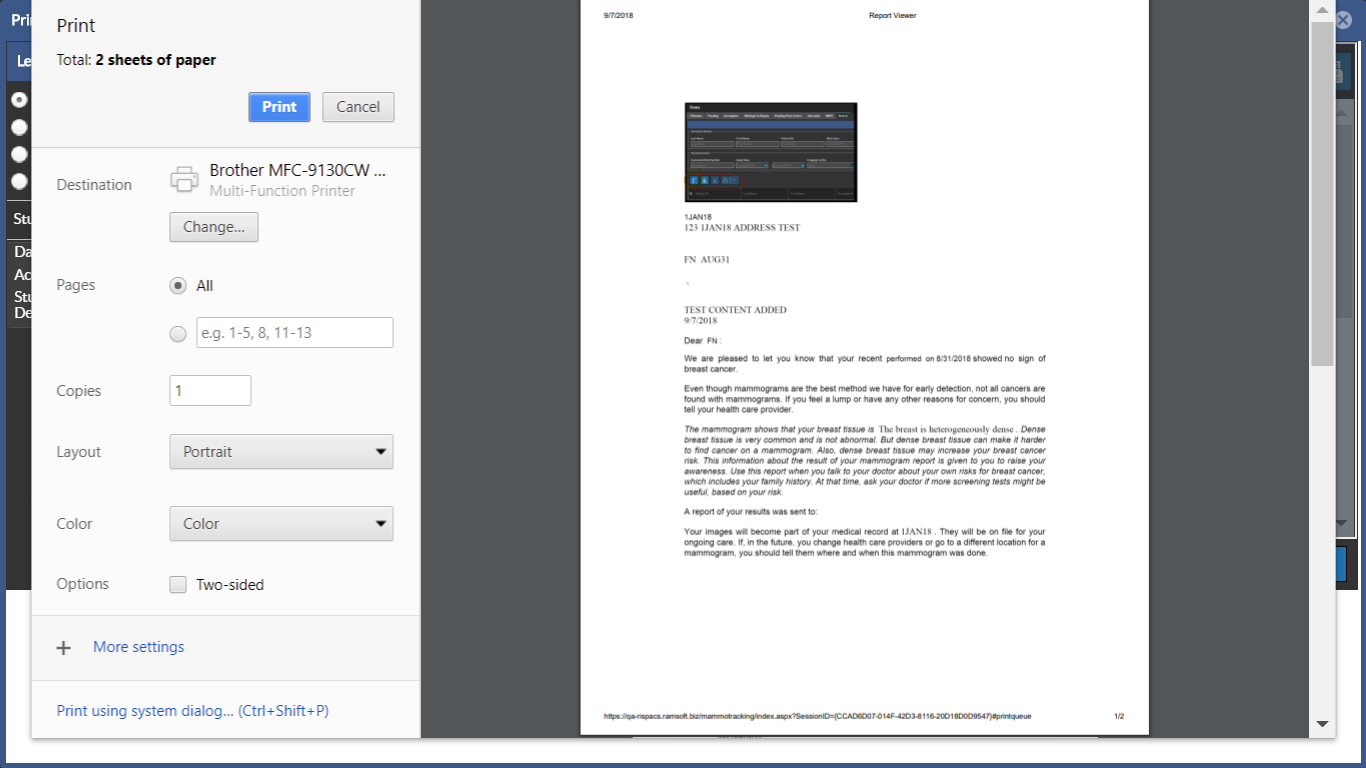
Click the Print icon on the toolbar to print the letter. The Printing process is initiated and the Print dialog box appears. Click Print to confirm printing.
The Letter is printed.
-
Once the letter is printed, Click on the Mark As Printed button to mark the letter as printed. The message "Saved Successfully" is displayed. Marking a letter as printed helps to comply with audit requirements to track the print usage.

Once you mark a letter as printed, the Printed Date and Printed By information is updated. It will no longer be in the Pending Print Letters Worklist for the specific Letter Type.
For printing, by default, the paper size is US Letter (8.5 x 11 inches). If desired, set the default paper size by selecting the Configuration entries, Default Paper Size Width (inches) and Default Paper Size Height (inches) in Settings > System Configuration in PowerReader. By default, the values are 8.5 and 11. The following paper sizes can be set up:
| Paper Size |
|---|
| Letter (8.5 x11 inches) |
| Legal (8.5 x 14 inches) |
| Executive (7 x 10 inches) |
| A4 (8.27 x 11.69 inches) |
| A5 (5.83 x 8.27 inches) |
| B5 (6.9 x 9.8 inches) |
Note: Changing the Default Paper Size configuration entries will require you to recycle the PowerReaderAppPool to reflect the changes.
Selecting Multiple Studies for Printing
You can select multiple studies letters for printing at once. This is similar to printing a single study, except that the studies are displayed in the Report viewer in the same order of selection.
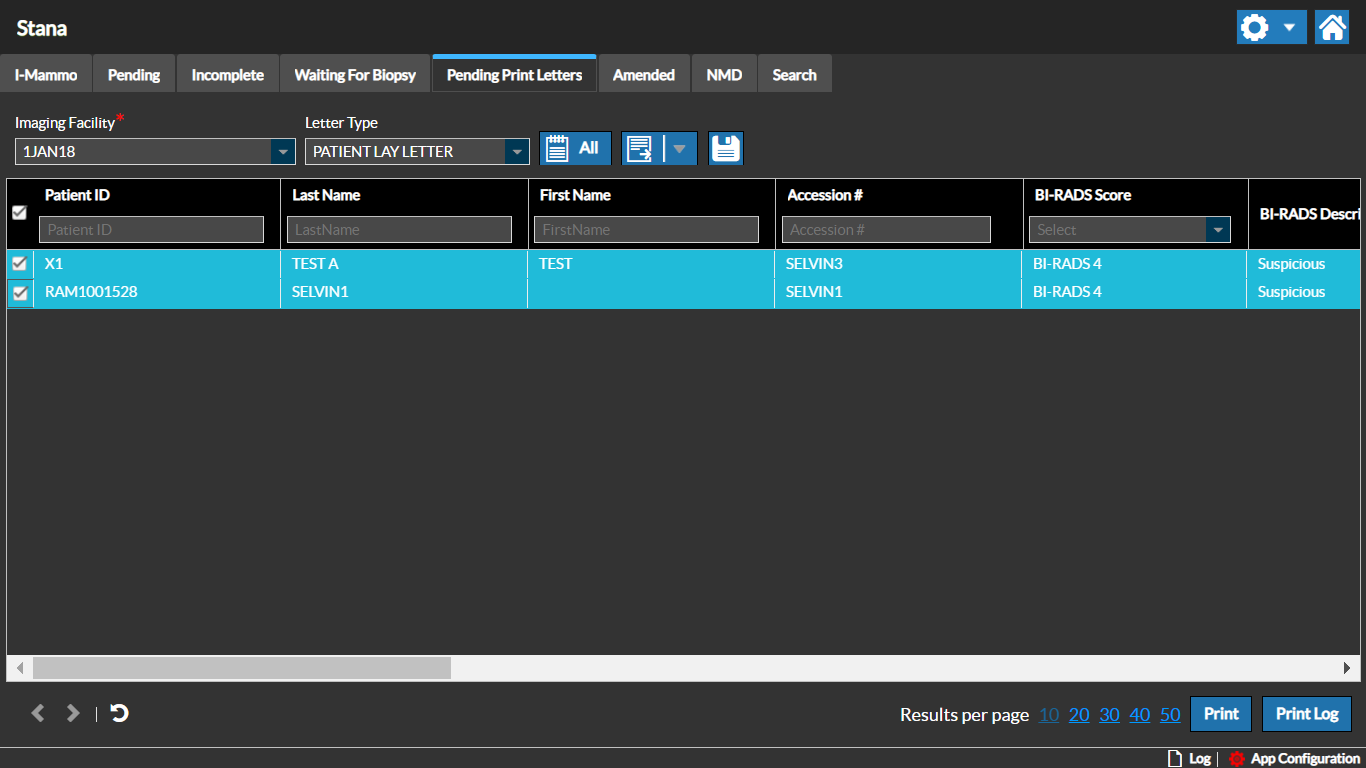
You can see that letters for both studies are displayed in the Report Content viewer based on the selected Letter Type.
RELATED TOPICS: