Reconciling Clinical Information
Clinical Information Reconciliation refers to the process of identifying the most accurate list of medications that the patient is taking by comparing the current medical records to an external list of medications obtained from a patient, provider or imported from a CCDA document.
RamSoft PowerServer enables the creation of a single reconciled list of medications, allergies or problems. The accuracy of a final set of date can be validated to create a reconciled list.
Reconciling Medications and Allergies
In RamSoft PowerServer, medications and allergies reconciliation can be performed whenever a CCDA document is in the Inbox.
To reconcile medications and allergies, perform the following:
-
Select the patient for whom you want to reconcile this data and click the Patient Info
 icon.
The Patient Info screen appears.
icon.
The Patient Info screen appears. -
Click the Health Information tab.
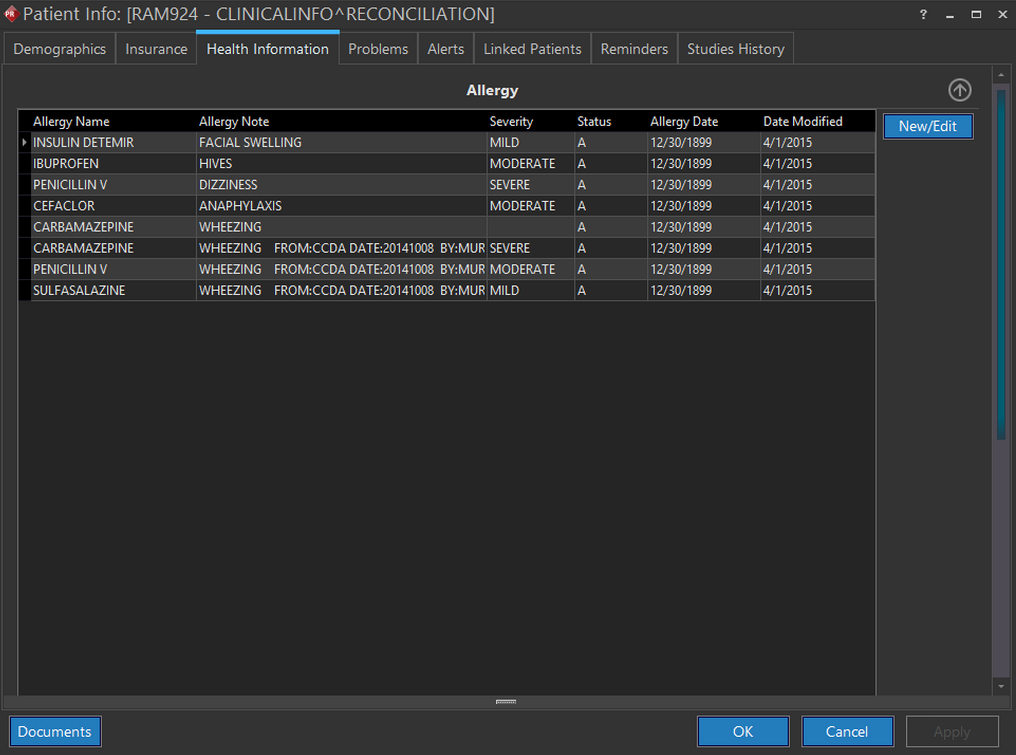
The Allergy section is displayed.
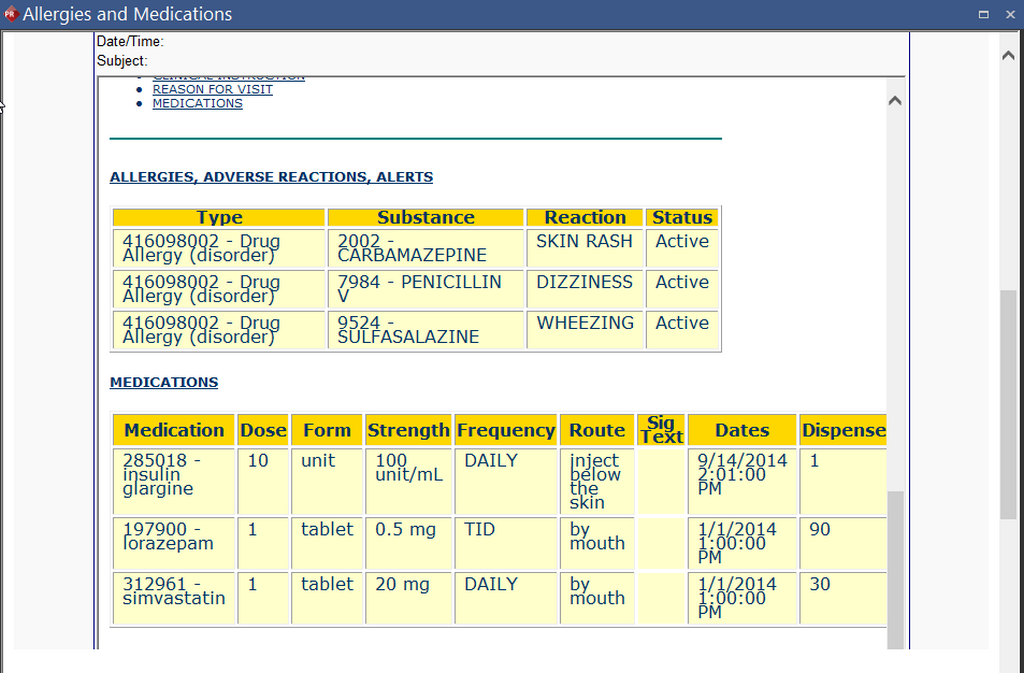
- Click the New/Edit button. The Allergies and Medications screen is displayed. By default, the Med Entry tab is open.
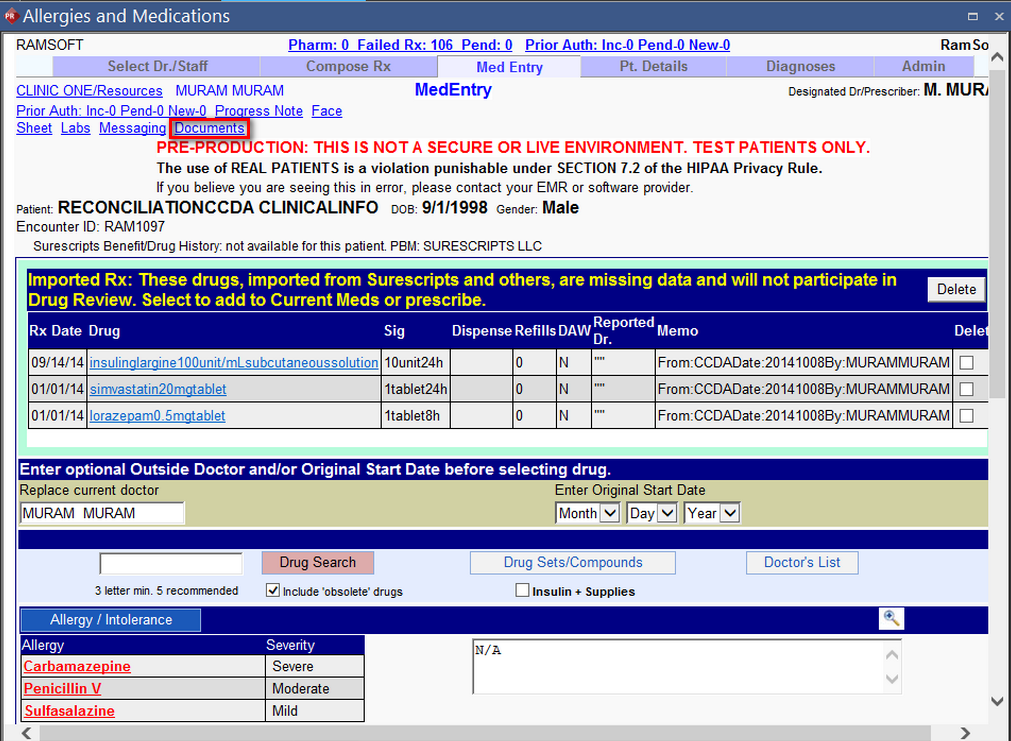
Note that there are existing medications and allergies for the patient.
- Click the Documents link on the MedEntry page. The Imported Documents section under the Admin tab appears.
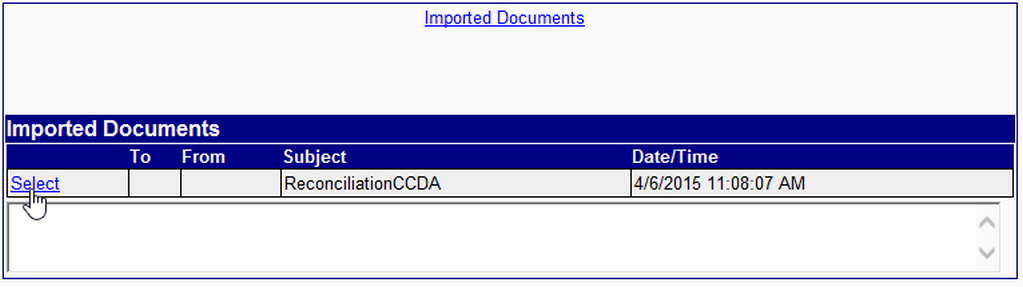
- Click the Select link to open the CCDA document to be imported. The CCDA document listis the medications and allergies to be imported.
- Click the Import Meds, Allergies and Problem List button.
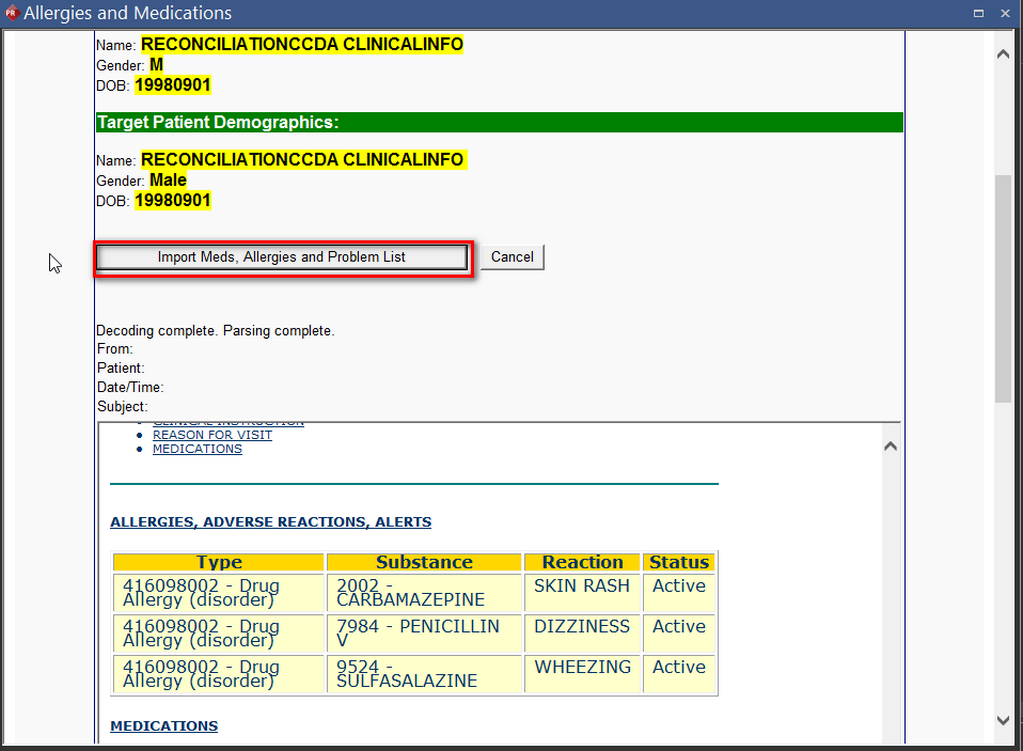
The Med Reconciliation page under the Admin tab is displayed. The current medications and current allergies along with the imported medications and allergies are listed on the left hand side.
- Select the list of medications and allergies and create a final Reconciled list by clicking the
 button.
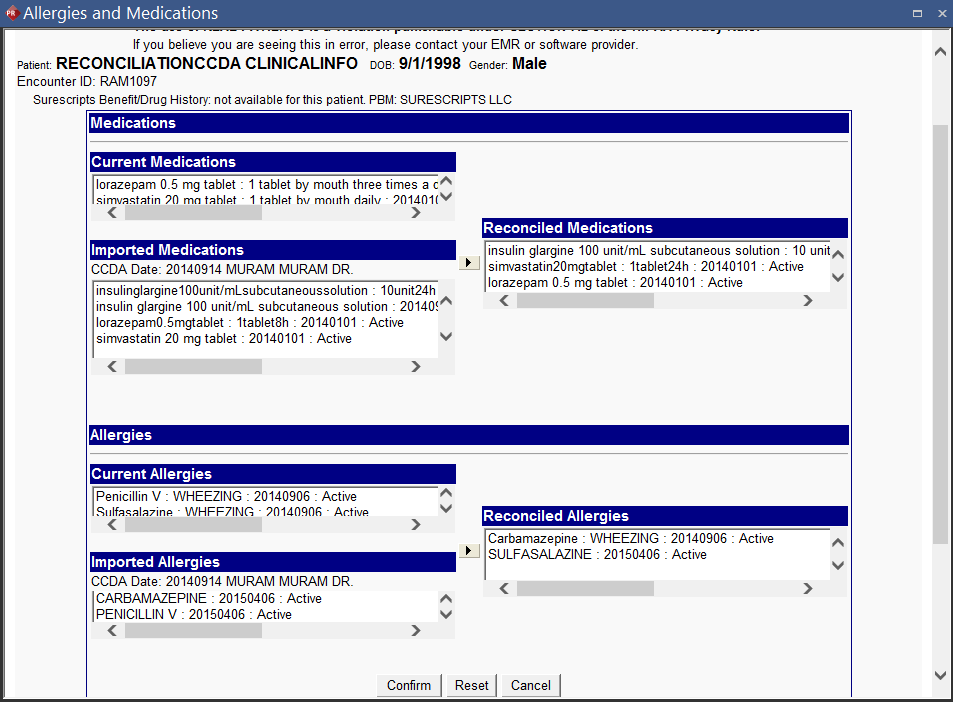
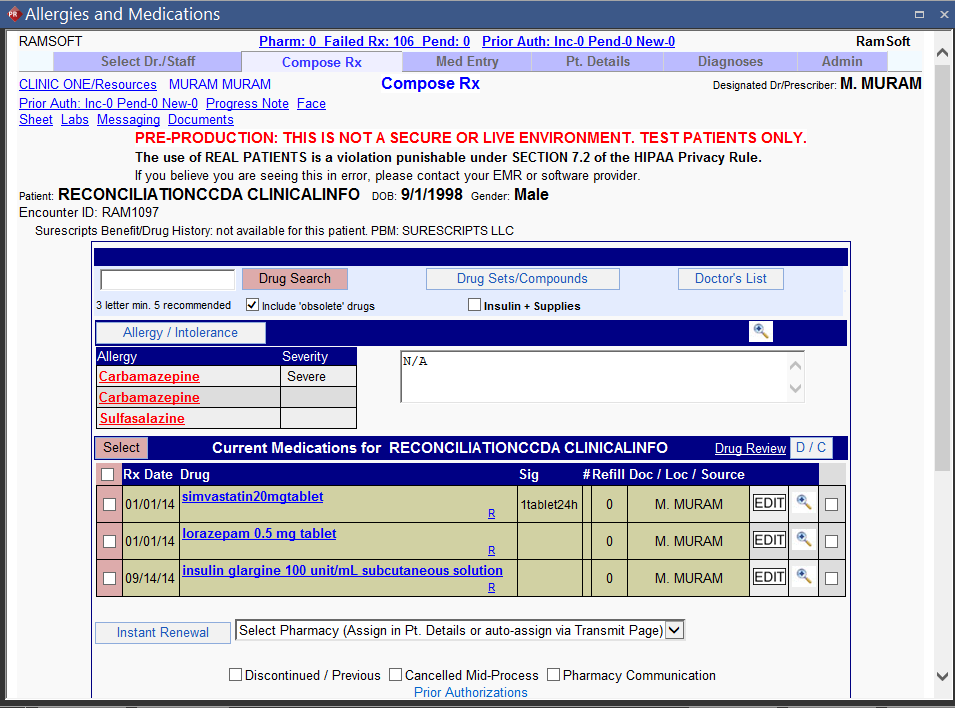
- Click the Confirm button. The Compose Rx tab displays the Reconciled list of medications and allergies.
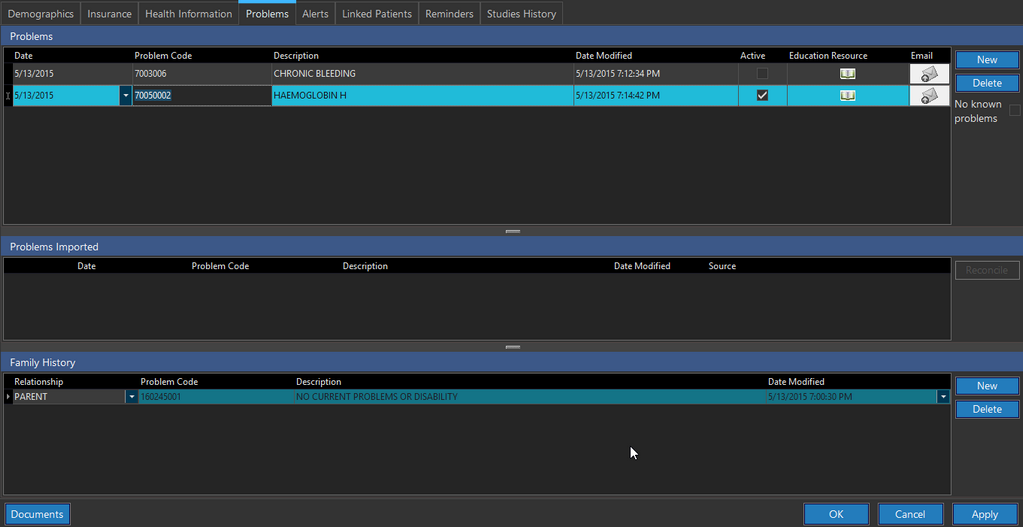
Reconciling Problems
In RamSoft PowerServer, Problems reconciliation can be performed when a CCDA document is received.
To reconcile Problems, perform the following:
-
Select the patient to be reconciled and click the Patient Info
icon. -
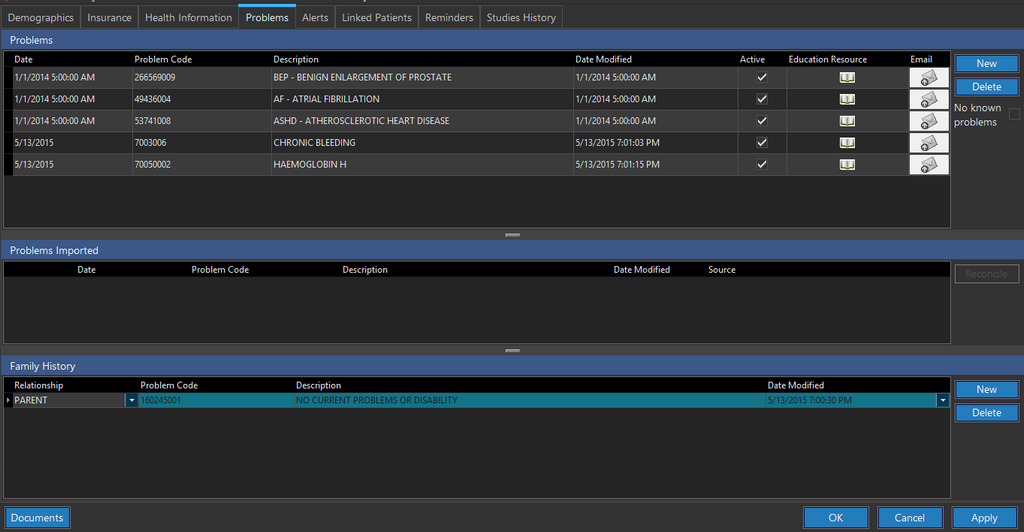
Click the Problems tab.
-
Click OK.
-
Select the patient and click the Messaging icon
 .
.
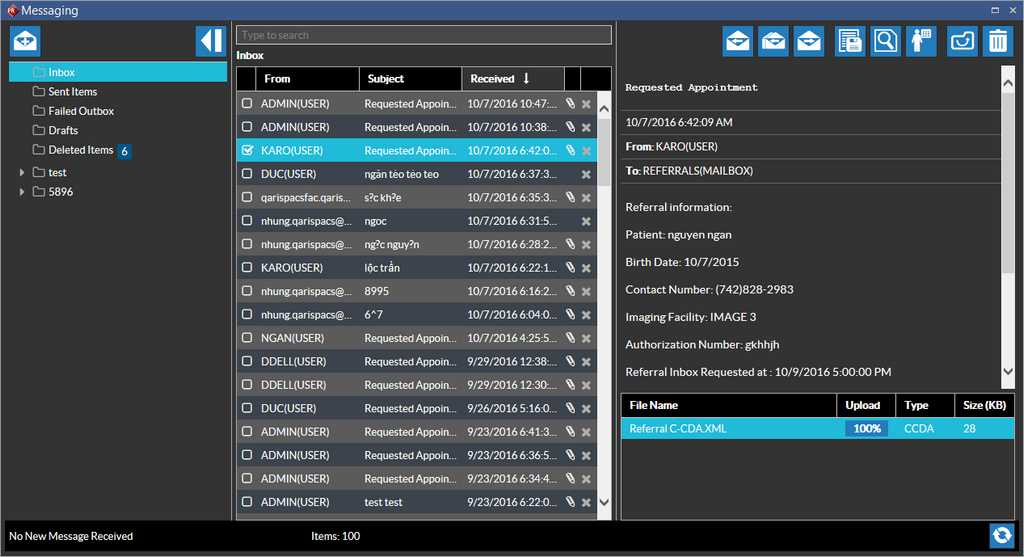
- Select the CCDA document and click the Convert CCDA to Appointment icon.
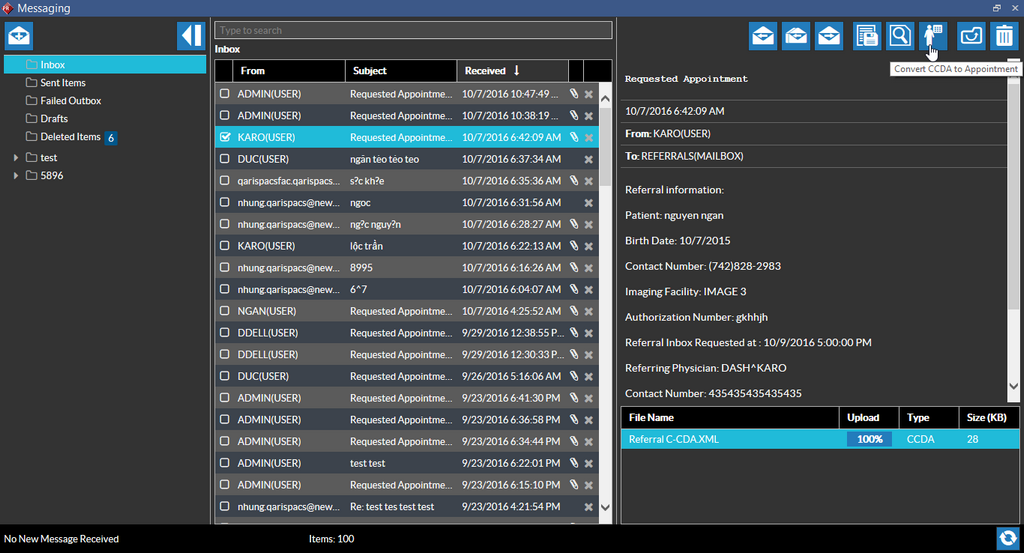
Note: The "Convert CCDA to Appointment" icon will not be displayed if the 'Schedule Appointments' privilege is turned off for the user.
- In the Select Patient form, enter the Patient name and Issuer of Patient ID information for the patient's profile to import the CCDA document.

- Click the Import button.

-
Click OK and close the screen.
-
Upon opening the Patient Info screen and clicking the Problems tab, the imported Problems are listed under the Problems Imported section.
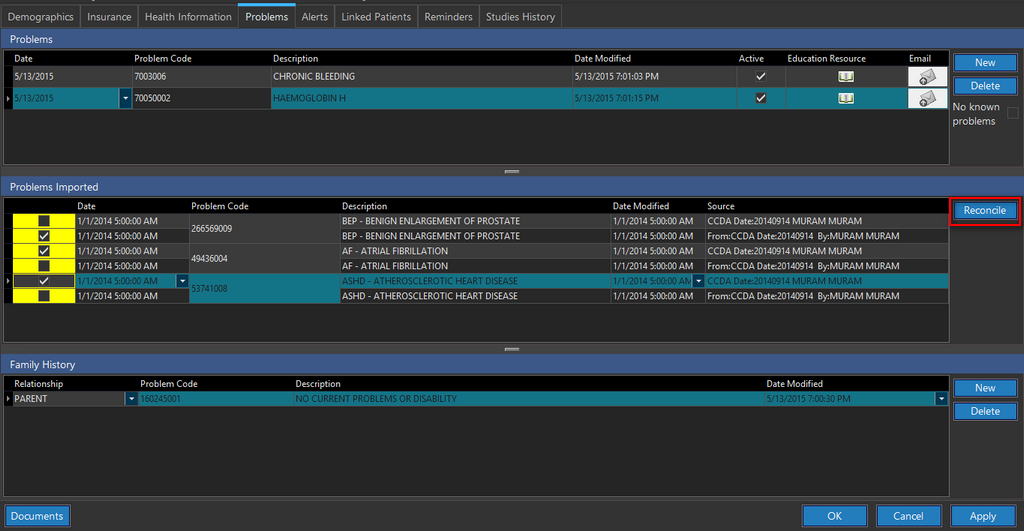
- Select the relevant Problems to be imported to the current Problems list and click the Reconcile button.

- Click Yes to confirm. The reconciled Problems are listed under the Problems section.