Mouse Presets
Often, Radiologists and Technicians prefer mouse options to have the same behavior as that of other commonly available image reading softwares. PowerReader 6.0 provides the user with a list of major PACS vendors and their mouse behavior definitions from which the user can select the preset as the user is used to. These mouse presets are defined by users with administrative privileges through Settings > Server Settings > Mouse Preset. Once the presets have been defined by the admin, they can be chosen by the user from the Settings > User Options > Mouse Behaviors tab as a Default Mouse Preset. For further information on how to choose a Default Mouse Preset please refer to the section Mouse Settings.
RamSoft PowerReader 6.0 provides the following Default Mouse Presets: RamSoft, Fuji, Merge eFilm, GE Centricity and any other New Presets created by the admin user. To define and create a Mouse Preset, click on the option Settings > Server Settings > Mouse Preset. Once the Mouse Preset Configuration forms opens up, you will notice that the RamSoft preset is chosen as default.
The Mouse Preset dropdown options include:
- Dropdown Menu (access the dropdown menu)
- Lock Image Viewer (locks image viewer from manipulations)
- Maximize/Restore (maximizes or restores the window)
- Next Frameset (displays the next frameset)
- Next Viewing Protocol (displays the next viewing protocol)
- Scroll (mimics the Scroll tool)
- Select (mimics the Select tool)
Note: If a Study is open when changing the Left Drag Mouse Preset, the new behaviour will not take effect until the study is closed and re-opened:
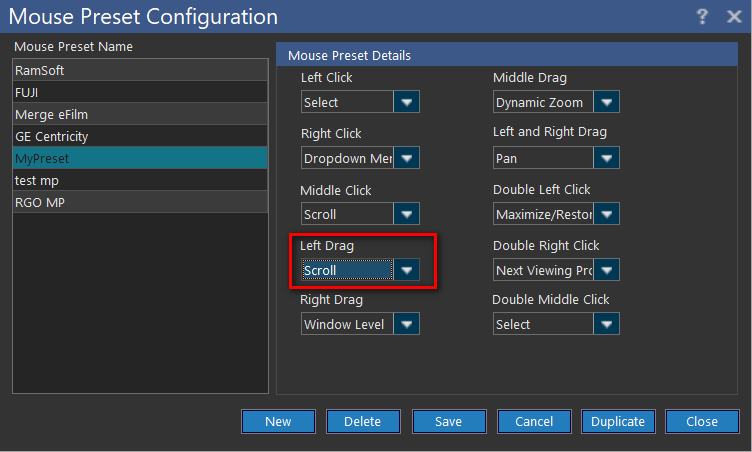
RamSoft Mouse Preset
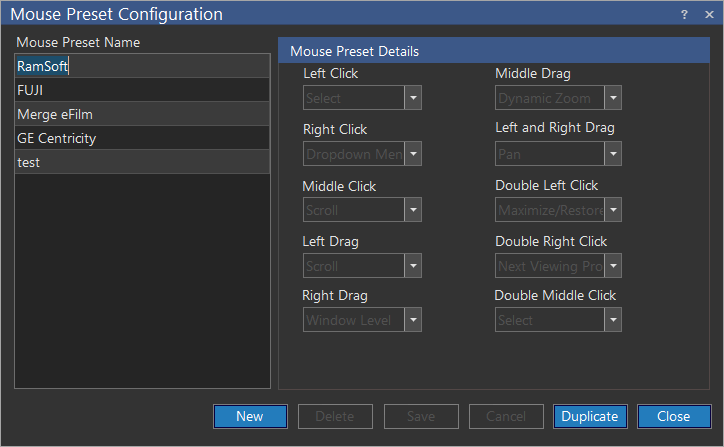
The RamSoft mouse presets are setup in the following way:
- Mouse left button Click: Select
- Mouse right button Click: drop-down Menu
- Scroll wheel click: Image Scrolling
- Mouse left button click and drag: Image Scrolling
- Mouse right mouse button click and drag: Window/level tool
- Scroll wheel click and drag: Dynamic Zoom tool
- Simultaneous left and right button click and drag: Pan
- Mouse left button double click: Maximize image/Restore image to original size
- Mouse right button double click: Next Viewing Protocol
- Scroll wheel double click: Select
Fuji Mouse Preset
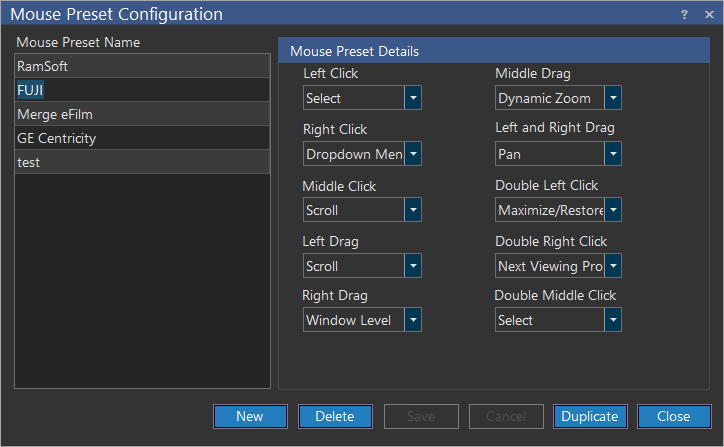
The Fuji mouse presets are setup in the following way:
- Mouse left button click: Select
- Mouse right button click: Drop-down menu
- Scroll wheel click: Image scrolling
- Mouse left button click and drag: Image scrolling
- Mouse right button click and drag: Window/level tool
- Scroll wheel click and drag: Dynamic Zoom tool
- Simultaneous left and right Mouse Button Click and Drag: Pan
- Mouse left button double click: Maximize image / Restore image to original size
- Mouse right button double click: Next Viewing Protocol
- Scroll wheel double click: Select
All the above presets are customizable.
Merge eFilm mouse preset
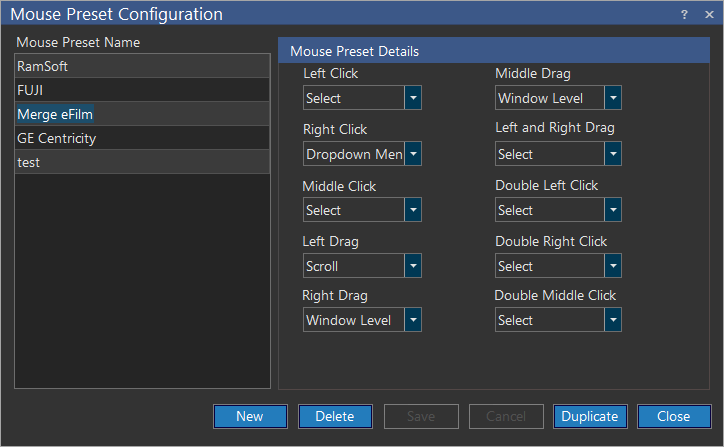
The Merge eFilm presets are setup in the following way:
- Mouse left button click: Select
- Mouse right button click: Drop-down menu
- Scroll wheel click: Image scrolling
- Mouse left button click and drag: Image scrolling
- Mouse right button click and drag: Window/level tool
- Scroll wheel click and drag: Dynamic Zoom tool
- Simultaneous left and right Mouse Button Click and Drag: Pan
- Mouse left button double click: Maximize image / Restore image to original size
- Mouse right button double click: Next Viewing Protocol
- Scroll wheel double click: Select
All the above presets are customizable.
GE Centricity mouse preset
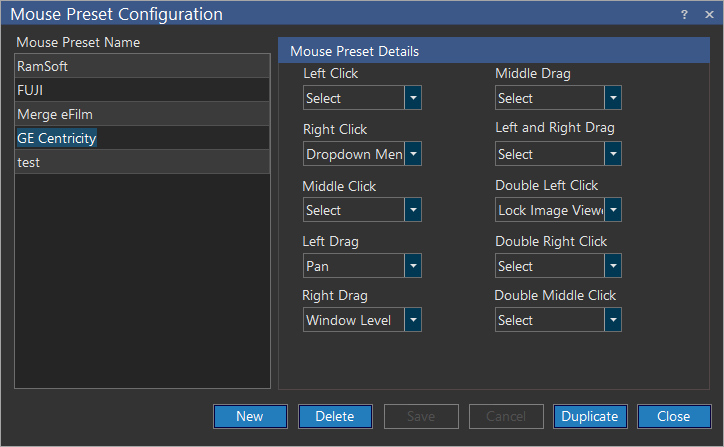
The GE Centricity presets are setup in the following way:
- Mouse left button click: Select
- Mouse right button click: Drop-down menu
- Scroll wheel click: Image scrolling
- Mouse left button click and drag: Image scrolling
- Mouse right button click and drag: Window/level tool
- Scroll wheel click and drag: Dynamic Zoom tool
- Simultaneous left and right Mouse Button Click and Drag: Pan
- Mouse left button double click: Maximize image / Restore image to original size
- Mouse right button double click: Next Viewing Protocol
- Scroll wheel double click: Select
All the above presets are customizable.
Creating custom mouse presets
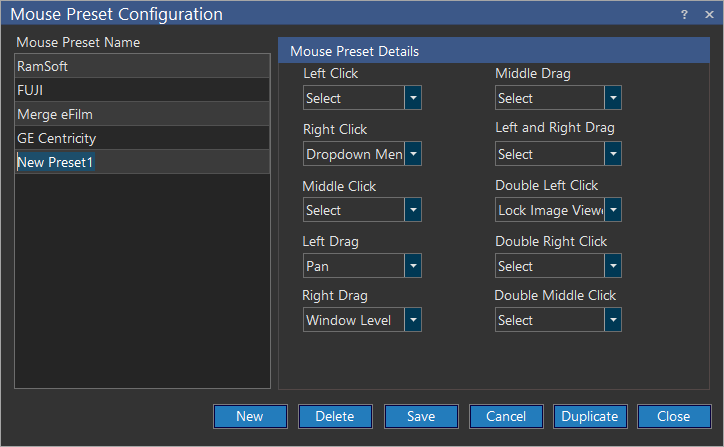
You may also has the option of creating an entirely new mouse preset by clicking New. You can then define the presets, name the new preset and click Save. If you wish to create a new preset similar to an existing preset, you can do so by clicking Duplicate. This will create a new preset identical to the existing preset and then choose the various options to customize the new preset.
Dynamic zoom can be done using mouse when mouse scroll wheel 'Clicked' and 'Dragged' while any tool is selected on study desktop except the 'Dynamic Zoom-Pan-Window level' tool.