Electronic Appointment Request with RapidResults
An Electronic Appointment Request is used by Referring Physicians to Order various studies. These studies can then be accessed by the Imaging facility to book appointments for the ordered studies.
When a study is ordered by the Referring Physician, the required fields are filled out and submitted. The ordered studies can be accessed by the Scheduler through the Messaging ![]() icon in PowerReader. The unread messages and unprocessed referrals are stored in the Inbox. The scheduler can convert the Ordered Study into an Appointment.
icon in PowerReader. The unread messages and unprocessed referrals are stored in the Inbox. The scheduler can convert the Ordered Study into an Appointment.
- To place an online order, open RapidResults and click Request an Appointment tab. Request an Appointment screen appears as shown below.
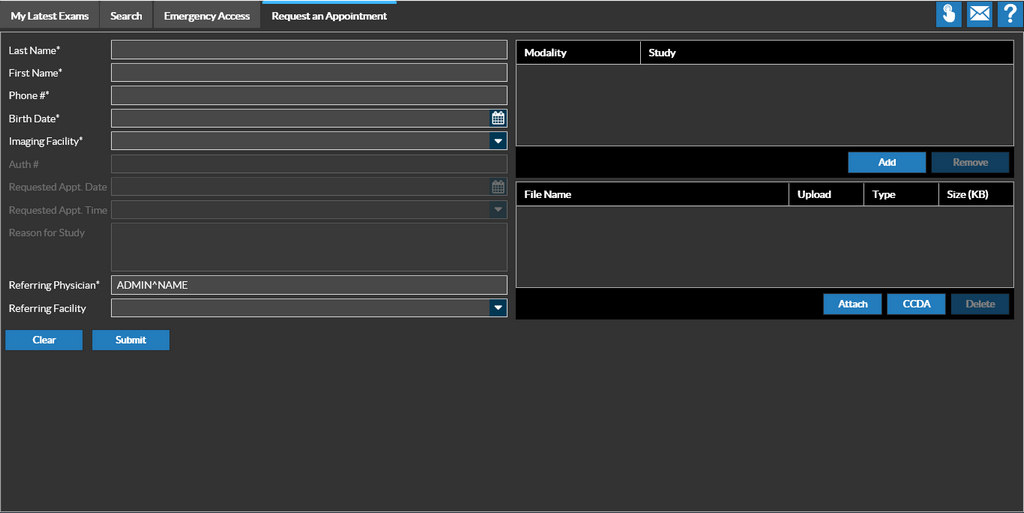
- Type in the patient's demographic information such as Last Name, First Name, and Phone #.
- Select the date of birth of the patient from the date picker
 available in Birth Date field.
 - Click the drop-down found in the Imaging Facility field. The application will display a list of facilities that are associated. Select the name of the facility to which the patient need to be referred.
- Click the Add button to select a modality and a procedure code.
- Click the drop-down on the Modality field. The application will display a list of exams available in that facility.
- Select the name of the exam that the referring physician has requested.
- Type in the unique identification code assigned for the exam in the field beside Study.
- Enter the authorization number in the Auth # text field. It is a unique authorization number generated by the insurance company authorizing the patient to undergo exam/procedure.
- Click the date picker on the Requested Appt. Date field and select the date for appointment.
- Click the drop-down found in the Requested Appt. Time field and select the time that is convenient to the patient.
- Enter the reason for this study in the Reason for Study text field.
- Enter the name of the physician who refers the patient in the Referring Physician text field. You can meta search and select the Referring Physician. When you start typing in the letters of the Referring Physician's name, the available values matching the values entered so far are displayed.
- Enter the name of the facility (from where the patient was referred) in the Referring Facility text field.
- Click on the Attach button to attach a file to the electronic appointment request. The following file formats are supported - CCDA,CCD,CCR,PDF,JPEG,BMP,PNG,GIF,TXT,TIF and HTML. These attachments can be viewed in the Messaging Inbox in PowerReader. Once a request is converted into an order, all attachments will be added as study level documents.
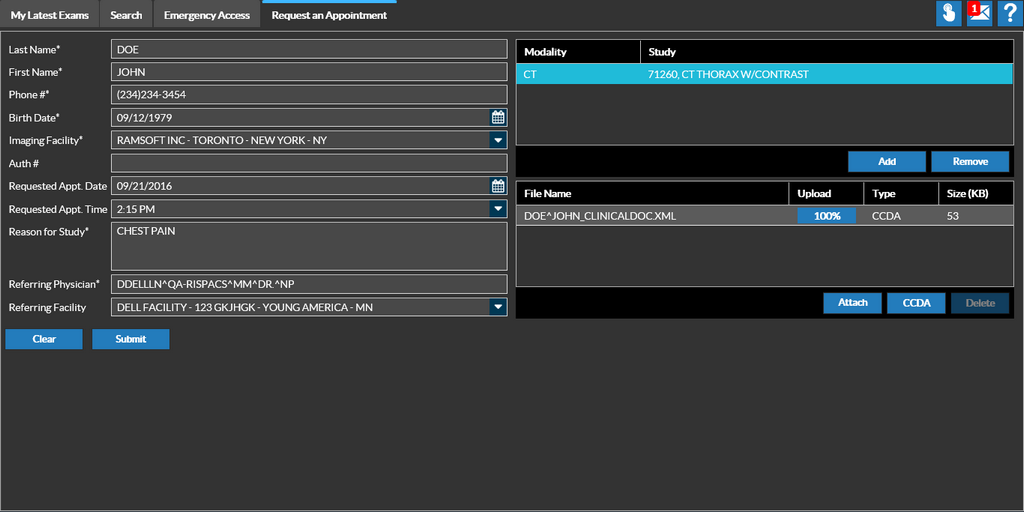
A sample of Request an Appointment tab with sample data filled in all fields is displayed below.
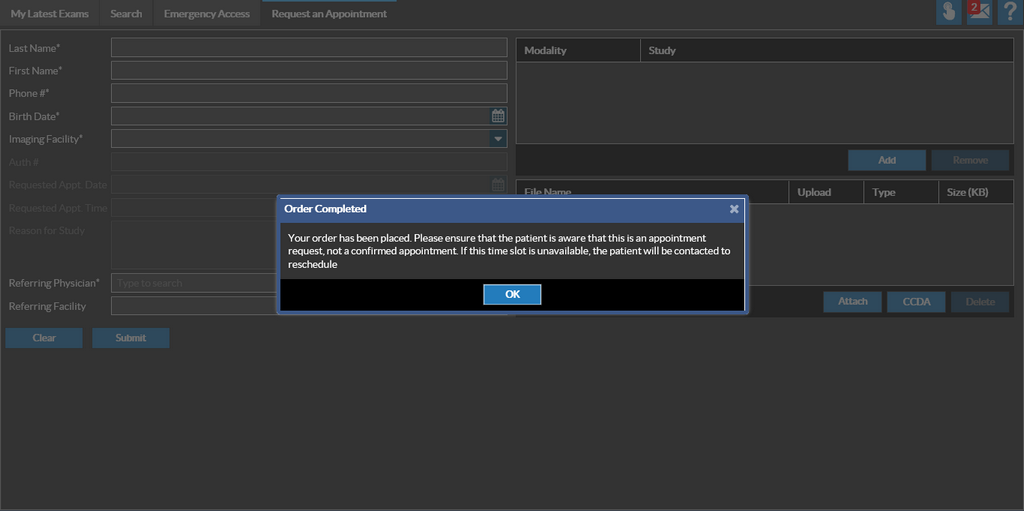
- Click Submit. The application displays that the order has been completed as shown below.
For more information about RapidResults, refer to RapidResults User Manual
Scenario 1: The requested Date/Time, Facility/resource matches and available as requested by referring physician. The appointment is booked and shows on the scheduler.
- Hover the mouse over Messaging
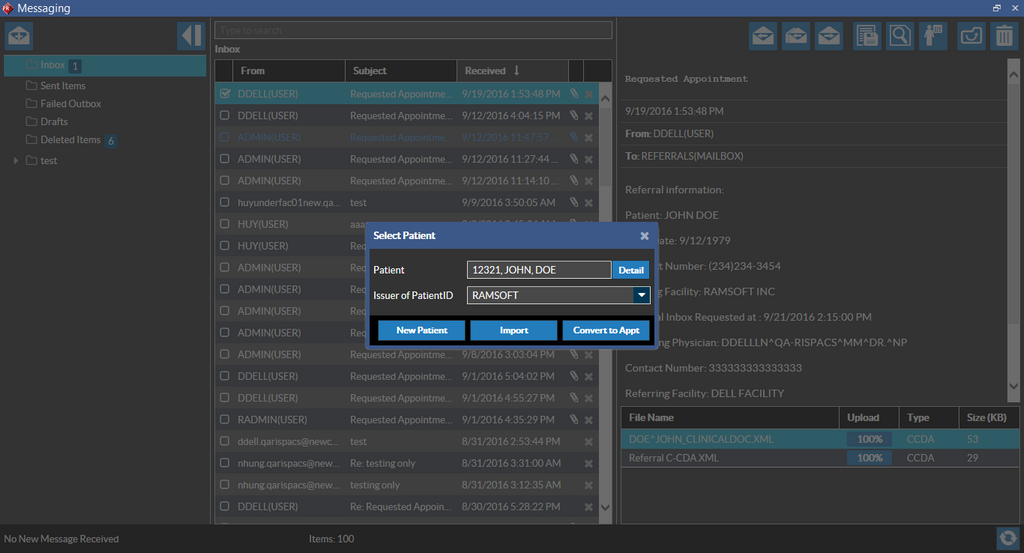
 icon. It displays the total count of unread messages. Clicking this icon displays a messaging screen as shown below. The Messaging Inbox displays a list of studies that have been ordered.
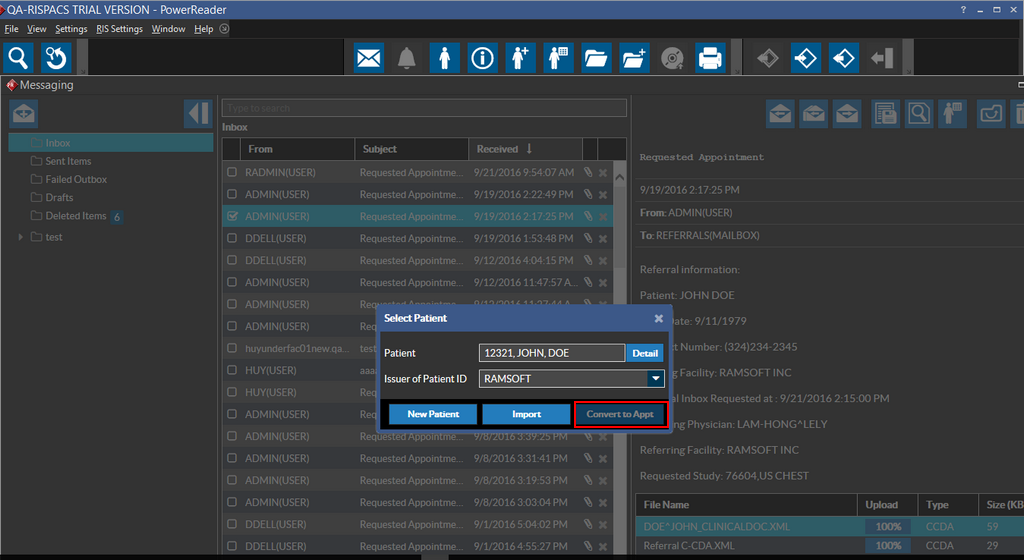
 - Select the study that has been ordered, and select Convert CCDA to Appointment icon on the top right corner.

- The Select Patient popup dialog appears. Select the Patient and the provide the Issuer of Patient ID and click Convert to Appt to convert the referral to an Appointment. If the patient is a new patient being added, click on the New Patient button.
- Once you click on the Convert to Appt button, the Appointment Information screen displays the Patient Information and Appointment Information. This information is populated from the data which was filled out in the RapidResults while ordering this study.

-
In the Appointment Information form, any relevant information can be filled out. Fields such as Patient, Facility, Comments, and Study Type have already been populated. The other fields such as Consulting Physician and Symptoms can be added by the user.
If the Referring physician is assigned to a single facility, the Referring facility name appears by default and the Referring Facility field appears in bold by default. If the physician is assigned to multiple facilities, then the desired facility can be selected from the drop-down menu. The Referring Facility field is mandatory when a facility is already assigned to a physician. If there are multiple referring facilities associated with the Referring Physician, the Referring Facility field would appear in bold.
If there is no facility set up with a referring physician, then the Referring Facility field is disabled.
-
After all the necessary information has been filled out, click the OK button located on the bottom right of the screen.
A confirmation screen is displayed confirming successful conversion to an appointment as shown below:

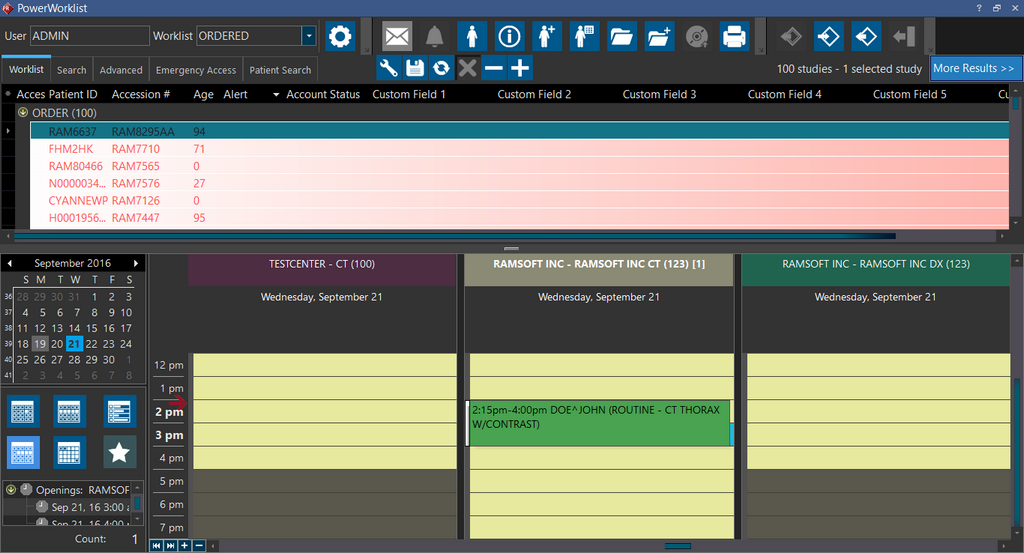
- Once the Appointment has been confirmed, the ordered study is booked into the Scheduler at the specified Date and Time.
- To view the appointment in the Scheduler, select the booked date from the calendar and locate the specific facility. If the facility is not visible, you can scroll horizontally or use the Show More Resources
 or Show Fewer Resources
  icons to locate the facility.
 - Locate the time slot for the appointment and you can see the scheduled appointment information.
If you do not see the Scheduler on the Worklist screen, select the Show Scheduler option at the bottom of the Worklist Editor. For more information on this option, please refer to the Adding additional criteria for the Worklist section in the topic Creating & Editing Personalized Worklists.
If a user does not have the "Schedule Appointments" and "Block Time" action privileges enabled, it is not possible to convert a CCDA to an appointment as the Convert to Appt option is not enabled.
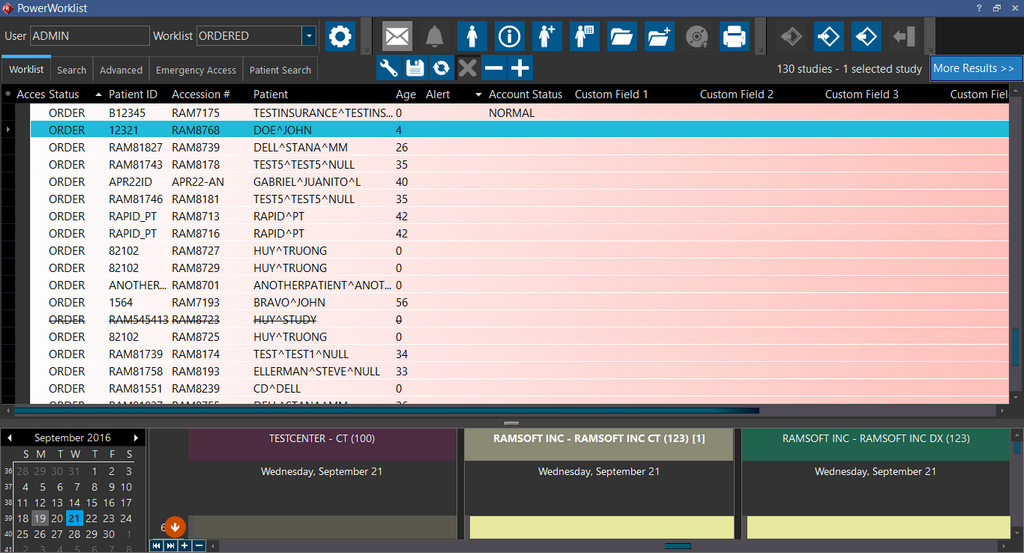
Scenario 2: Either the requested Date/Time or Facility/resource doesn't match or not available as requested by the referring physician. The study would only be shown in ORDERED status.
This scenario documents a situation when the requested date/time or facility/resource doesn't match or is not available as requested by the referring physician. A sample screenshot is shown below.
In this case, the procedure is available but the chosen date/time is not available in the selected facility and hence the application shows a warning message.
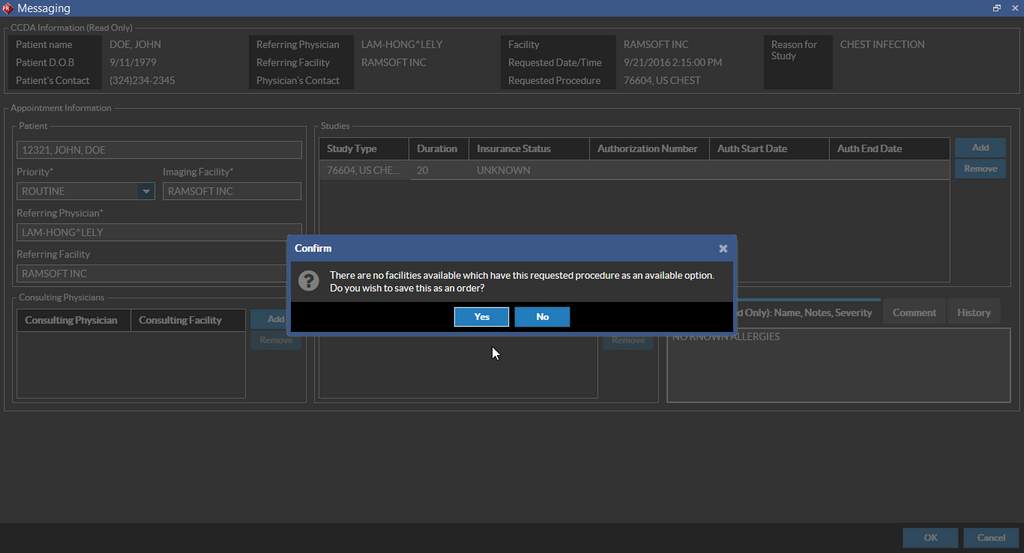
Click Yes. Navigate back to Worklist screen so that you could see the study in ORDERED status.